This recipe posted as part of Real Food Wednesdays. Check out the other posts for more ways to incorporate healthful, real food, into your diet.
Wednesday, November 25, 2009
What to Do with Green Tomatoes?
This recipe posted as part of Real Food Wednesdays. Check out the other posts for more ways to incorporate healthful, real food, into your diet.
Wednesday, November 18, 2009
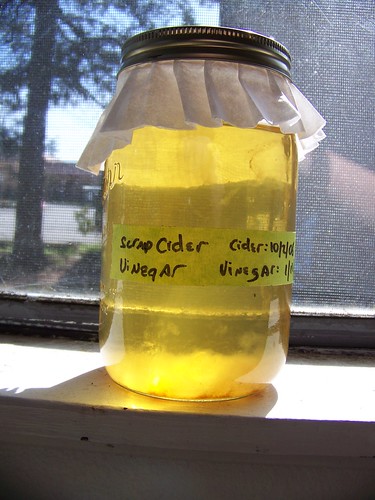
Homemade Cider Vinegar
**** **** ****
If you have any questions, pleae leave a comment. I tried to write this as clearly as possible, but maybe I didn't. The best way to learn this stuff, of course, is to meet someone who can show you. Good luck with your vinegar, and all your kitchen brews!
Wednesday, October 21, 2009
Nothing Says Lovin' Like Something From the Crockpot
Monday, September 21, 2009
Street Food, Portland Style
Today, though, I went for something a little different. A little more Asian. I spent a day last week reading through Food Carts Portland.com and found myself daydreaming about a Thai cart they reviewed downtown. If you throw a rock in the air in this town you will hit a decent Thai restaurant or food cart, and as you know I do love Thai food. This one, however, is a little different.
Nong's Khao Man Gai has only one dish on the menu... khao man gai. Just one dish, you ask. And this one dish is chicken and rice? This doesn't sound daydream worthy. But just wait until you taste it. First off, it's served wrapped up in white butcher paper with the fork and napkin tucked under a rubber band. Too adorable!
Then you open the package and smell the delicate, heady scent of the chicken and rice. Whatever seasoning Nong uses in her broth is absolutely fantastic! The cucumber and cilantro add a nice crisp, cool crunch to the warm soft chicken and rice and look beautiful against the mound of brown. Then you open the little sauce cup and the ginger soy chili smell momentarily takes over everything. But you are ready. You take a fork full of chicken and the flavor sensation begins. A little chicken, a little rice, some sauce. Or no rice, just chicken and sauce. Cucumber and rice and sauce. A sip of the winter melon soup served on the side. Yummmmm. Everything is subtle, and flavorful and absolutely delicious.
I don't often spend this much time waxing poetic over a single dish, but this stuff begs for it. It is the epitome of that Asian juxtaposition of simplicity and complexity. I know where I'm going to eat the next time I am feeling a little under the weather, or just in need of some interesting comfort food. Next time, I might try adding the chicken livers or fried chicken skin, or I might just try to make it at home. Khao man gai, my new favorite food!
Wednesday, September 2, 2009
Egg Tacos, Ole!
I've seen two kinds of huevos rancheros recipes in this world: the traditional fried egg with tortillas and chile sauce, and eggs poached in a chile sauce served with cheese and tortillas. I was actually served the latter while on a cross country trip on the Green Tortoise bus. 30 international travelers, two hippy drivers and me for 3 weeks driving across the U.S. We had huevos rancheros for breakfast one morning at a hot spring resort in New Mexico. It's one of those food memories I will never forget.
This recipe is unlike either or those and is much simpler. Basically, it's an egg fried ON a tortilla with cheese and whatever toppings you like. Couldn't be simpler, couldn't be tastier! It's hard to translate this food concotion into to "recipe" because you can make it different each time. I've made it with one egg on the tortilla and two, I've made it with different cheeses and I've topped it with everything from refried beans and salsa to grilled zucchini and chutney. Give it a try!
Egg Tacos
1 or 2 corn tortillas
A small pinch of grated cheddar or jack, or crumbled cotija cheese
1 or 2 farm fresh eggs
Salt and pepper, fat for the pan
Toppings of your choice including seasoned whole or refried beans, cooked rice, more cheese, avocado, tomato, red or green salsa, sour cream, hot sauce, pickled chiles, lime wedges, grilled veggies, ketchup, chutney, chocolate sauce (OK, just kidding about that last one.. kind of).
Heat a well seasoned cast iron skillet and warm up the corn tortillas over medium heat. Allow one side to start getting browned and a little crispy. Use only as many tortillas as will fit in your pan with minimal overlap. For my Ikea skillet it's one. With a 10 inch skillet I could fit two.
Flip the tortilla once it is starting to brown and add a pinch of cheese to the top of the tortilla. Crack the egg directly onto the tortilla, trying to keep it mostly on the tortilla, and cook until the white is starting to set. Carefully flip the tortilla over and cook the egg to your liking. Serve with toppings!
As I made these tortillas I came across one major problem - keeping the eggs from sticking to the cast iron skillet. Non-stick pans would fix this problem but we don't use those kinds of pans here at Real Food, My Way. (For an explanation of why and healthy alternatives check out this article this article from Mercola, this one from Tuberose.com, this one from Marks Daily Apples, or even this article that was front page of the Oregonian newspaper FoodDay section recently.) A very well seasoned cast iron skillet is clearly the answer, but you don't always have that as well. I tried using tons of butter, like I do when I scramble or fry eggs normally, but the tortilla kind of sucked all the butter up. Once I did successfully lift up the tortilla, melt some butter under it and flip the egg into the melted butter without spilling egg white all over the pan. Just note, this is a recipe to make one a day your cast iron seems to be cooperating.
This recipe is so easy, so tasty and so variable. I am not joking when I say I made it for five meals in a row and never got bored. Thanks, blog-o-sphere!
For more great recipes and tips from the blog-o-sphere, check out Real Food Wednesday!
Wednesday, August 12, 2009
The Making of an Alewife
Being a disciple of Sandor Katz and uncounted generations of alewives brewing in their kitchens I have adopted a much more free flowing style. All of my experience making fermented vegetables had led to me have faith in the microbes. If you give them a reasonable place to set up shop, they will! My first beers were literally "a little of this, a little of that, throw in some yeast". Honestly, that first beer is quite drinkable. I did actually cave and buy a kitchen scale after the first brew day and my second beer is much better.
****
*Hops - 20 g of whole hops (Any variety that is not a specialty bittering or aroma hop)
*Fir tips - 40g (Be sure to collect only the young, soft, light green tips. They have a lovely citrusy, christmas tree smell but less tannin and bitterness than the older, dark green tips. The young tips of any edible conifer would do. Spruce is traditional but many pines are edible too)
*1 packet of dry ale yeast (Don't let them talk you into "pitchable yeast". Since you are making a 1 gallon batch you want to be able to use less than a whole packet. Any American or non-specialty yeast will do)
*Good drinking water. People always claim that their water is the reason their beer or wine is so good. If your tap water is icky, buy bottled water. Or better yet, find a well or a spring.
Method:
Start heating a half gallon plus a pint (10 cups) of water in a good quality cooking pot and 4 cups of water boiling in a second pot. Measure out your hops and divide them into two hop bags. One bag should have 15g of hops in and the other one should have 5g. Measure out the fir tips and put 20g in a third hop bag and the remainder in your glass jar or other container that can hold at least cups of water. When the smaller pot has come to a boil pour the boiling water over the fir tips in the jar and let steep. This is your fir tip tea.
Hardware:
***
So there it is, one alewife's guide to brewing a 1 gallon batch of beer. I highly recommend reading Wild Fermentation and Sacred and Herbal Healing Beers as well as spending time on the homebrew forums or chatting with the fine folks at your local brew supply store. You'll learn lots more about brewing beer and maybe figure out some better ways to do it!
Brewing beer is not that difficult. In a future post I will talk about making wine, which is a very similar process. Wine is possibly easier to start but takes months, if not years, to finish and age. Beer takes a little more work up front but is ready to drink is just over a month. In the end it is all just setting a table and inviting the right yeast to the party. It's not hard, it's not expensive and the results are well worth it. Even a middling homebrew is better than a fine commercial beer.
Friday, July 24, 2009
Roly Poly, Daddy's Little Fatty
In his New York Times piece What If it's All Been a Big Fat Lie Gary Taubes goes over the science and pseudoscience behind low fat and low carbohydrate diets (his research point to pro low carb and anti low fat diets). He lays out a very convincing story that a combination of imperfect human researchers and impossibly complicated human bodies have led us down a path towards obesity and disease. There is also more and more evidence that our modern diet is excessively high in polyunsaturated fats which are not a part of traditional diets. Polyunsaturated fat in the form of vegetable oil is cheap to produce and with the advances in chemically separating the oil from plant seeds, removing toxic chemicals and deodorizing the oils it has become a staple in every American home, restaurant and food processing plant.
Low fat, high fat? Unsaturated, mono-, poly-, just plain saturated fat? Omegas and LDLs and all that... what's a girl to do? Look to the past, that's what I always say. What would people use for cooking fat if they didn't have mono-cropped soy beans and giant food processing factories?
Using this criteria I have put together a fat primer for you. I present it to you with the reminder that we all do the best we can with what we have. I eat out sometimes, I eat at people's houses sometimes and sometimes I even get a pack of chips out of a vending machine. I am not a whole food Nazi, but when I can I prefer to use the most healthful, traditional cooking fats. Here's what I do in my kitchen... on my best days.
******
Fats for Cooking by Type of Fat
Unrefined coconut oil: This is the work horse of my cooking fats. It is almost flavorless and can be used at pretty high temperatures so I use it anywhere you would use "vegetable oil". It is solid when the weather is cool and liquid when room temps are above about 70F but since it comes in a wide mouth jar I just use a spoon to get it out. It's a little spendy to use for deep frying, but it would be good any other time you are cooking with fat. I usually buy Omega Nutrition brand but that's just because it's available at a good price at my local health food store.
Virgin coconut oil: I treat this as a special fat with amazing antimicrobial properties in addition to lots of medium chain fatty acids and a fantastic smell. It is pretty expensive and cooking might destroy the beneficial properties so I cook with it when I am doing something where coconut would be appreciated, like Thai curry. I melt it for use in baked goods occasionally when the flavor would be appreciated and use it along with butter on my popcorn. And sometimes I make coconut bark. Yuummm. I also use it for a number of body care products like skin cream (coconut oil and jojoba oil with a little scent) and deodorant (coconut oil and baking soda with scent). I buy pint jars at my health food store, but lots of people like Wilderness Family Naturals for 5 gallon buckets.
Butter: Mmm... butter. In addition to slathering this on bread and pouring it over popcorn I do cook with this occasionally. I use it, often mixed with coconut oil, when pan sauteing veggies or frying eggs. Butter does have some amount of water and protein in it so it will burn, but I don't have major problems with that. Ghee or clarified butter is an all purpose cooking fat in French and Indian cooking and can easily be bought or made at home. Raw, pasture raised butter is best but even regular store butter is better than margarine or vegetable oil. Look for imported butter like Kerrygold from Ireland or Anchor from New Zealand. Organic Pastures has a "pastured" butter and most stores sell organic butter these days.
Rendered animal fat: I am still working my way through the 3 pints of goose grease I rendered when I cooked a goose last winter. It's pure white, about butter consistency and has a slight poultry flavor. I enjoy cooking with this anywhere it's flavor would be appreciated or tolerated. I've also used chicken fat and would gladly use lard or tallow if I had it available. Each of these will have different flavors and smoke points but all would be good for general cooking (sauteing veggies, frying onions, browning meat, etc). A note on rendered animal fats.. these are not fats you can buy at any old grocery store.
Do NOT buy lard from a regular grocery store. The stuff they sell there is usually adulterated with hydrogenated lard and preservatives. It is not much better for you than crisco. These are fats you need to produce at home or buy from a specialty dealer/farmer. Of course, these fats are best from pastured, organic,happy animals but even grocery store chickens will make fat that is better than hydrogenated lard. You can save scraps from the meat you eat, skim fat from stock making or see if you can buy un-rendered fat from a butcher or farmer. Google around for instructions on rendering it yourself. It's not hard and the rendered fat will keep in jars in the fridge or freezer for a very long time.
Bacon grease: I collect bacon grease and keep it in a mason jar next to the stove. I use it for cooking anything a bacony flavor would be appreciate - which is lots of things. It's the best for starting soups or frying eggs. Mmm...bacon grease. And someday I'll get it together and make that bacon grease mayo recipe that's been floating around....
Olive Oil: Olive oil one of the few traditional liquid oils and is the classic oil for mayonnaise and flavored dipping oils. Buy the best quality you can afford because olive oil is subject to going rancid if not stored properly, and is probably much more adulterated than we would like to think about. It really shouldn't be cooked with. I do, sometimes for flavor, but rarely. Olive oil is much better for you when used in salad dressings or other raw applications because the monounsaturated fats are much more delicate than saturated fats. Extra virgin is the most flavorful, but feel free to use not-extra-virgin as long as you are using oil from a reputable producer.
High oleic sunflower oil: I just found this in the store, finally! It is a high monounsaturated fat oil that should be as healthful as olive oil, but with a different (less olivey perhaps?) flavor. I haven't opened the bottle yet so I can't tell you what it's like but I would use this anywhere I would use olive oil. It would be especially nice for mayo or other salad dressings where you don't necessarily want the olive oil flavor.
Spectrum palm shortening: I bought this years ago and found it tasted horrible.It is made of deodorized palm oil and is low in polyunsaturated fats, so should be an acceptable fat. Probably a compromise fat because of how processed it is, but low in bad fats anyway. They say it can be used anywhere regular shortening would be used but the pie crust I made with it tasted like soap. Anytime I've used it for cooking I've also gotten a gross soapy flavor. I used it to season my cast iron pans last winter, and sometimes throw a glob in a wiped out cast iron skillet to grease it up and protect it. I might try it on a BBQ sometime. too.
Sunflower, safflower, sesame oil: I have bought these oils in small bottles to make salad dressings with. They are all higher in polyunsaturated fats than we would like to be consuming (especially since I probably still get a fair amount of poly unsaturated fats from factory farmed meat, eating out, eating at friend's houses and occasional packaged foods), but sometimes you have four heads of lettuce in the fridge and really don't want an all olive oil salad dressing. Now that I found the high oleic sunflower oil I won't buy these guys anymore. When looking at bottles in the oil isle at the health food store look for oils with the lowest polyunsaturated fat level and the highest monounsaturated fat level.
Red Palm Oil: I've never used this but I hear it's pretty neat. It's solid like coconut oil and deep red in color. The color indicates a high level of carotene vitamins and the saturated fats keep it stable at high temperatures.
Canola oil: This stuff really is gross and the devil in so many ways. My roommate has a bottle of it that I moved to under the sink and he hasn't missed it because he hasn't cooked in months. I busted it out when I grilled the other weekend just because I wanted to have fun and it was easy. I drank a Budweiser that night too. So sue me! :)
******
Cooking Fats by Type of Cooking
Pan frying/sauteing: expeller pressed coconut oil, virgin coconut oil, butter,bacon grease, rendered animal fat, olive oil. Depends on the flavor. Be careful with butter at high temps.
Baking: butter, virgin coconut oil or expeller pressed coconut oil. Depends on the flavor, and how the fat is used. I would use either, along with parchment paper, for "greasing" the pan.
Deep frying: you would want to use rendered animal fat like lard or tallow there. These fats have the highest smoke point so are able to get good and hot to fry the food without letting it get greasy.
Seasoning cast iron skillets: Lard if you have it, palm shortening or crisco. I believe that a long baking in the oven would polymerize the fat and turn it into a coating rather than a fat that gets into your food so this would be a way to use up that jar of crisco you still have. I use palm shortening or coconut oil to grease up a pan between uses if I am not going to actually bake the fat on.
BBQs or Grilling: Well... yeah, about that. I still use canola oil for this. Expeller pressed coconut oil should be fine because of it's high smoke point, but it's awfully expensive for swabbing all over a grill top. I might try the palm shortening next time. I think ideally you would have a slab of un-rendered pork fat to rub all over the grill :)
******
There is lots of good information out there about which fats to use and why. Check out all the links I used in this post and then check out the following resources:
*Weston A. Price Foundations Know Your Fats Index
*Cheeseslave's and Kelly the Kitchen Kop's Posts on Fat
*Nina Planck's Real Food book
*Bryan's Blog Stay Healthy, Enjoy Life. Specifically his post about fats.
Fat is a prized food for a reason. It is full of vitamins, energy giving calories and protective molecules. Remember, every cell in your body is encased in saturated fat and your brain is mostly saturated fat. The hormones that make you happy and sexy are made of saturated fat. Don't sell yourself short by going low fat or eating unhealthy, non-traditional fats.
Be sure to check out Real Food Wednesday for more posts from folks who aren't afraid of fat!! Also, be sure to click on all the photos I used to see more from my amazing, not fat-a-phobe, Flickr friends!
What fats do you cook with at home? What's your favorite way to get more fat into your diet? Whats the best butter you've ever tasted?
Tuesday, June 23, 2009
Of Probiotics and Pickles
The term probiotics refers to bacteria and yeast found in food that are good for your body. Our skin and intestinal tract are completely covered in bacteria and the idea is that inviting the right kind of bacteria into that system has health benefits. The human gut can contain over 2 lbs of intestinal microflora (beneficial bacteria) and they do some pretty important work there. They help digest food and create vitamins, they make it hard for bad bacteria to live there and stimulate the part of our immune system that is in our digestive system. In fact, there is more and more evidence that everything from acute intestinal upset to allergies to autism can be helped by normalizing gut bacteria and using probiotics. There are lots of good commercial probiotic foods and supplements available (as well as some not so good ones) but being the DIY kinda girl I am, I like to make my own.
Yogurt, kefir and buttermilk are all very common probiotic foods. These are all fermented dairy products that are eaten while the bacteria are still alive. Vegetables and fruit can also be cultured into probiotic foods through a process called lacto fermentation. A couple months ago I wrote a tutorial for making sauerkraut, one of my favorite kinds of lacto fermented vegetable. Sauerkraut is a great way to start in on fermented vegetables because most Americans at least know what sauerkraut is and many even already like it. I've been surprised at how many of my friends are excited to try my sauerkraut because they grew up eating sauerkraut. Sauerkraut is not the only pickled vegetable out there so don't despair if you don't like the kraut.
Vegetable pickles are possibly even easier than sauerkraut and allow for as many variations as your imagination can come up with. The basic idea is to cover vegetables with a salty brine and allow the bacteria to do their thing. I'll give you a recipe-tutorial for my very favorite pickled vegetable recipe and list some of my favorite variations here and then I'll answer some common questions in a follow up post.
* * * * * * * * * * * * * *
Spicy Carrot Pickles
I like Spicy Carrot Pickles so much because they come out great every time. They are salty, spicy and a bit sour and always have a great texture. You can adjust the amount of spiciness to your liking using different kinds of peppers. These are based on the pickled carrots usually served at autentico taco places so they should be sort of familiar to a number of people.
Step One: Jar and Vegetable Prep
Find a glass jar with a tight fitting lid. A pint sized mason jars with a metal or plastic lid is great but an old pickle jar work just as well. Wash the jar and lid with hot soapy water and rinse well.
For a pint (two cup) jar you will probably use 1 1/2 - 2 medium carrots, 1/2 an onion, 2 cloves of garlic and half of a jalapeno. Have more carrots available in case I am underestimating and adjust the garlic and pepper as your family would like. I find half a jalapeno adds heat but is not blinding, but you may have widely different tastes. You can use a hotter pepper like Serrano or Habanero (if you dare) or a milder pepper like an Anaheim, a Hungarian pepper or a pizza pepper. Be sure to adjust the "half a pepper" accordingly to the size and heat of the pepper you choose. You could also use a pinch of red pepper flakes instead of fresh peppers.
Wash the carrots but don't peel them. Slice them into long ovals by slicing on a steep diagonal to about 1/4 inch thickness. Peel and slice the garlic cloves and slice the onion longitudinally (from pole to pole, not around the equator) into 1/2 inch slices or into chunks. Slice the jalapeno into rings. Layer the vegetables in the jar to within an inch of the threads.
Step Two: The Brine
There are all kinds of recipes out there for brine strength ranging from a specific measurement in the jar to percent salinity. After reading The Ultimate Kimchi recipe and Wild Fermentation by Sandor Katz, I decided to do this the old fashioned way - use my taste buds.
I make a brine by adding salt to water until it is "too salty to be tasty, but not salty enough to make me gag." I understand that this is a very vague description of how much salt to use, but it works. I promise. Start with a teaspoon in a pint (two cups) of water and taste it. You can hardly taste the salt, right? Add another teaspoon and taste again. Then increase by half teaspoons until the water is really gross. Add a splash of water and taste again. Somewhere in between tasty and gross is the right amount of salt. It always seems a little saltier than seawater to me.
Oh - and use the right kind of salt. You should use sea salt because it is pure and has lots of trace minerals that are really good for you. I personally use RealSalt because it lists the trace minerals on the package and sells for a reasonable price. Other sea salts would be fine too. You can also use kosher salt or other salt as long as it has no iodine and no anti-caking ingredients. One caution about Celtic or grey salt - moist salt is sometimes known for carrying bacteria and mold that can ruin your ferments. If you want to use moist Celtic sea salt then you should bake it first until it is dry. Seriously, though, who needs to go through that much work for pickles. Just buy some lower quality sea salt for fermenting and keep the Celtic for sprinkling on your potatoes.
Once you have your brine made with the right kind of salt to the right saltiness then pour it over the jar full of vegetables. The brine should cover the vegetables but still be below the threads of the jar. Screw the lid on tight and set it on the counter to begin fermenting.
Step Three: Fermentation
Just like in the Kraut 101 tutorial I recommend you check your pickles every day and learn to look for signs of fermentation. The day after you make your carrot pickles open the jar and listen for popping, fizzing or hissing as you open the jar. Smell the contents and then taste a sip of the brine (you can take some out with a spoon or just sip it out of the jar like I do... but then again I'm pretty cavalier about things like that). Is it at all sour or fizzy or still just salty? Put the lid back on and let it sit out for another day.
It usually takes 2-5 days for signs of fermentation to really show up. Exactly how long depends on everything from the quality of your vegetables and the ambient temperature to whether you sacrificed to the proper deities. I'll address some of these variables in the next post and in the end it doesn't really matter how long it takes, just that it happens. Be patient, it will.
When your pickles are popping, fizzing or starting to taste sour then move them to the fridge. Carrot pickles usually taste best after another two or three days in the fridge (you should try them every day to see when you like them best) but will last for months without getting mushy or gross. The onion will start to get a little mushy after a month or so but whole garlic cloves are still virtually raw until at least a month in the brine.
I like to eat these pickles in anything even remotely Mexican in flavor. I love them in quesadillas and burritos as well as on salads. The pickle brine can really brighten up a soup and makes a fine salad dressing when substituted for vinegar in any recipe.
* * * * * * * * * * * * * *
Once you've run through this recipe once then you are ready to start thinking about pickling other vegetables. Here are some of my favorites.
Cucumbers: pickled cucumbers are a classic. I have used whole pickling cucumbers as well as sliced eating cucumbers (remove part of the skin, it is tough and bitter). Pack the jar with cucumbers, dill seed, garlic cloves, black peppercorns and maybe some sliced onion and/or mustard seed. Cover with brine and follow the steps above.
I didn't use cucumbers as my master recipe because I've had mixed luck with fermenting them. Cucumbers, being so watery, are at risk of getting mushy and even when they aren't mushy they never taste quite the same as vinegar pickles do. I like the fermented flavor but have not yet perfected the crunchy cucumber pickle. Some people add a grape leaf to the jar and others soak the cucumbers in salty water first. I'm going to experiment this summer and I'll let you know.
Turnips, Radishes, Not Spicy Carrots: Slice them into planks or chunks and cover with brine. Try these will dill seed and garlic or with mustard seed and red pepper flakes. Turnips tend to be a bit spicy when fermented, but are great on salads.
Beets: I recently made up a jar of sliced raw beets and carrots with no extra seasoning at all. The liquid is thick, sweet and deep red and the vegetables are now tender, sour, sweet. Fantastic.
Green Beans or Asparagus: Trim the veggies to fit in the jar and add a garlic clove and maybe one of those small, dried red chiles. Try doing the same with okra. A little juice from one of these jars is the secret to my Bloody Mary. Fantastic!
Mushrooms: White or baby 'bella mushrooms can be pickled in brine into a very tasty appetizer. I like to add black peppercorns and mustard seed as well as a small garlic clove. The mushrooms will float like corks but it has never seemed to be a problem.
Summer Relish: Last summer I made a jar of relish using canned corn, chopped green tomato, red bell pepper and onion with mustard seeds. It took a month or so for the flavor to develop but I was sad when it was gone. It was long past green tomato season and I've been daydreaming about it ever since!
Pickled Garlic: Peel the cloves, fill the jar and cover with brine. It will take months (as in 4 or 5) for the cloves to ferment fully but it will be worth it. They ferment into this mellow, garlicky, almost sweet tangy condiment. Perfect for salad dressings and topping soup. And exceptionally good for you!
Of course you can mix and match. I almost never make a jar of just one vegetable, I use whatever I have around. I will often add turnips or carrots to sauerkraut, or get lazy and throw brine over cabbage as well. Give any vegetable you have a try in the brine and see how it turns out. Experiment with seasonings, garlic, onion and different flavor combinations. You'll be amazed at what you find you like. I serve pickled vegetables with almost every meal and pretty soon you will be too!
This post is part of the Real Food Wednesday Blog Carnival. Be sure to check out the other posts for more great real food ideas!
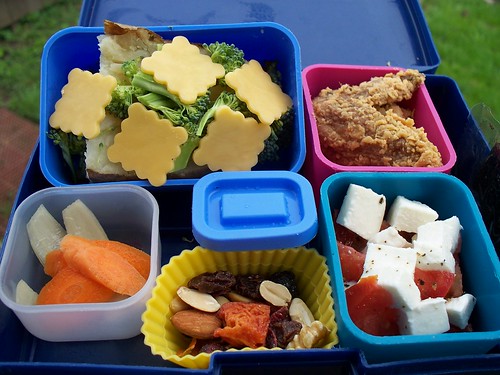
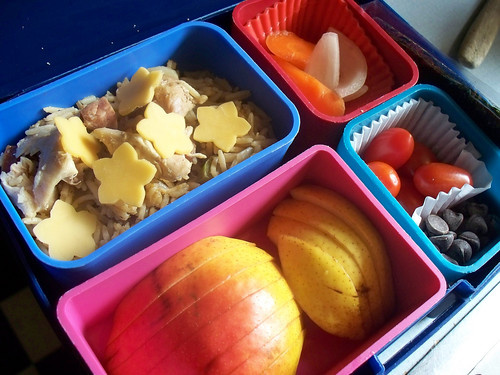
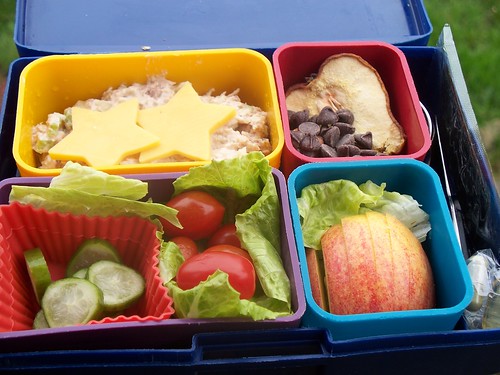
To see more photos of my lunches, others with home made pickles in them, check out my Flickr page.
Wednesday, June 17, 2009
Breakfasts of Champions
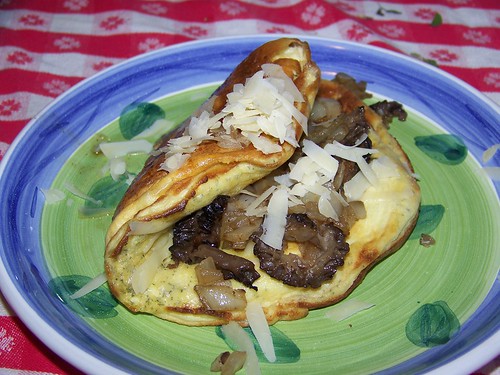
The first breakfast of the weekend was a puffy omlette with wild mushrooms. A friend from work gifted me some wild mushrooms that her friend had collected. Some were unquestionably morels and I happily sauteed them up but I wasn't sure what the other was. It might have been a king bolete but as I continued looking at it and googling like a mad woman I decided that I didn't really want to eat it. It was a little past it's prime, and mushrooms are just one of those things. Oh well, the morels were fantastic.
I read about puffy omlettes on this fantastic blog I found last week called Beyond Salmon. The author talks about her dilema in teaching a cooking class focused on eggs. She wanted to use authentic french methods to cook an omlette but it turns out no one likes flat, plain french omlettes. So she asked her mom how to make a fluffy omlette. Turns out the secret is a blender. I used her method, with some dill added to the eggs and the musrhooms and Irish cheddar inside. It was fantastic!
Mushroom and Dill Puflette
1/3 cup whole milk
2 1/2 tsp unbleached flour
2 large eggs
1/4 tsp salt
A few grinds of black pepper
A pinch of dried dill
Fat for the pan - a mix of butter and oil or butter and goose fat
2-3 Tbs of sauteed wild mushrooms and onions
- Combine the eggs, milk, flour, salt, pepper and dill in a blender and blend until well combined. The original recipe calls for blending for 2 minutes, I didn't blend for anywhere near that long.
- Preheat the broiler and set a a 6 inch cast iron skillet (recipe called for a 7-8 inch nonstick skillet). Add your cooking fat and let it heat until the butter has melted and the foam subsided. I used a goodly amount, at least a tablespoon total because I was worried about the eggs sticking but if you have a well seasoned pan you just need a thin coating.
- When the foam subsides in the butter add the egg mixture into the skillet, cover the pan and cook for 45 seconds (maybe a full minute for the 6 inch pan) or until the eggs look set around the edges but completely liquid in the center.
- Uncover and place the skillet 2-4 inches away from the broiler element until the mixture is puffy and golden on top, 60-90 seconds or until it is puffy and golden on top.
- Add the filling, slide the omlette onto a plate and fold in half. The original recipe calls to "Dot with a sliver of butter, spreading it over the top of the omelette as it melts." How wonderful!
The next day for breakfast I just had simple scrambled eggs but accompanied them with a red flannel hash. Red flannel hash is a New England special of pan fried potatoes and beets with or without salty meat like corned beef or bacon. Mine had no meat but did have onion and lots of black pepper. This was really out of control good. Way, way better than I was expecting.
Red Flannel Hash
1 baseball sized beet, peeled and diced to 1/8 inch dice
2 baseball sized yellow potatoes, washed and shredded on a box grater
1/2 onion, sliced thin
salt, pepper
goose fat, lard or coconut oil for the pan
- Melt the fat in a 12 inch cast iron skillet over medium heat and add the onions and beets. Lightly salt and pepper and cook, stirring occasionally, until the beets are tender.
- Add the potatoes, more salt and generous amounts of pepper. Toss and stir until well incorporated with the beets and then smoosh the mass into the pan. Continue cooking over medium heat, stirring, scraping and turning occasionally, until the potatoes are cooked through and starting to get a bit crispy, about 20 minutes. Taste for salt and pepper and serve alongside scrambled eggs or topped with a poached egg.
This post is part of the Real Food Wednesday Blog Carnival. Check out what other folks are eating for breakfast, lunch and dinner over there!