If you are in anyway connected to the world you've probably heard more and more about
probiotics and beneficial bacteria. People are selling
probiotics as pills, liquids, juices, yogurts and other fanciful items. Most of you have probably seen the yogurt commercial with the slightly disturbing animation of an arrow on a woman's stomach and you might even be able to hum the jingle for that product. What's all the big deal about
probiotics anyway? And do we really need to spend top dollar to have them added to our foods?
The term
probiotics refers to bacteria and yeast found in food that are good for your body. Our skin and intestinal tract are completely covered in bacteria and the idea is that inviting the right kind of bacteria into that system has health benefits. The human gut can contain over 2 lbs of intestinal
microflora (beneficial bacteria) and they
do some pretty important work there. They help digest food and create vitamins, they make it hard for bad bacteria to live there and stimulate the part of our immune system that is in our digestive system. In fact, there is more and more evidence that everything from acute intestinal upset to allergies to
autism can be helped by normalizing gut bacteria and using
probiotics. There are lots of good commercial
probiotic foods and supplements
available (as well as some not so good ones)

but being the
DIY kinda girl I am, I like to make my own.
Yogurt,
kefir and buttermilk are all very common
probiotic foods. These are all fermented dairy products that are eaten while the bacteria are still alive. Vegetables and fruit can also be cultured into
probiotic foods through a process called
lacto fermentation. A couple months ago I wrote a
tutorial for making sauerkraut, one of my favorite kinds of
lacto fermented vegetable. Sauerkraut is a great way to start in on fermented vegetables because most Americans at least know what sauerkraut is and many even already like it. I've been
surprised at how many of my friends are excited to try my sauerkraut because they grew up eating sauerkraut. Sauerkraut is not the only pickled vegetable out there so don't despair if you don't like the kraut.
Vegetable pickles are possibly even easier than sauerkraut and allow for as many variations as your imagination can come up with. The basic idea is to cover vegetables with a salty brine and allow the bacteria to do their thing. I'll give you a recipe-tutorial for my very favorite pickled vegetable recipe and list some of my favorite variations here and then I'll answer some common questions in a follow up post.
* * * * * * * * * * * * * *
Spicy Carrot PicklesI like Spicy Carrot Pickles so much because they come out great every time. They are salty, spicy and a bit sour and always have a great texture. You can adjust the amount of
spiciness to your liking using different kinds of peppers. These are based on the pickled carrots usually served at
autentico taco places so they should be sort of familiar to a number of people.
Step One: Jar and Vegetable Prep
Find a glass jar with a tight fitting lid. A pint sized mason jars with a metal or plastic lid is great but an old pickle jar work just as well. Wash the jar and lid with hot soapy water and rinse well.
For a pint (two cup) jar you will probably use 1 1/2 - 2 medium carrots, 1/2 an onion, 2 cloves
of garlic and half of a jalapeno. Have more carrots
available in case I am underestimating and adjust the garlic and pepper as your family would like. I find half a jalapeno adds heat but is not
blinding, but you may have widely different tastes. You can use a hotter pepper like
Serrano or H
abanero (if you dare) or a milder pepper like an
Anaheim, a
Hungarian pepper or a pizza pepper. Be sure to adjust the "half a pepper" accordingly to the size and heat of the pepper you choose. You could also use a pinch of red pepper flakes instead of fresh peppers.
Wash the carrots but don't peel them. Slice them into long ovals by slicing on a steep diagonal to about 1/4 inch thickness. Peel and slice the garlic cloves and slice the onion longitudinally (from pole to pole, not around the equator) into 1/2 inch slices or into chunks. Slice the jalapeno into rings. Layer the vegetables in the jar to within an inch of the threads.
Step Two: The Brine
There are all kinds of recipes out there for brine
strength ranging from a specific measurement in the jar to percent salinity. After reading
The Ultimate Kimchi recipe and
Wild Fermentation by Sandor
Katz, I decided to do this the old fashioned way - use my
taste buds.
I make a brine by adding salt to water until it is "too salty to be tasty, but not salty enough to make me gag." I understand that this is a very vague description of how much salt to use, but it works. I promise. Start with a teaspoon in a pint (two cups) of water and taste it. You can hardly taste the salt, right? Add another teaspoon and taste again. Then increase by half teaspoons until the water is really gross. Add a splash of water and taste again. Somewhere in between tasty and gross is the right amount of salt. It always seems a little saltier than seawater to me.
Oh - and use the right kind of salt. You should use
sea salt because it is pure and has lots of trace minerals that are really good for you. I personally use
RealSalt because it lists the trace minerals on the package and sells for a reasonable price. Other sea salts would be fine too. You can also use kosher salt or other salt as long as it has no iodine and no anti-caking ingredients. One caution about Celtic or grey salt - moist salt is sometimes known for carrying bacteria and mold that can ruin your ferments. If you want to use moist Celtic sea salt then you should bake it first until it is dry. Seriously, though, who needs to go through that much work for pickles. Just buy some lower quality sea salt for fermenting and keep the Celtic for sprinkling on your potatoes.
Once you have your brine made with the right kind of salt to the right saltiness then pour it over the jar full of vegetables. The brine should cover the vegetables but still be below the threads of the jar. Screw the lid on tight and set it on the counter to begin fermenting.
Step Three: Fermentation
Just like in the Kraut 101 tutorial I recommend you check your pickles every day and learn to look for signs of fermentation. The day after you make your carrot pickles open the jar and listen for popping, fizzing or hissing as you open the jar. Smell
the contents and then taste a sip of the brine (you can take some out with a spoon or just sip it out of the jar like I do... but then again I'm pretty cavalier about things like that). Is it at all sour or fizzy or still just salty? Put the lid back on and let it sit out for another day.
It usually takes 2-5 days for signs of fermentation to really show up. Exactly how long depends on everything from the quality of your vegetables and the ambient temperature to whether you sacrificed to the proper
deities. I'll address some of these variables in the next post and in the end it doesn't really matter how long it takes, just that it happens. Be patient, it will.
When your pickles are popping, fizzing or starting to taste sour then move them to the fridge. Carrot pickles usually taste best after another two or three days in the fridge (you should try them every day to see when you like them best) but will last for months without getting mushy or gross. The onion will start to get a little mushy after a month or so but whole garlic cloves are still virtually raw until at least a month in the brine.
I like to eat these pickles in anything even remotely Mexican in flavor. I love them in
quesadillas and burritos as well as on salads. The pickle brine can really brighten up a soup and makes a fine salad dressing when substituted for vinegar in any recipe.
* * * * * * * * * * * * * *
Once you've run through this recipe once then you are ready to start thinking about pickling other vegetables. Here are some of my favorites.
Cucumbers: pickled cucumbers are a classic. I have used whole pickling cucumbers as well as sliced eating cucumbers (remove part of the skin, it is tough and bitter). Pack the jar with cucumbers, dill seed, garlic cloves, black peppercorns and maybe some sliced onion and/or mustard seed. Cover with
brin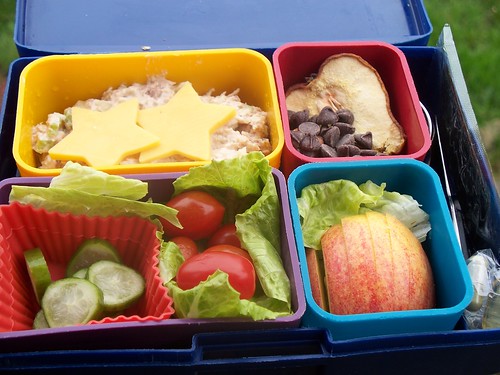
e and follow the steps above.
I didn't use cucumbers as my master recipe because I've had mixed luck with fermenting them. Cucumbers, being so watery, are at risk of getting mushy and even when they aren't mushy they never taste quite the same as vinegar pickles do. I like the fermented flavor but have not yet perfected the crunchy cucumber pickle. Some people add a grape leaf to the jar and others soak the cucumbers in salty water first. I'm going to experiment this summer and I'll let you know.
Turnips, Radishes, Not Spicy Carrots: Slice them into planks or chunks and cover with brine. Try these will dill seed and garlic or with mustard seed and red pepper flakes. Turnips tend to be a bit spicy when fermented, but are great on salads.
Beets: I recently made up a jar of sliced raw beets and carrots with no extra seasoning at all. The liquid is thick, sweet and deep red and the vegetables are now tender, sour, sweet. Fantastic.
Green Beans or Asparagus: Trim the veggies to fit in the jar and add a garlic clove and maybe one of those small, dried red
chiles. Try doing the same with okra. A little juice from one of these jars is the secret to my Bloody Mary. Fantastic!
Mushrooms: White or baby '
bella mushrooms can be pickled in brine into a very tasty appetizer. I like to add black peppercorns and mustard seed as well as a small garlic clove. The mushrooms will float like corks but it has never seemed to be a problem.
Summer Relish: Last summer I made a jar of relish using canned corn, chopped green tomato, red bell pepper and onion with mustard seeds. It took a month or so for the flavor to develop but I was sad when it was gone. It was long past green tomato season and I've been daydreaming about it ever since!
Pickled Garlic: Peel the cloves, fill the jar and cover with brine. It will take months (as in 4 or 5) for the cloves to ferment fully but it will be worth it. They ferment into this mellow, garlicky, almost sweet tangy condiment. Perfect for salad dressings and topping soup. And exceptionally good for you!
Of course you can mix and match. I almost never make a jar of just one vegetable, I use whatever I have around. I will often add turnips or carrots to
sauerkraut, or get lazy a
 nd
nd throw brine over cabbage as well. Give any vegetable you have a try in the brine and see how it turns out.
Experiment with seasonings, garlic, onion and different flavor combinations. You'll be amazed at what you find you like. I serve pickled vegetables with almost every meal and pretty soon you will be too!
This post is part of the
Real Food Wednesday Blog Carnival. Be sure to check out the other posts for more great real food ideas!
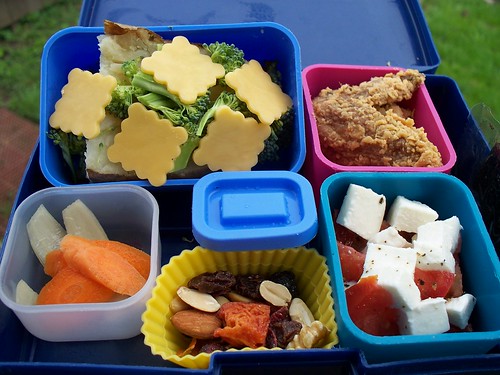
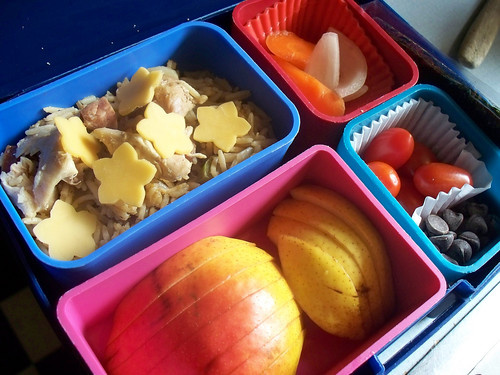
To see more photos of my lunches, others with home made pickles in them, check out my
Flickr page.
 As expected, its taste is hardly noticeable in the highly flavored kimchi, though it is visually apparent as black threads in the cabbage mix.
 veggies you can add some more brine - salt added to water until it is too salty to be tasty but not so salty it makes you gag. You will end up with a wetter kimchi, but it will ferment just the same.


