Vinegar is a bacterial ferment that turns alcohol into acetic acid. Remember, alcohol is a yeast fermentation that turns sugar into alcohol. Some people make cider vinegar by allowing raw, fresh pressed cider to do it's own thing with wild yeast and bacteria bu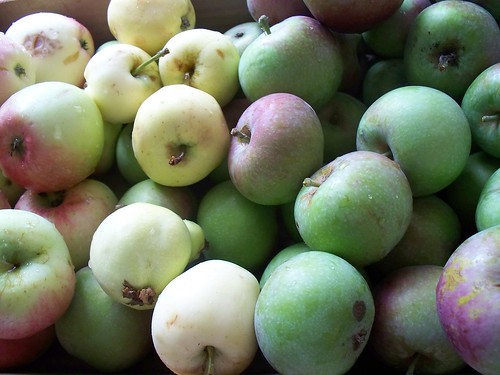 t I like to shepherd the process along with some simple technology and starters. You can start with raw, pressed cider, pasturized store bought juice or apple scraps and sugar. I used the scraps because that's what I had, and the vinegar turned out great.
t I like to shepherd the process along with some simple technology and starters. You can start with raw, pressed cider, pasturized store bought juice or apple scraps and sugar. I used the scraps because that's what I had, and the vinegar turned out great. I highly recommend that you start by reading the beer, wine and vinegar chapters of Wild Fermentation by Sandor Katz. Try making a beer like the one I write about in my Alewife blog post, or try a wine from one of Sandor's recipes. Once you've tried a beer or wine ferment, vinegar is an easy next step. It's a lengthy process but like all fermentations it's mostly waiting. Take an adventure, give it a try.
**** **** ****
Scrap Cider Vinegar ala Broderick Cellars
Hardware:
*A one gallon or so sized bucket or wide mouthed glass jar with a lid
*1 nylon mesh bag, food grade (could use cheesecloth, I guess, but I have a 2 gallon nylon bag I got at a brew store for not very much money)
*A pot, 6 quart or larger
*a stainless steel long handled spoon (or other easily cleaned spoon-like device)
* a cup or jar, pint sized or so
* a measuring cup or kitchen scale
*A one gallon sized glass jug with a narrow mouth (you can buy these at brew shops, or you can buy a jug of Carlo Rossi wine or apple cider invite your friends over and have a party :)
*An air lock and stopper (avaliable at homebrew shops for cheap - Wild Fermentation by Sandor Katz has DIY options, but I say buy an airlock, it'll work great and costs like a buck)
*A funnel and strainer and/or a siphon/racking stick/length of food grade plastic piping
Software:
*Apple peels and scraps - about a gallon OR one gallon apple cider
*Sugar and/or apple juice concentrate - see below for amount
*Water, good quality.
*Wine yeast, avaliable at homebrew shops or online
* Unpasturized vinegar like Braggs, a glug or three
Phase One: Make Hard Cider
Day One: Making the Must and Adding the Yeast
If you are using scraps and sugar, follow the directions in this first paragraph. If you are using cider, then heat the cider to pasturize it, cool it to body temperature and skip down to where you add the yeast.
Make a mock apple juice with sugar water and/or apple juice concentrate by heating up water and sugar until the sugar is dissolved and the liquid is just boiling. I use the amount of sugar in apple juice as a guide so 24 g of sugar per cup of juice. That equals about 2 tablespoons of granualted sugar per cup or a half cup sugar per quart of water. You could probably get away with less sugar because there is sugar in the apple peels, but I would add at least a little. (Online Conversion.com is an amazing website to help you convert weights and volumes of common food items... very handy for off the cuff cooking!) You need about a gallon of boiling hot apple juice sugar water.
Put your peels, cores and scraps into your nylon mesh bag and put in "primary fermenter", aka your bucket. If you wanted a wild fermentation you would let the sugar water cool to body temperature and then pour over the apples, cover with a cloth and let ferment. I like to guarantee alcoholic fermentation by adding wine yeast. Take out a cup or so of the sweet water and let it cool to body temperature in a small jar or cup. Pour the rest of the hot sugar water over the apples in the bucket and stir to combine everything well. Put the lid on the bucket and let everything cool to body temperature. Body temperature means it feels neither hot nor cold. It's a little cooler than bath water, about 100 degrees F.
While the apple must (juice ready for fermenting) is cooling add your wine yeast to the small jar of body temperature sugar water. It will start to get frothy and smell yeasty after 10 or 20 minutes. When the must is body temperature and the yeast is primed (active and ready to work) then pitch(pour) the yeast into the must and cover the bucket with the lid again. The lid shouldn't be air tight, but it should be closed. The guy who taught me to brew used a 5 gallon bucket with a small hole drilled in the lid as his primary fermenter. He covered the holewith a clean coffee filter and then the whole lid with a clean dishtowel. I have a glass jar with a glass lid that doesn't fit down tight and that works fine, too. Day one is completed. Your must is beginning to ferment?
Day Two: Check Fermenting Cider
Now you will leave your fermenting cider to do it's thing for a couple days. On the first morning check it the next morning to make sure it's frothy and fermenty (if it's not, email me and we'll make an emergency plan B) Every day or so clean off your "easily cleaned spoon like device" and stir the cider around making sure to mush any floating fruit back down under the liquid. Do this quickly and try to keep the lid on as much as possible while stirring. The active fermentation will make it difficult for contaminating bacteria or yeast to get a foothold in there, but it could happen. 5-10 days after you started fermenting it is time to "rack" (move the liquid offthe solid stuff) the cider into your "secondary fermenter" (jug with an airlock- isn't brewing lingo fun?!?).
If you have any questions, pleae leave a comment. I tried to write this as clearly as possible, but maybe I didn't. The best way to learn this stuff, of course, is to meet someone who can show you. Good luck with your vinegar, and all your kitchen brews!
Day Three: Racking into Secondary Fermentation
On racking day clean up your whole kitchen, your kitchen sink and the secondary fermenter and funnel/sipon tubing. I use hot water and soap with three rinses of hot water, but others would have you use bleach or some more serious disenfectant. Have a trash bag or compost bucket handy. With your primary fermenter situated near your sink and garbage take the lid off and pull the nylon bag out of the liquid. With clean hands squeeze it a little to get most of the liquid out of the fruit. Put the fruit in your garbage or compost and set the bag aside to clean later (but not too much later. Don't forget, ask me how I know. It was gross).
Now you have to get the cider into your secondary fermenter. One way to do this is to siphon it. Stick the clean tubing into the primary fermenter until most of it is in the liquid, put your thumb over the end of the tube and pull it out ofthe liquid until the part of the tube with the liquid is below the bottom of the fermenter (like in the sink or on the floor below the counter), put the tube inyour secondary fermenter and take your hand off the end of the tube. The liquid will pour through the tube into the jug. Magic. This guy has pretty good instructions with photos. The other way to do this is to gently pour the liquid out of the bucket into the strainer in the funnel and into the jug. Either way works.
Once your jug is filled up to about the shoulder of the jug then put the airlock on it. There are a couple varieties of air lock but all involve filling a small portion of the lock with water and putting the stopper and lock on the mouth of the jug. Put the jug back in a safe, dark spot where it won't be disturbed or have major temperature fluctuations (ie: basement good, back porch bad). Label it well with what it is and the date you started fermenting and the date you racked it (the labels on my jugs are my record keeping system, what exactly goes on your label is up to you)
Label it well with what it is and the date you started fermenting and the date you racked it (the labels on my jugs are my record keeping system, what exactly goes on your label is up to you)Aaaaand, now we wait a few months. Like three, or six. You will know the cider is done fermenting because you won't really see bubbles coming up out of the airlock anymore. Also, the cider should clear up as the yeast die and fall to the bottom of the jug.
Thanks to Anthony at Homestead Pretty for the gorgeous photo. Go check out their post on making honey wine!
Day Four: Racking Off the Yeast
When you have a relatively clear cider and hardly any bubbles coming up through the air lock then you can taste the cider. The easiest way to do this is to stick a small amount of tubing or a straw into the jug, put your finger over the top and pull the liquid out. A syringe with some tubing would work too. You don't want to disturb the yeast bed. Does your cider taste alcoholic? If not, come back for emergency plan B, but most likely it will. It may not taste good, but it should taste alcoholic.
At this point, you can rack the cider off the yeast bad (carefully, with the tubing - a commercial racking stick works great here because it is stiff and has holes in the tubing half an inch up from the bottom so you pull the liquid from above the yeast bed. Tubing can work with some careful holding to keep the end off the yeast bed) and either bottle it to age for drinking as hard cider, or make vinegear.
Congratulations! You are done with phase one!
Phase Two: Making Vinegar
You've racked the cider off the yeast in the secondary fermenter. You can rack it into another jug, into your original bucket or into a number of smaller jars. Ultimately, you will want to get the liquid into containers with relatively wide mouths because vinegar is an aerobic (with 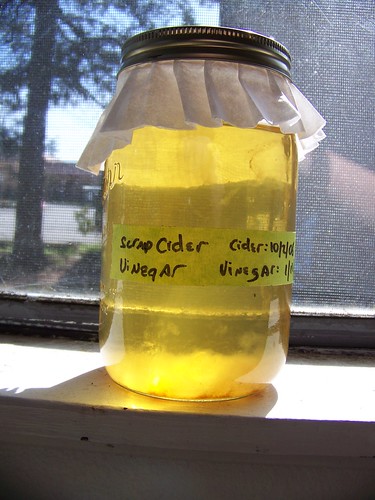 oxygen/air) fermentation. We used the airlock to keep oxygen out of the alcohol fermentation, but will work to get air into the vinegar fermentation. I put my cider into 3 or 4 quart sized mason jars and recommend that, but you can find containers that work just right for you. It should be glass, though.
oxygen/air) fermentation. We used the airlock to keep oxygen out of the alcohol fermentation, but will work to get air into the vinegar fermentation. I put my cider into 3 or 4 quart sized mason jars and recommend that, but you can find containers that work just right for you. It should be glass, though. Pour the cider into the container(s) you are going to make the vinegar in. It is OK, and even a good thing to let this pouring incorporate lots of oxygen intothe mix. Pour it from as high up as you can, let it splash around a bit. Add a goodly dose of raw vinegar to your cider.. I'd say 1/8-1/4 cup vinegar per quart of cider. If your vinegar has a mother in or on it - the rubbery or stringy floaty bits - then add those to the cider, too. That's the good stuff.
Cover the container(s) of cider with something that will allow air in and out, but keep out bugs and dust. I put two layers of coffee filter over the mouth of the jar and held it in place with a mason jar ring. Cloth and string or rubberbands would work too. Label, label label.
A note - this ferment should be kept away from any other alcohol ferments you are doing like beer or wine. You might also want to keep it away from kombucha ferments, though I don't. Vinegar bacteria can spoil alcohol ferments(make them vinegar when what you really wanted was wine) and could potentially cross contaminate with kombucha. My vinegars have turned into kombugar and I don't care if my kombucha becomes vineguchaor, but some people might.
In a couple weeks or a month or whenever you think about it, see how your vinegar is doing. Is there a mother on top? It looks kinda like a kombucha scoby but might be quite thin like a film. Does it smell vinegary? It's OK, maybe even adviseable, to lift the mothers off the jars (carefully keeping them a side to add back) and pour, mix and aerate the vinegar. I had three jars going and would get out a fourth and pour everything back and forth among the jars, mixing and aerating everything. Then add the mothers back to the jars, cover with the paper or cloth and let them sit another few months. When it is vinegary to your liking, it's vinegar! :)
**** **** ****
It sounds super complicated, but it's not really, I promise. Like I said, check out Wild Fermentation for good, simple instructions with clear illustrations. Google "home wine making" 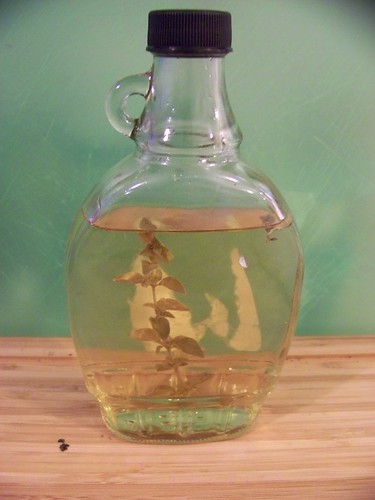 for more info and make friends at your local brewstore. They're friendly folks there, no doubt. Your vinegar will keep in the cupboard for close to forever so don't worry about making too much. I have recently been infusing my vinegar with different flavors - rosemary, oregano and blueberry are my favorites so far.
for more info and make friends at your local brewstore. They're friendly folks there, no doubt. Your vinegar will keep in the cupboard for close to forever so don't worry about making too much. I have recently been infusing my vinegar with different flavors - rosemary, oregano and blueberry are my favorites so far. If you have any questions, pleae leave a comment. I tried to write this as clearly as possible, but maybe I didn't. The best way to learn this stuff, of course, is to meet someone who can show you. Good luck with your vinegar, and all your kitchen brews!
i am making home made apple cider vinegar but there are no bubbles coming on top its teh third day - (i dont want to make alcohol) just vingar what should i do how long should i wait more.
ReplyDeleteplease email me hayapteman@yahoo.co.uk
thanks
My method of making vinegar requires making alcohol first. Vinegar is a product of acetic fermentation of alcohol.. which is itself product of a yeast fermentation of sugar. Which step are you in that you don't have bubbles?
ReplyDeleteI would like to say thank you for sharing this cool article about apple cider vinegar. This is exactly what I need, Thanks a lot. Keep blogging. :)
ReplyDeleteBlog are so informative where we get lots of information on any topic. Nice job keep it up!!
ReplyDeleteThank you!
Rotary airlock valves manufacturers