Tuesday, June 23, 2009

Of Probiotics and Pickles

If you are in anyway connected to the world you've probably heard more and more about probiotics and beneficial bacteria. People are selling probiotics as pills, liquids, juices, yogurts and other fanciful items. Most of you have probably seen the yogurt commercial with the slightly disturbing animation of an arrow on a woman's stomach and you might even be able to hum the jingle for that product. What's all the big deal about probiotics anyway? And do we really need to spend top dollar to have them added to our foods?

The term probiotics refers to bacteria and yeast found in food that are good for your body. Our skin and intestinal tract are completely covered in bacteria and the idea is that inviting the right kind of bacteria into that system has health benefits. The human gut can contain over 2 lbs of intestinal microflora (beneficial bacteria) and they do some pretty important work there. They help digest food and create vitamins, they make it hard for bad bacteria to live there and stimulate the part of our immune system that is in our digestive system. In fact, there is more and more evidence that everything from acute intestinal upset to allergies to autism can be helped by normalizing gut bacteria and using probiotics. There are lots of good commercial probiotic foods and supplements available (as well as some not so good ones) but being the DIY kinda girl I am, I like to make my own.

Yogurt, kefir and buttermilk are all very common probiotic foods. These are all fermented dairy products that are eaten while the bacteria are still alive. Vegetables and fruit can also be cultured into probiotic foods through a process called lacto fermentation. A couple months ago I wrote a tutorial for making sauerkraut, one of my favorite kinds of lacto fermented vegetable. Sauerkraut is a great way to start in on fermented vegetables because most Americans at least know what sauerkraut is and many even already like it. I've been surprised at how many of my friends are excited to try my sauerkraut because they grew up eating sauerkraut. Sauerkraut is not the only pickled vegetable out there so don't despair if you don't like the kraut.

Vegetable pickles are possibly even easier than sauerkraut and allow for as many variations as your imagination can come up with. The basic idea is to cover vegetables with a salty brine and allow the bacteria to do their thing. I'll give you a recipe-tutorial for my very favorite pickled vegetable recipe and list some of my favorite variations here and then I'll answer some common questions in a follow up post.

* * * * * * * * * * * * * *

Spicy Carrot Pickles


I like Spicy Carrot Pickles so much because they come out great every time. They are salty, spicy and a bit sour and always have a great texture. You can adjust the amount of spiciness to your liking using different kinds of peppers. These are based on the pickled carrots usually served at autentico taco places so they should be sort of familiar to a number of people.

Step One: Jar and Vegetable Prep

Find a glass jar with a tight fitting lid. A pint sized mason jars with a metal or plastic lid is great but an old pickle jar work just as well. Wash the jar and lid with hot soapy water and rinse well.

For a pint (two cup) jar you will probably use 1 1/2 - 2 medium carrots, 1/2 an onion, 2 cloves of garlic and half of a jalapeno. Have more carrots available in case I am underestimating and adjust the garlic and pepper as your family would like. I find half a jalapeno adds heat but is not blinding, but you may have widely different tastes. You can use a hotter pepper like Serrano or Habanero (if you dare) or a milder pepper like an Anaheim, a Hungarian pepper or a pizza pepper. Be sure to adjust the "half a pepper" accordingly to the size and heat of the pepper you choose. You could also use a pinch of red pepper flakes instead of fresh peppers.
Wash the carrots but don't peel them. Slice them into long ovals by slicing on a steep diagonal to about 1/4 inch thickness. Peel and slice the garlic cloves and slice the onion longitudinally (from pole to pole, not around the equator) into 1/2 inch slices or into chunks. Slice the jalapeno into rings. Layer the vegetables in the jar to within an inch of the threads.

Step Two: The Brine

There are all kinds of recipes out there for brine strength ranging from a specific measurement in the jar to percent salinity. After reading The Ultimate Kimchi recipe and Wild Fermentation by Sandor Katz, I decided to do this the old fashioned way - use my taste buds.

I make a brine by adding salt to water until it is "too salty to be tasty, but not salty enough to make me gag." I understand that this is a very vague description of how much salt to use, but it works. I promise. Start with a teaspoon in a pint (two cups) of water and taste it. You can hardly taste the salt, right? Add another teaspoon and taste again. Then increase by half teaspoons until the water is really gross. Add a splash of water and taste again. Somewhere in between tasty and gross is the right amount of salt. It always seems a little saltier than seawater to me.

Oh - and use the right kind of salt. You should use sea salt because it is pure and has lots of trace minerals that are really good for you. I personally use RealSalt because it lists the trace minerals on the package and sells for a reasonable price. Other sea salts would be fine too. You can also use kosher salt or other salt as long as it has no iodine and no anti-caking ingredients. One caution about Celtic or grey salt - moist salt is sometimes known for carrying bacteria and mold that can ruin your ferments. If you want to use moist Celtic sea salt then you should bake it first until it is dry. Seriously, though, who needs to go through that much work for pickles. Just buy some lower quality sea salt for fermenting and keep the Celtic for sprinkling on your potatoes.

Once you have your brine made with the right kind of salt to the right saltiness then pour it over the jar full of vegetables. The brine should cover the vegetables but still be below the threads of the jar. Screw the lid on tight and set it on the counter to begin fermenting.

Step Three: Fermentation

Just like in the Kraut 101 tutorial I recommend you check your pickles every day and learn to look for signs of fermentation. The day after you make your carrot pickles open the jar and listen for popping, fizzing or hissing as you open the jar. Smell the contents and then taste a sip of the brine (you can take some out with a spoon or just sip it out of the jar like I do... but then again I'm pretty cavalier about things like that). Is it at all sour or fizzy or still just salty? Put the lid back on and let it sit out for another day.
It usually takes 2-5 days for signs of fermentation to really show up. Exactly how long depends on everything from the quality of your vegetables and the ambient temperature to whether you sacrificed to the proper deities. I'll address some of these variables in the next post and in the end it doesn't really matter how long it takes, just that it happens. Be patient, it will.

When your pickles are popping, fizzing or starting to taste sour then move them to the fridge. Carrot pickles usually taste best after another two or three days in the fridge (you should try them every day to see when you like them best) but will last for months without getting mushy or gross. The onion will start to get a little mushy after a month or so but whole garlic cloves are still virtually raw until at least a month in the brine.

I like to eat these pickles in anything even remotely Mexican in flavor. I love them in quesadillas and burritos as well as on salads. The pickle brine can really brighten up a soup and makes a fine salad dressing when substituted for vinegar in any recipe.

* * * * * * * * * * * * * *

Once you've run through this recipe once then you are ready to start thinking about pickling other vegetables. Here are some of my favorites.

Cucumbers: pickled cucumbers are a classic. I have used whole pickling cucumbers as well as sliced eating cucumbers (remove part of the skin, it is tough and bitter). Pack the jar with cucumbers, dill seed, garlic cloves, black peppercorns and maybe some sliced onion and/or mustard seed. Cover with brine and follow the steps above.

I didn't use cucumbers as my master recipe because I've had mixed luck with fermenting them. Cucumbers, being so watery, are at risk of getting mushy and even when they aren't mushy they never taste quite the same as vinegar pickles do. I like the fermented flavor but have not yet perfected the crunchy cucumber pickle. Some people add a grape leaf to the jar and others soak the cucumbers in salty water first. I'm going to experiment this summer and I'll let you know.

Turnips, Radishes, Not Spicy Carrots: Slice them into planks or chunks and cover with brine. Try these will dill seed and garlic or with mustard seed and red pepper flakes. Turnips tend to be a bit spicy when fermented, but are great on salads.

Beets: I recently made up a jar of sliced raw beets and carrots with no extra seasoning at all. The liquid is thick, sweet and deep red and the vegetables are now tender, sour, sweet. Fantastic.

Green Beans or Asparagus: Trim the veggies to fit in the jar and add a garlic clove and maybe one of those small, dried red chiles. Try doing the same with okra. A little juice from one of these jars is the secret to my Bloody Mary. Fantastic!

Mushrooms: White or baby 'bella mushrooms can be pickled in brine into a very tasty appetizer. I like to add black peppercorns and mustard seed as well as a small garlic clove. The mushrooms will float like corks but it has never seemed to be a problem.

Summer Relish: Last summer I made a jar of relish using canned corn, chopped green tomato, red bell pepper and onion with mustard seeds. It took a month or so for the flavor to develop but I was sad when it was gone. It was long past green tomato season and I've been daydreaming about it ever since!

Pickled Garlic:
Peel the cloves, fill the jar and cover with brine. It will take months (as in 4 or 5) for the cloves to ferment fully but it will be worth it. They ferment into this mellow, garlicky, almost sweet tangy condiment. Perfect for salad dressings and topping soup. And exceptionally good for you!

Of course you can mix and match. I almost never make a jar of just one vegetable, I use whatever I have around. I will often add turnips or carrots to sauerkraut, or get lazy and throw brine over cabbage as well. Give any vegetable you have a try in the brine and see how it turns out. Experiment with seasonings, garlic, onion and different flavor combinations. You'll be amazed at what you find you like. I serve pickled vegetables with almost every meal and pretty soon you will be too!

This post is part of the Real Food Wednesday Blog Carnival. Be sure to check out the other posts for more great real food ideas!

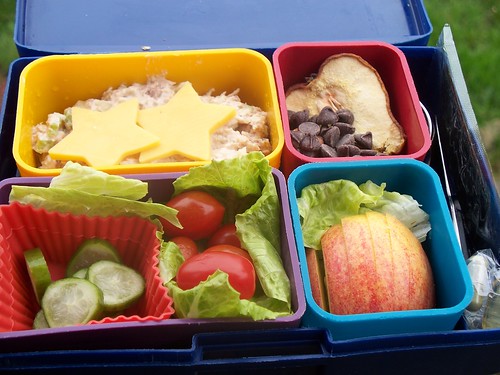
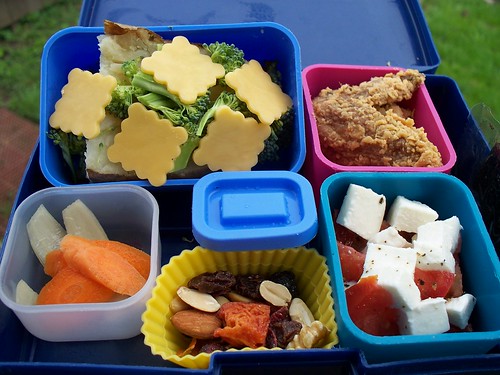
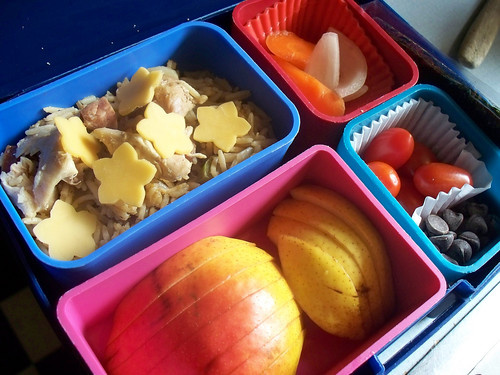
To see more photos of my lunches, others with home made pickles in them, check out my Flickr page.

Wednesday, June 17, 2009

Breakfasts of Champions

This last weekend I made two fantastic breakfasts for myself. I love a good cooked breakfast more than just about any other meal. Omlette with goodies tucked inside, hashbrowns or homefries, bacon, sausage, ham, hollandaise sauce! I lived with a boyfriend for a while who loved cooking breakfast as much as I love eating it and we got in the habit of eating bacon, fried eggs and toast even on weekdays. Now that I'm cooking for one again I rarely do that, but I do make a point to cook a good breakfast meal at least once on the weekends. Even better is going out for breakfast! I have heard that going out to breakfast is a real Portland thing and that means I'm a real Portland girl. I love breakfasts.

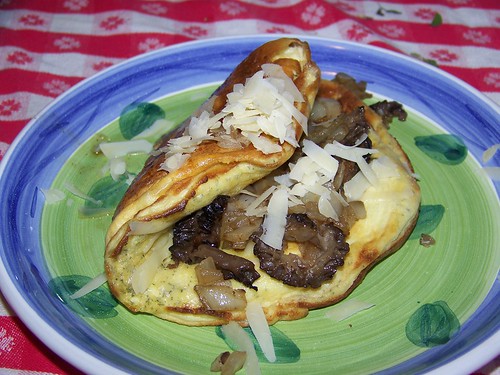
The first breakfast of the weekend was a puffy omlette with wild mushrooms. A friend from work gifted me some wild mushrooms that her friend had collected. Some were unquestionably morels and I happily sauteed them up but I wasn't sure what the other was. It might have been a king bolete but as I continued looking at it and googling like a mad woman I decided that I didn't really want to eat it. It was a little past it's prime, and mushrooms are just one of those things. Oh well, the morels were fantastic.

I read about puffy omlettes on this fantastic blog I found last week called Beyond Salmon. The author talks about her dilema in teaching a cooking class focused on eggs. She wanted to use authentic french methods to cook an omlette but it turns out no one likes flat, plain french omlettes. So she asked her mom how to make a fluffy omlette. Turns out the secret is a blender. I used her method, with some dill added to the eggs and the musrhooms and Irish cheddar inside. It was fantastic!


Mushroom and Dill Puflette


1/3 cup whole milk
2 1/2 tsp unbleached flour
2 large eggs
1/4 tsp salt
A few grinds of black pepper
A pinch of dried dill
Fat for the pan - a mix of butter and oil or butter and goose fat
2-3 Tbs of sauteed wild mushrooms and onions


  • Combine the eggs, milk, flour, salt, pepper and dill in a blender and blend until well combined. The original recipe calls for blending for 2 minutes, I didn't blend for anywhere near that long.
  • Preheat the broiler and set a a 6 inch cast iron skillet (recipe called for a 7-8 inch nonstick skillet). Add your cooking fat and let it heat until the butter has melted and the foam subsided. I used a goodly amount, at least a tablespoon total because I was worried about the eggs sticking but if you have a well seasoned pan you just need a thin coating.
  • When the foam subsides in the butter add the egg mixture into the skillet, cover the pan and cook for 45 seconds (maybe a full minute for the 6 inch pan) or until the eggs look set around the edges but completely liquid in the center.
  • Uncover and place the skillet 2-4 inches away from the broiler element until the mixture is puffy and golden on top, 60-90 seconds or until it is puffy and golden on top.
  • Add the filling, slide the omlette onto a plate and fold in half. The original recipe calls to "Dot with a sliver of butter, spreading it over the top of the omelette as it melts." How wonderful!

The next day for breakfast I just had simple scrambled eggs but accompanied them with a red flannel hash. Red flannel hash is a New England special of pan fried potatoes and beets with or without salty meat like corned beef or bacon. Mine had no meat but did have onion and lots of black pepper. This was really out of control good. Way, way better than I was expecting.


Red Flannel Hash


1 baseball sized beet, peeled and diced to 1/8 inch dice
2 baseball sized yellow potatoes, washed and shredded on a box grater
1/2 onion, sliced thin
salt, pepper
goose fat, lard or coconut oil for the pan


  • Melt the fat in a 12 inch cast iron skillet over medium heat and add the onions and beets. Lightly salt and pepper and cook, stirring occasionally, until the beets are tender.
  • Add the potatoes, more salt and generous amounts of pepper. Toss and stir until well incorporated with the beets and then smoosh the mass into the pan. Continue cooking over medium heat, stirring, scraping and turning occasionally, until the potatoes are cooked through and starting to get a bit crispy, about 20 minutes. Taste for salt and pepper and serve alongside scrambled eggs or topped with a poached egg.
Breakfast really is the most important meal of the day. Making sure that it is full of good fats and plenty of protein means you don't get hungry early in the day. A good breakfast keeps you productive and healthy AND happy. What do you like to eat for breakfast? .

This post is part of the Real Food Wednesday Blog Carnival. Check out what other folks are eating for breakfast, lunch and dinner over there!

Friday, June 12, 2009

I Tempted Her With Pheasant

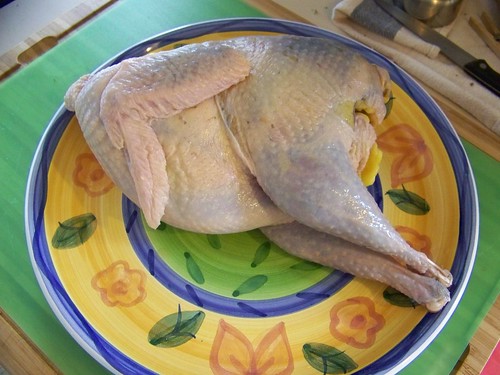
Last month when I was at Kookoolan Farm I bought a pheasant from Chrissie. I've never cooked a pheasant before but thought it would be fun. Like my goose adventure, only with less grease! I find cooking exotic birds to be a bit less intimidating than cooking exotic beasts. They seem more accessable, and like with the goose I ended up with lots of 'extra food' from the pheasant.

Cooking a pheasant clearly should not be a just me for dinner kind of night so I invited some friends over. One friend hemmed and hawed because, it being a Saturday in June, she had three other parties to go to. I finally convinced her to come under false pretenses of homemade mead, but she was happy with pheasant and wine.

Pheasant is a dark meat bird with considerably less breast meat than a chicken. I looked at lots of recipes for roast pheasant and all of them called for wrapping the breast in bacon before cooking. Everything is better with bacon, isn't it? In the end, fearing a dried out, tough bird I opted to braise the pheasant instead of roast it. The recipe I used was a simple one and everyone loved the flavor. I added a split chicken breast in on top of the pheasant fearing there wouldn't be enough meat for all three of us, and though it wasn't necessary it was nice to have the leftovers. I would certainly use this reciepe again, with modifications found below.

Braised Pheasant
1 pheasant (plus a chicken breast or a few chicken thighs)
3 tbs flour
salt and black pepper
2 tsp dried rosemary
2 bay leaves
5 peppercorns
bacon fat and/or goose grease
1/4 cup red wine
1 1/2 chicken broth
1/2 a medium onion, sliced
4 cloves of garlic, smashed or cut in half
1 tablespoon flour
1/2 tsp ground dried rosemary

1) Cut the pheasant into pieces. I cut the leg/thigh pieces off, cut out the backbone and hacked the breast apart into two pieces. I saved the backbone, wingtips and trimmed neck and tail skin/fat for stock later. Preheat oven to 300 degrees.

2) Combine the flour with salt and pepper making sure the flour tastes seasoned. Rub the flour all over the pieces of pheasant. Heat the bacon fat and/or goose grease (lard or coconut oil if that's all you have) in a cast iron skillet. Brown the meat skin side down first until it is nice and golden brown. Do it in batches, making sure not to crowd the pan.

3) Place the browned pieces in the bottom of an enameled cast iron dutch oven (or other heavy pot with a well fitting lid). Be sure to keep chicken pieces on top of the pheasant as it doesn't need to cook as much. Tie the peppercorns, bay leaves and rosemary in a cheesecloth bundle and tuck in between the pheasant pieces. Add onion and garlic on top of the meat. Deglaze the pan with the red wine and pour that over the meat. Add the chicken broth and place in the hot oven.

4) Allow pheasant to cook for AT LEAST 2 1/2 hours. Probably more. When the pheasant is cooked through and the wing and leg joints move freely remove the meat to a platter and cover with foil to keep warm. Remove the onion and garlic either with a slotted spoon or by pouring all the sauce through a sieve and catching the liquid in a measuring cup, gravy separator or small saucepan.

5) Make the pan liquid into a gravy by cooking flour and ground rosemary in an equal amount of either fat that rises to the top of the pan sauce or more bacon grease. When the flour is cooked and starting to brown add the pan liquid into the roux and stir over medium high heat until flour is incorporated and the gravy is starting to thicken. Stir constantly and reduce heat to low when it is bubbling and thick.

6) Serve pheasant over wild rice, Israeli cous cous, orzo or mashed potatoes making sure to pass the gravy.

The cook is always most critical of their meal and my guests really enjoyed the experience. I found the pheasant to have a really pleasant flavor but it was tough. I braised mine for just over two hours and think another hour in the pot would have done wonders. A dry roasted hunk or meat or bird needs to reach the proper temperature but not go much above. A braised hunk of bird or meat needs to stay at the proper temperature long enough to melt connective tissue. I didn't give my pheasant enough time and it was pretty tough. I'll also add more rosemary next time. It was a lovely flavor and the original recipe called for branches of rosemary to be placed over the meat and liquid in the pot. I think that is a fantastic idea.

In the end, my guests enjoyed themselves. The gravy helped a lot (my trick to good gravy is to season the flour for the roux well with rosemary, basil, oregano or whatever other herb might fit the situation) and a couple bottles of wine with dinner helped even more. I didn't get any photos of the cooked meal, we were too busy eating it. Here is the lovely flower bouquet that was on the table.

I wonder what's next on my exotic bird cooking tour? Duck? Pigeon? Pastured turkey? Bring it on!

For more great blogs about cooking real food and why it's important check out this week's Real Food Wednesday!

Tuesday, June 2, 2009

Pokrov Farm Tour

If you haven't gotten out to tour a farm yet this spring then get yourself in gear! Spring on a farm is a fantastic time. The weather is nice (but not too hot, so the animal smells aren't overwhelming), the vegetables are pretty (but not overgrown) and best of all... there are baby animals everywhere!!

A couple of weeks ago I was lucky enough to visit Kookoolan Farms in Yamhill, OR and this week I got to visit Pokrov Farm outside of Sandy, OR. I met Genevieve, one of the farmers, through my local Weston A Price Foundation email list when she advertised that her farm had CSA shares available for the summer. I jumped on board and am eagerly awaiting my first CSA basket - it comes next week! I happened to be driving by her place last weekend and stopped in to meet her family and tour the farm.

Their farm is set on a hill outside of Sandy, OR on the flanks of Mt. Hood. They are leasing 35 acres of some of the most beautiful farm land in western Oregon. They have green meadows, big trees, a creek and a pond, a couple barns and a lovely farm house. I pretty much want to move in with them. Genevieve is deeply inspired by Joel Salatin and his farming methods and attended a workshop in Southern Oregon last fall that led her to find this farm for her family. She is now homeschooling her children as well as running the farm along with her husband and two housemates. They've only been on the land since November but already have a lovely vegetable garden, about a million chickens, a milk cow and a couple happy pig and goat families.

One of the housemates (forgive me, I've forgotten his name - though I'll probably learn it next week at the CSA pick up) is a certified Master Gardener and in charge of the vegetable patch. It looks like it's growing great with a wide variety of veggies, herbs and even some flowers growing. Have I mentioned that I can't wait for my first basket?

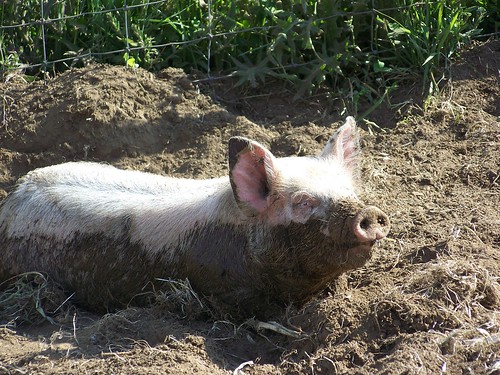
They are using some old fashioned labor to till and fertilize a new extension to the garden - pigs! They've got a pair of pigs and this year's piglets fenced into an area that was weedy and dry just a couple weeks ago. As you can see the piggies are enjoying their mud baths as they dig for roots and insects and enjoy fresh air and sunlight. That is going to be some vitamin D rich lard! I found it really interesting when Genevieve mentioned that another farmer asked about renting her boar to breed with their sow. Apparently it is virtually impossible to find old fashioned pigs to make baby old fashioned pigs because most pig farmers use artificial insemination to breed in "new and improved" characteristics into their herd. Genevieve, with her everpresent optimism and openness said, "Sure! Let me research how to do that!".

Pokrov Farm seems to be crawling with chickens. Happy, outdoor, bug eating chickens! They have two big barns that both have adult chickens in them as well as a big room full of baby chickens! When we were visiting the two housemates were working on a Joel Salatin style chicken tractor so that the babies can move out into the field as soon as they get their feathers. Genevieve was saying that they got hooked in with a Southeast Asian community that wants a couple hundred live birds a month so that they can butcher them themselves. What a great things for a small farm to have such a standing order.

In one of the chicken houses they have a Joel Salatin style rabbit set up with the wire bottom cages over where the chickens are. The chickens scratch the rabbit droppings and keep the area clear of insects that might bother the rabbits. One of my favorite parts of the tour was getting to see the brand new baby rabbits. One mama rabbit had kindled her kits a couple days earlier and the other had kindled the night before I was there. The babies were like little pink blobs with bunny ears.

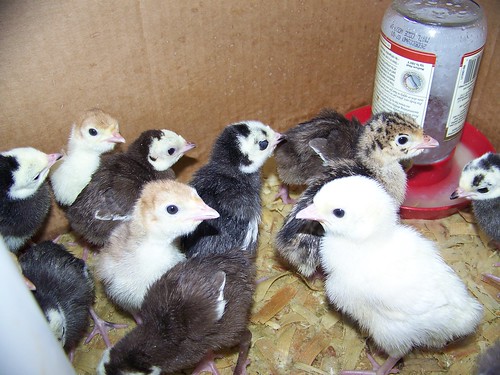
The other babies I got to see at the farm were baby goats, baby geese and baby turkeys. Genevieve ordered a mixed pack of turkey hatchlings so she doesn't even know what breeds they are. I ordered one for my thanksgiving dinner.... I'm not sure how I would feel about raising them from these tiny fluffy babies into dinner, but I'll be happy to eat them when they come my way! The geese were possibly the cutest things ever, but I didn't get a good picture. They were fuzzy and yellow, like cartoon ducklings. Genevieve is keeping a couple pygmy goats for milk and they had just kidded that week. I picked up one of the kids and it was tiny, like a puppy!

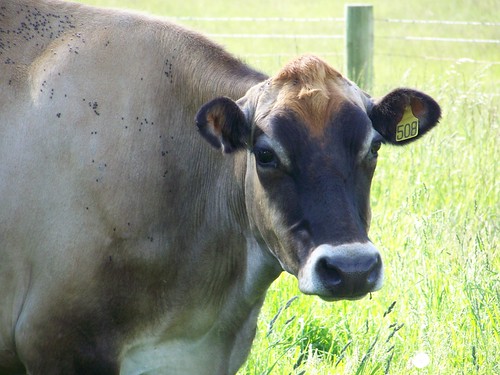
Genevieve's pride of the farm is her Jersey cow, Ella. Ella is producing milk that Genevieve is drinking and selling raw, as well as making cheese. She is planning on holding cheesemaking classes through the summer as well as other workshops. Genevieve was commenting on how they have been having a fly problem with Ella and are having a very hard time finding advice on how to treat external parasites without chemicals. She doesn't want to put poison on the animal that provides milk for her children. She did eventually find a method using pine tar and has the supplies on order.

Genevieve and her family are an inspiration to those of us with homesteading ambitions. She says she had been an urban homesteader in Portland, keeping chickens and digging up her lawn to plant vegetables. She and her husband saw an opportunity to move up a notch and have a real farm and have taken it. They are working hard and have lots more to go before they are assured a financially profitable farm, but they are supplying themselves with most of their own food. I am very proud to be able to support them this summer and have them support me! I can't wait to go out for a cheesemaking class or to harvest apples or fish trout in their pond. On top of it all, Genevieve is one of the most welcoming, optimistic and just plain sweet people I've met in a long time.

Now it's time for you to find a farm to go visit! Buy a CSA share, find someone producing raw milk or free range chickens! Go out there and meet your meat and veg with your veggies!

For more posts about REAL FOOD like the kind you get at small family farms check out the Real Food Wednesdays and Food Roots blog carnivals!