Showing posts with label recipe. Show all posts

Sunday, April 17, 2011

Lima Bean Soup

April is a month for babies, isn't it? I mean, I'm sure perfectly lovely children are born in other months of the year, but the height of spring seems a perfect time for new life like chicks, lambs and babies. A friend of mine had twins at the beginning of the month and in addition to taking her dog hiking last weekend I made her a soup. She is a vegetarian so I was looking for something hearty enough for someone eating for three, simple and frugal enough that I could make a giant batch for two households, and that would be delicious. I decided on a lima bean soup using home made vegetable broth and dried lima beans. At the bottom of the recipe are some non-vegetarian options for those of us who appreciate the nourishment that comes from bone broth.

Veggie Lima Bean Soup

1/2 pound dried lima beans, sorted, rinsed and soaked in water overnight.

For the veggie broth:
1/2 a yellow onion
2 stalks of celery, broken to fit in the pot
1 carrot, chopped in two or three pieces
1 small potato, scrubbed and quartered
2 cloves garlic, cut in half
Small bit of arame seaweed (optional)
A couple pieces of dried mushroom
1/2 tsp herbs de Provence and/or Italian seasoning
A couple peppercorns
Salt
Trimmings from the vegetables for the soup

For the soup:
Olive oil, butter and/or coconut oil
1 yellow onion, chopped
4 stalks celery, sliced
2 large carrots, chopped (note: should be about equal on those three)
2 cloves garlic, minced
herbs de Provence and/or Italian seasoning, red chili flakes if you'd like
black pepper and salt
2 tsp soy sauce
1 tbs lemon juice
red wine, Worcestershire sauce, vinegar

Start by making the veggie broth. Cover all the vegetables and trimmings with water, bring to a boil and simmer for about 40 minutes. I didn't add very much salt to the broth because I am always afraid beans will stay hard if well salted. The above made about 2 quarts of broth.

When the broth is done or mostly done, start heating the cooking oil over medium heat in a large enameled, cast iron dutch oven. Turn the oven on to 300 degrees. When the fat is hot add the vegetables and dried herbs. Add some salt and pepper at this time. Again, I under-salt because I'm afraid for the beans. Stir and cook until they are starting to turn golden brown. Add the garlic at this time and stir another minute until fragrant.

Strain the veggie broth into the soup pot and turn the heat up to high. When the broth is close to boiling add the drained lima beans, a splash of soy sauce, and a splash of lemon juice. When the soup is just coming to a boil put the lid on the dutch oven and put it in the oven to cook.

Check the beans at 1 hour to see if they are tender. If not, continue cooking and checking every 30 minutes. I didn't time mine but they couldn'tve take more than an hour and a half. When the beans are tender bring the pot out of the oven and adjust for seasoning. Add salt at this time, and maybe a splash of wine, more soy sauce, some Worcestershire sauce and/or vinegar. Hot sauce would be nice if you are into that kind of thing.

You can drop some tender greens like chard or spinach in the pot at this time, or add the raw or cooked greens to each bowl to get wilted. Serve with toast, croutons, sour cream, sauerkraut or any condiment that sounds good.

***

I actually really appreciate the pure and simple flavors in this soup. The beans are so soft and delicious. How did lima beans get a bad rap? I guess generations of moms have made spinach taste bad too. Criminal.

When I had some of this for my own lunch I fried up some bacon and crumbled that on top of the soup (ok, I also drizzled some bacon grease over top too...) If I were making this for myself I would do any number of the following:

*Use chicken stock instead of the veggie broth. Though, I gotta say, the veggie broth really does leave the dish very pure and light. But still, chicken broth for me.

*Add some bacon, sausage or chicken. Beans and pork are a classic combination, but again I love the pure flavor of this dish so I might use bone-in, skinless chicken thighs instead.

*Use chicken fat instead of the olive oil and butter.. though, refined coconut oil is a fine, neutral flavored oil for sauteeing veggies.

All that being said, this is delicious and as easy as falling off a log, especially if you have chicken stock in the freezer already. And it was greatly appreciated by my new mom friend and her boys.

Friday, February 25, 2011

Instead Foods

A couple of years ago my sister was going through a phase where she only wanted to eat hot wings. OK, so that phase has lasted up until the present (we've gone to Fire On the Mountain, THE place to get wings in Portland, OR twice in the last five weeks), but it kind of used to be worse. When she was trying to loose weight her friend suggested she make "hot wing salads" of baked chicken breasts over lettuce with hot sauce and blue cheese dressing.

This is an example of what I call an instead food - instead of eating the thing that is really not good for you, you eat something that kind of fills that craving you are having. Unfortunately, like the hot wing salads, most instead foods just aren't quite the real thing.

I have recently been in need of an instead food for my ice cream addiction. Firstly, no one needs to be eating ice cream at the rate I can put the stuff away. Sweet, creamy and chocolate are my three favorite things and there's a grocery store in my neighborhood that sells Hagen Dazs at less than 3 dollars a pint. Secondly, I am coming to the realization that with my third decade of life is coming less and less tolerance for conventional dairy products. Especially fatty and sweet dairy products. Sadness.

So I began the hunt for my chocolate ice cream instead food. Coconut milk is a wonderful substitute for creamy and sweet so I looked into coconut milk ice creams. There is one good quality, all natural brand here in Oregon called Luna and Larry's Coconut Bliss that really is blissful but at 7 dollars a pint or more that is just not gonna cut it. So Delicious makes a coconut milk ice cream that is more reasonably priced, but is full of guar gums and "natural flavors". I was lamenting this situation on Facebook when a friend of a friend said that she makes ice cream in her freezer without an ice cream maker. I immediately turned to google to see if this miracle could be true. Sure enough, David Lebowitz has a recipe for ice cream made in a shallow pan that you stir up every 45 minutes or so. I combined his method with The Nourishing Gourmet's recipe and ended up with an amazing product. Who knew it could be so easy?!?


I wondered what else I could accomplish with this amazing coconut milk and chocolate combination and my mind immediately turned to pudding. I didn't grow up eating pudding but have come to appreciate it's creamy texture and the fact that it comes in truly single serving size containers. I this recipe from vanilla & lace and was very pleased with the flavor and set of the pudding. For the ice cream I had used a canned coconut cream but for the pudding I used So Delicious brand coconut milk. It comes in a tetrapack, is much lower in fat and more like cows milk in consistency. It doesn't give the same really creamy texture as the coconut cream, but the cornstarch does a fine job of creating the pudding texture that fools you into thinking its really fatty and creamy. I poured the hot pudding into 1/2 cup sized tupperware containers and had my own pudding packs in the fridge.

The main problem with my first batch of pudding was the lumps of cornstarch that come from adding the cornstarch to the hot chocolate milk. For my second batch of pudding I used Martha Stewart's recipe that has you whisk small amounts of milk into the cornstarch at the very beginning of the process to form a paste, then add the rest of the milk. I also added a little cinnamon to the pudding for a refined, adult flavor and again poured it into small plastic containers for individual servings. The recipe was 100% successful and definitely a dessert worthy of eating alone in front of a rerun of Sex in the City or serving at the end of a dinner party.

Photos by stu_spivak and llsimon53. Please click on their names or photos and see what else they've been cooking up!

Monday, November 8, 2010

Saturday Baking

Doesn't it seem like as soon as the weather turns cooler you just want to turn the oven on? Well, the weather started changing around here around the middle of October and sure enough I spent two Saturdays in a row baking lovely things for breakfast and sharing. The warm sweet aromas coming out of the oven and the occasional burst of bright sunshine through the orange and red leaves makes fall a not so bad time of year after all.

Making sweets or baked goods while following a traditional foods lifestyle can be challenging for a couple of reasons. Evidence is stacking up from all sides that sugar and simple carbohydrates in refined flour are just not good for you. Sally Fallon recommends the use of rapadura, an unrefined cane sugar, instead of refined white sugar or adapting a recipe to use honey or maple syrup. These sweetners, while still very high in sucrose and fructose that can wreck havoc on all but the very most stable blood sugar levels, do contain some of the trace nutrients of the original plant material. Traditional wisdom reminds us that tempering our sweets with adequate fats can help regulate our blood sugar so I always try to include nutritious ingredients and a full compliment of butter, eggs or coconut oil.

The other problem with baking is the problem of grains. Sally Fallon teaches us that though whole grains are more nutritious than refined grains, they need to be processed properly in order to neutralize anti-nutrients and release their full potential. The usual methods for neutralizing phytates are soaking in an acidic medium, sprouting or fermenting using sourdough methods. I won't even get into gluten free baking, oy! Sprouted flour can be used in any recipe that calls for wheat flour with minimal or no changes to the process. Soaking and fermenting require completely different processes and honestly, are a bit outside my range of motion on a typical Saturday morning. I take comfort in the knowledge that white flour, though not adding much nutrition, is not removing vital minerals through the action of phytic acid. My baked goods are treats, not staples in my diet, and so I don't worry too much.

This recipe, though, circumvents most of these problems by being grain free and refined sugar free. It is based on a recipe in the great cookbook White Trash Cooking by Ernest Matt Mickler, a lovely collection of authentic recipes reminiscent of the author's childhood in rural Mississippi. The original is called Sweet Potato Pone and is a mix of baked sweet potatoes, heavy cream, molasses and eggs baked into a sweet treat. I subsituted the sweet potato for canned pumpkin and the heavy cream for coconut milk to make a healthful, easy baked treat for any Saturday morning.

Pumpkin Molasses Custard (or Pone, if you prefer)

1 can canned pumpkin (or 2 cups mashed cooked pumpkin, winter sqash or sweet potato)
1/2 can coconut milk (or 1 cup heavy cream or evaporated milk)
3 eggs (or 2, if that's all you got)
1/2 cup molasses (give or take - a big hearty glugg out of the jar will do)
spices to taste - I used 2 tsp cinnamon. Nutmeg, ginger or cloves are not out of place here.
1/2 tsp salt

Combine everything in a mixing bowl and then pour into a greased 8x8 baking dish. Bake at 350 degrees for 40 to 50 minutes or until set and browned to your liking. It really can be eaten anywhere from still a little jiggly to brown and firm so take it out whenever you just can't stand it anymore.

Serve with whipped cream, cold heavy cream, chopped nuts or just a spoon. It's very rich but very tasty.

What do you like to bake up on these cool, rainy, autumn mornings?

Thursday, February 11, 2010

I Love Oregon.. and Cheese

February 14 is not only that hallmark holiday all decked out in pink and red, it is also the anniversary of Oregon becoming a state. Since I love Oregon much more than I love pink hearts I am very happy that a friend of mine has a tradition of a "Oregon, Be My Valentine" cheese and wine party each year. We play Pin the Heart on Oregon, take prom-style photos in front of a giant map of Oregon, wear green instead of red and generally love up on our very lovable state. Oh, and eat a ton of local (and otherwise) cheese and wine. Oregon is known for both.

For two years running I have made cheese logs. Not only are they retro and delicious, they're a great way to stretch a little high quality cheese out to feed a party. One recipe I've made is the classic cheddar cheese log and then I made two others with blue cheese and goat cheese. Here's the cheddar recipe, with variations for the other two below it.

*** *** ***

Cheddar Cheese Log for the 21st Century

8 oz cream cheese or homemade yogurt cheese (see below)
6 oz shredded cheddar cheese (see below for links to directions to make it, or buy the best quality you can find. The sharper the better)
1/2 tsp Worcestershire sauce (look for High Fructose Corn Syrup free brands)
1/2 tsp ground mustard
1 tsp seasoned salt (like Chile Grill Salt)
1/4 tsp ground black pepper (optional)
1/4 tsp cayenne pepper (to taste, optional)
1/4 tsp turmeric, if your seasoned salt doesn't have it in it
1/3 cup finely chopped almonds, walnut or other nut of your choice

*Combine the cream cheese and shredded cheddar in a bowl with a fork, or with a mixer. Sprinkle the seasonings in and continue mixing until everything is uniformly combined.

*Use plastic wrap and your hands to form the cheese mixture into a ball, log or several small balls. Wrap in plastic wrap or parchment paper and refrigerate until firm, at least two hours.
*Unwrap the cheese and roll it in the finely chopped nuts. Serve with crackers or sliced apple.

Herbed Goat Cheese Log

-8 oz cream cheese or yogurt cheese
-6 oz soft goat cheese, with or without herbs
-Up to 2 tsp of two or three of your favorite dried herbs or a tablespoon or so of your favorite fresh herbs chopped finely. Try oregano and thyme or basil and rosemary or herbs de Provence.
-Salt and pepper to taste
-1/3 cup chopped pine nuts, hazelnuts or other nuts
-1 tbs ground sumac
*Combine cream cheese, goat cheese and herbs in a bowl or mixer. Use plastic wrap to form into a ball or log and refrigerate until set.

*Roll firm cheese log in either the nuts or the sumac, or a mixture of both. Serve with pita bread or sliced pears.

Honeyed Blue Cheese Log

8 oz cream cheese or yogurt cheese
6 oz soft blue cheese
salt and black pepper
1/3 cup chopped pecans
2 tbs dark honey

*Combine the cream cheese and blue cheese with a fork or mixer, adding salt and a little black pepper as you would like. Form, wrap and refrigerate.

*Unwrap the cheese and sprinkle liberally with black pepper. Roll in the chopped pecans and place on your serving platter. Drizzle the honey over the cheese and serve with sweet, crisp apples.

*** *** ***

Cheese is a healthy food when you choose the right kinds. Those right kinds, as Kristen the Food Renegade reminds us, are made from whole milk from healthy animals and not much else. Anything that says "cheese product" or "protein concentrate" anywhere on the package is not the kind of cheese worth putting in your body. Find a good grocery store or cheese store and start tasting different kinds of real cheese. Better yet, find a farmer who will sell you their homemade cheese or learn to make your own.

Making cheese is not terribly difficult but does take some time. I've never made hard cheese but drool over the directions on Dr. Fankhauser's cheese page regularly. I have, however, made cream cheese out of yogurt many times. Kelly the Kitchen Kop wrote up some great directions here, which is really handy since cream cheese is an integral part of making cheese logs.
These cheese logs were a huge hit at our party, and I bet they will be at yours as well. The cheddar log has a comforting, familiar taste while the goat cheese one is a little sophisticated without breaking your budget. Everyone raved over the blue cheese log this year. I think it's a particularly inspired flavor combination. I hope you enjoy them as much as we did!

This post is a part of Real Food Wednesday! Check out this week's Mr. Linky for tons more great real food recipes.

Tuesday, January 19, 2010

How to Dress a Salad

When people are switching over to a more traditional or healthful diet the how-to of salad dressing almost always comes up. Commerical salad dressing is usually a nasty brew of polyunsaturated oils, high fructose corn syrup, artificial flavors, gums and starches. For some people switching to a healthier diet they are the first thing to get tossed out of the fridge. For others they can be the last. Healthy, homemade salad dressing SHOULD be easy, right? It's just oil, vinegar and seasonigns, what can be so hard? I can hear the healthfood wanna be's laughing now.

I had the hardest time with salad dressing until just recently. It was always too oily, or too vinegary, or too salty, or not salty enough. Then I discovered an old cookbook, snitched from a public library untold years ago, in my mom's basement. The Savory Way, by Deborah Madison, one of the leaders of the Berkeley health food movement in the 1960s and 70s. The book is vegetarian and elegant, but homely too. These are the kinds of foods someone who has spent years perfecting their sense of flavors and textures makes at the end of a cocktail party, or for her own Sunday afternoon supper. Flipping through the book makes me long to live next door to her, to have the luxury of dropping in for a bowl of this or a nibble of that. Generally simple, but perfectly composed, her salads are a highlight of the book.

In one of the salad dressing recipes she mentioned her trick to perfect sald dressings - a simple ratio. She uses a ratio of 3:2, oil to acid for all of her dressings with adjustments in ingredients and additions, but not that base ratio. Three to two is almost identical to 5:3 but using that ratio allows you to mix and match your oils and acids in even more variations. A ratio also allows you to make various quantities ranging from a quarter cup of dressing for dinner for two to a quart of dressing to keep in the fridge to have on hand. Simply adjust your measuring tool. I often use tablespoons or teaspoons when making dressing for one or two, but quarter cups would make a family sized batch.

A few words about ingredients before I get into some recipes. One of the reasons we are ditching the commercial salad dressings (aside from cost - they are expensive compared to homemade!) is the polyunsaturated fats. In my post on fats I linked to a couple of articles about the health impacts of polyunsaturated fats - as in, they are really bad for you and you should work towards eliminating them completely - and also talked about the cooking fats I do use in my house. Most healthy fats are solid at room temperature, though, making them unsuitable for salad dresssings.

Olive oil is the classic choice for salad dressings. It is high in monounsaturated fat, a fat that has real health benefits, and low in polyunsaturated fats. Use caution when buying and storing olive oil, though, many olive oils are adulterated with cheaper vegetable oils, and the monounsaturated fatty acids are fragile and thus go rancid more quickly than animal fats. Buy from a reputable source and keep the oil in a cool, dark place.

Sometimes you just don't want your salad to taste like olive oil, though. Sometimes you are going for an asian flavor, or your kids balk at the olivey flavor. Check with your olive oil source and see if they have a light or second pressing oil with a more neutral flavor. You can also use some nut or seed oils (sunflower, sesame, walnut, almond, etc) for salad dressing as well. High oleic sunflower oil is a particularly good choice because it is high in monounsaturated fat and low in polyunsaturated, but it is hard to find. When buying nut or seed oils be sure to read the labels carefully for the levels of polyunsaturated, monounsaturated and saturated fats in the oil. Ideally, you want something with low poly- and higher mono- and saturated. In any case, remember that these seed and nut oils are fragile foods that should be used in strict moderation. Buy small bottles, keep them cool and dark, and don't use them for much of anything except salad dressing. Keep cooking with your good, healthy animal fats.

Here is an example of a simple dressing and a few variations using Deborah Madison's magic ratio. I will use tablespoons for all my measurements because I usually make just enough for one or two meals, but feel free to scale up if you are feeding a crowd.

*** *** ***

Simple Italian Dressing

  • 3 tbs olive oil
  • 2 tbs red wine vinegar
  • 1/2 tsp dijon mustard
  • 1 small garlic clove, pressed
  • goodly pinch of salt and grind of pepper

In a small jar with a lid combine the vinegar, mustard, garlic, salt and pepper. Stir with a fork until well combined. Add the oil, screw on the lid and shake until well incorporated. Taste, on a leaf of lettuce, and adjust salt or vinegar as necessary.

Asian Dressing

3 tbs high oleic sunflower oil or un-toasted sesame oil
1 tbs rice wine vinegar
1 tbs lime juice
1 tsp grated ginger
1/2 tsp grated or pressed garlic
1/2 tsp soy or fish sauce
a few grinds of black pepper
chile flakes, to taste

Combine everything but the oil in a small jar with a lid. Stir to combine and then add the oil. Screw on the lid, shake to combine then taste and adjust as necessary.

Fruity Vinaigrette

1 tbs extra virgin olive oil
2 tbs light olive oil or high oleic sunflower oil
1 tbs fruit infused cider vinegar (raspberry, blueberry, cherry, plum, etc)
1 tbs red wine vinegar
1/2 tsp honey, or to taste
a pinch of garlic powder
a very generous amount of black pepper
salt

Combine everything but the oil in a small jar with a lid and stir well to combine, getting the honey really incorporated into the vinegar. Add the oil, put the lid on, shake to combine and adjust seasoning.

Balsamic Roasted Garlic Dressing

3 tbs olive oil
1 tbs balsamic vinegar
1 tbs white wine vinegar
2 or 3 cloves roasted garlic
1/2 tsp dijon mustard
salt and pepper to taste

Mash the roasted garlic with the mustard and the salt and pepper. Stir in the vinegar until it is well combined then shake it up with the oil.
*** *** ***
The variations here are endless. Add herb, fruit or spice infused vinegars or oils, different fresh or dried herbs, different sweetners or spices. Sometimes I like to use the brine from my home pickled vegetables. Pickled beets make a particularly beautiful and tasty salad dressing. You can stir in grated parmesan, crumbled feta or blue cheese, yogurt or sour cream. The sky is the limit here.

What is your favorite salad dressing? What is your favorite salad recipe? Have you suceeded in copy catting a favorite commercial dressing? Who do you buy your olive oil from?

This post is a part of Real Food Wednesday. Check it out for more real food recipes and stories!

Wednesday, January 13, 2010

Soup Weather

Around here it's been cold. And wet. And dark. Did I mention wet? And cold? The perfect weather for soup! Every culture has a multitude of soups and for a very good reason. Soup is a cost effective way to get nourishing, warming food into lots of people. Warm food is so important in this cold time of the year. Many doctors and parents are coming to realize the health implications of not keeping our bodies, especially our children's bodies, warm. Being chronically cold can affect growth, attention, and even the course of diseases and infection. And we all know how important keeping those bodies well nourished is.

"But isn't making homemade soup difficult?" people ask. Not if you do a little prep work, keep certain ingredients on hand, and use a little creativity in your soup making. The key to good homemade soup is good homemade stock or broth. Canned stock or broth is just salty water with artificial flavors. It is not healthful or nourishing. Real stock made from bones and meat trimmings is healthful, nourishing, has fantastic flavor and mouthfeel. It does take prep work, but it's all prep work you can do in advance. For information on how to make bone broth check my blog here, my other blog here, Cheeseslave's blog here, or Kelly the Kitchen Kop's blog here. A tasty and relatively healthful vegetarian broth can be created with dried mushrooms or a well chosen assortment of vegetable peelings gently cooked, but check out Cheeseslave and Kelly's blogs for a hundred and one reasons to make bone broth.

Once you've got your bone broth a soup is as simple as sauteeing onions, adding meat and vegetables and adjusting the seasonings. Here is a basic stovetop "chicken" soup recipe with variations.

*** ***
Chicken Soup with Variations

*1 yellow onion, chopped into 1/4 inch pieces
*3 ribs of celery, sliced fine
*2 medium carrots, chopped fine
*Coconut oil or other healthy cooking fat
*1-4 cloves of garlic, pressed or sliced
*1/4 tsp ground sage
*1 tsp oregano
*1 tsp ground, dried rosemary
*salt and pepper to taste (really depends on how salty your broth is)
*2 quarts chicken broth or diluted chicken broth
*1-2 cups assorted chopped or frozen vegetables - green beans, zucchini, peas, corn, potatoes, sweet potatoes, etc.
*1-2 cups raw or cooked chicken meat
*1-2 tbs apple cider vinegar

Heat the cooking fat in a 4 quart soup pot and add the onion, celery and carrot. Salt and pepper lightly and stir over medium heat until the vegetables start to soften. Add the dried herbs and continue to cook, stirring occasionally until the onions are translucent. Add the garlic and cook, stirring constantly until fragrant, about 30 seconds.

Add the broth to the pan, scraping up any browned bits and turn the heat to high or medium high. Add the vegetables and meat and let soup come to a boil. Turn heat to low and let simmer until the vegetables are cooked and everything is hot. Taste soup after it comes to a boil (carefully! burned tongues ruin dinners!) and add salt if necessary.

When the vegetables and meat are cooked through taste the soup again for salt, pepper and acidity. Add a tablespoon of vinegar and see if you like the flavor. Add more if you would like, along with more salt and pepper if necessary.

Allow soup to cool slightly and serve with sauerkraut or other pickled vegetables, buttered or cheesy bread, a salad and a homebrew. Er.. or whatever you would like to serve it with. Hehe.

*** *** ***

Variations on this soup are endless. You can adjust the vegetables, the meat, the broth, the cooking fat, the acid and the seasonings. You can add tomatoes or cream. You can strip the soup down to its most basic. Here are a few of my very favorite variations.

Garlic Soup:
Omit everything except onion (reduce to half an onion, chopped very fine), garlic (increase to 6, 8 or 12 cloves, minced or sliced), cooking fat, broth and vinegar. Serve over a toasted slice of hearty bread, with or without cheese, or with a poached egg in a shallow bowl.

Cajun Soup:
Use cajun seasoning instead of the dried herbs (perhaps with some thyme and extra cayenne), omit carrot but increase the celery, and use green beans, peas and sweet potatoes along with chicken or spicy sausage. Serve with sauerkraut and hot pepper sauce.

Taco Soup:
Fry up some ground beef (with organ meat?) with taco seasoning, garlic and onion. Add some tomato, corn and black beans with the chicken broth. Finish with lime juice and serve with sour cream and tortilla chips.

Curry Soup:
Use curry powder instead of the dried herbs, use cauliflower, potatoes and green peas as the vegetables and use lemon or lime juice instead of vinegar. Use virgin coconut oil if you have it.

Bacon and Bean Soup:
Fry bacon first and use bacon grease as your cooking fat. Omit carrots and use drained, cooked pinto or kidney beans instead of the other vegetables. Use the fried, chopped bacon, hot dogs, sausages or no meat and season with a little rapadura, molasses or maple syrup if you'd like. Beef broth is great instead of chicken. Still finish with some vinegar.

Creamy mushroom soup:
Use bacon fat as your cooking fat and add a cup or three of sliced mushrooms in with the onions and celery and cook until the mushrooms have released their water and then gotten dry and browned. Increase garlic if you'd like and use thyme as a main herbal seasoning. Use beef broth if you have it and maybe a splash or wine or brandy. Use red wine vinegar to finish and add sour cream or heavy cream at serving time.

I like to make soup in batches that will provide at least two or three meals at a time because re-heating soup is an easy way to get healthful food on the table fast. You can always freshen up or change the flavor of the soup by sauteeing more onions with seasonings before adding the cold soup and heating it up.

What kind of soup do you like best? How do you work to keep warm, nourishing food on the table during these cold months? Whats your favorite soup garnish or topping?

This post is a part of Real Food Wednesdays. Check out more real food blogs here!

Huge thanks to These Days in French Life, Oz4Caster, Stubborndev and Greygoosie for their beautiful photos! Click on the photos and surf their flickr streams!

Wednesday, November 25, 2009

What to Do with Green Tomatoes?

A month or so ago I pulled the last of the straggling tomato plants out of my garden. The weather had turned and nothing else was going to ripen so it was better to bring them inside and see what could be salvaged. What to do with a table full of green tomatoes? Luckily, I found a few things!

The first thing I tried was fried green tomatoes. It's a simple, classic preparation that turned out great. I used kefir instead of buttermilk or sweet milk to moisten the tomato slices, a mixture of flour and cornmeal to bread them and fried them in a mix of refined coconut oil and bacon grease. They were fantastic hot, topped with some Secret Aardvark Sauce, and also cold on top of a lettuce salad.

The best thing I've done with them, however, is this fantastic green curry with shrimp recipe I came across. The original recipe calls for making a shrimp stock and augmenting the curry with lemongrass but my simpler version was still amazingly good. I've been a fan of yellow curry for a long time but this was my first time working with green curry paste. It is fiery hot but with really interesting sour flavors as well. I found more lime juice and sugar, as well as mixing in some yellow curry paste, really helped mediate the heat. Give it a try!

Simple Green Curry with Green Tomatoes and Shrimp

coconut oil or other cooking fat
1/2 yellow onion, sliced thin
3 cloves garlic, minced
1 tbs ginger, minced
2-4 tbs green curry paste (I like Mae Ploy brand)
1 can coconut milk
2-3 cups shrimp, chicken, or vegetable stock, or water
1 cup green tomatoes, halved or quartered into 1 or 2 inch chunks
shrimp*
brown or raw sugar
soy sauce or fish sauce (optional)
1 or 2 limes

*I used pre cooked frozen small shrimp from Trader Joes. Because it was a splurge item I used a fair amount of shrimp. Use as many of whatever kind of shrimp you want. Adjust how long they are in the curry based on how much cooking or heating your shrimp need.

Sautee onion and ginger in coconut oil in a medium sized sauce pan. When the onion is soft but not brown add the garlic and cook for another minute then add the green curry paste. Continue to cook for another minute or two until fragrant. Stir in the coconut milk and broth until it is the consistency you like - I like mine like a thin stew or thick soup.

Bring the curry to a boil and add in the green tomatoes, a spoonful of sugar, a dash of fish or soy sauce and a squeeze of lime juice. Taste the curry and see if you think it needs more or any of those seasonings. Allow to simmer for 15 minutes or until the tomatoes are tender. Stir in the shrimp and allow them to get cooked or heated through. Adjust final flavor with more sugar, lime or fish or soy sauce.

Serve over jasmine or basmati rice with more lime juice squeezed over top.

This recipe posted as part of Real Food Wednesdays. Check out the other posts for more ways to incorporate healthful, real food, into your diet.


Wednesday, September 2, 2009

Egg Tacos, Ole!

Sometimes you find a recipe that is more than a sum of it's parts. A way to prepare simple foods in an interesting way with lots of easy variations. Sometimes this recipe suprises you and you find yourself eating it every meal for three days straight. This recipe is all of that and more. Smitten Kitchen calls it Huevos Rancheros, I call it Egg Tacos.

I've seen two kinds of huevos rancheros recipes in this world: the traditional fried egg with tortillas and chile sauce, and eggs poached in a chile sauce served with cheese and tortillas. I was actually served the latter while on a cross country trip on the Green Tortoise bus. 30 international travelers, two hippy drivers and me for 3 weeks driving across the U.S. We had huevos rancheros for breakfast one morning at a hot spring resort in New Mexico. It's one of those food memories I will never forget.

This recipe is unlike either or those and is much simpler. Basically, it's an egg fried ON a tortilla with cheese and whatever toppings you like. Couldn't be simpler, couldn't be tastier! It's hard to translate this food concotion into to "recipe" because you can make it different each time. I've made it with one egg on the tortilla and two, I've made it with different cheeses and I've topped it with everything from refried beans and salsa to grilled zucchini and chutney. Give it a try!

Egg Tacos

1 or 2 corn tortillas
A small pinch of grated cheddar or jack, or crumbled cotija cheese
1 or 2 farm fresh eggs
Salt and pepper, fat for the pan

Toppings of your choice including seasoned whole or refried beans, cooked rice, more cheese, avocado, tomato, red or green salsa, sour cream, hot sauce, pickled chiles, lime wedges, grilled veggies, ketchup, chutney, chocolate sauce (OK, just kidding about that last one.. kind of).


Heat a well seasoned cast iron skillet and warm up the corn tortillas over medium heat. Allow one side to start getting browned and a little crispy. Use only as many tortillas as will fit in your pan with minimal overlap. For my Ikea skillet it's one. With a 10 inch skillet I could fit two.

Flip the tortilla once it is starting to brown and add a pinch of cheese to the top of the tortilla. Crack the egg directly onto the tortilla, trying to keep it mostly on the tortilla, and cook until the white is starting to set. Carefully flip the tortilla over and cook the egg to your liking. Serve with toppings!


As I made these tortillas I came across one major problem - keeping the eggs from sticking to the cast iron skillet. Non-stick pans would fix this problem but we don't use those kinds of pans here at Real Food, My Way. (For an explanation of why and healthy alternatives check out this article this article from Mercola, this one from Tuberose.com, this one from Marks Daily Apples, or even this article that was front page of the Oregonian newspaper FoodDay section recently.) A very well seasoned cast iron skillet is clearly the answer, but you don't always have that as well. I tried using tons of butter, like I do when I scramble or fry eggs normally, but the tortilla kind of sucked all the butter up. Once I did successfully lift up the tortilla, melt some butter under it and flip the egg into the melted butter without spilling egg white all over the pan. Just note, this is a recipe to make one a day your cast iron seems to be cooperating.

This recipe is so easy, so tasty and so variable. I am not joking when I say I made it for five meals in a row and never got bored. Thanks, blog-o-sphere!

For more great recipes and tips from the blog-o-sphere, check out Real Food Wednesday!

Tuesday, June 23, 2009

Of Probiotics and Pickles

If you are in anyway connected to the world you've probably heard more and more about probiotics and beneficial bacteria. People are selling probiotics as pills, liquids, juices, yogurts and other fanciful items. Most of you have probably seen the yogurt commercial with the slightly disturbing animation of an arrow on a woman's stomach and you might even be able to hum the jingle for that product. What's all the big deal about probiotics anyway? And do we really need to spend top dollar to have them added to our foods?

The term probiotics refers to bacteria and yeast found in food that are good for your body. Our skin and intestinal tract are completely covered in bacteria and the idea is that inviting the right kind of bacteria into that system has health benefits. The human gut can contain over 2 lbs of intestinal microflora (beneficial bacteria) and they do some pretty important work there. They help digest food and create vitamins, they make it hard for bad bacteria to live there and stimulate the part of our immune system that is in our digestive system. In fact, there is more and more evidence that everything from acute intestinal upset to allergies to autism can be helped by normalizing gut bacteria and using probiotics. There are lots of good commercial probiotic foods and supplements available (as well as some not so good ones) but being the DIY kinda girl I am, I like to make my own.

Yogurt, kefir and buttermilk are all very common probiotic foods. These are all fermented dairy products that are eaten while the bacteria are still alive. Vegetables and fruit can also be cultured into probiotic foods through a process called lacto fermentation. A couple months ago I wrote a tutorial for making sauerkraut, one of my favorite kinds of lacto fermented vegetable. Sauerkraut is a great way to start in on fermented vegetables because most Americans at least know what sauerkraut is and many even already like it. I've been surprised at how many of my friends are excited to try my sauerkraut because they grew up eating sauerkraut. Sauerkraut is not the only pickled vegetable out there so don't despair if you don't like the kraut.

Vegetable pickles are possibly even easier than sauerkraut and allow for as many variations as your imagination can come up with. The basic idea is to cover vegetables with a salty brine and allow the bacteria to do their thing. I'll give you a recipe-tutorial for my very favorite pickled vegetable recipe and list some of my favorite variations here and then I'll answer some common questions in a follow up post.

* * * * * * * * * * * * * *

Spicy Carrot Pickles


I like Spicy Carrot Pickles so much because they come out great every time. They are salty, spicy and a bit sour and always have a great texture. You can adjust the amount of spiciness to your liking using different kinds of peppers. These are based on the pickled carrots usually served at autentico taco places so they should be sort of familiar to a number of people.

Step One: Jar and Vegetable Prep

Find a glass jar with a tight fitting lid. A pint sized mason jars with a metal or plastic lid is great but an old pickle jar work just as well. Wash the jar and lid with hot soapy water and rinse well.

For a pint (two cup) jar you will probably use 1 1/2 - 2 medium carrots, 1/2 an onion, 2 cloves of garlic and half of a jalapeno. Have more carrots available in case I am underestimating and adjust the garlic and pepper as your family would like. I find half a jalapeno adds heat but is not blinding, but you may have widely different tastes. You can use a hotter pepper like Serrano or Habanero (if you dare) or a milder pepper like an Anaheim, a Hungarian pepper or a pizza pepper. Be sure to adjust the "half a pepper" accordingly to the size and heat of the pepper you choose. You could also use a pinch of red pepper flakes instead of fresh peppers.

Wash the carrots but don't peel them. Slice them into long ovals by slicing on a steep diagonal to about 1/4 inch thickness. Peel and slice the garlic cloves and slice the onion longitudinally (from pole to pole, not around the equator) into 1/2 inch slices or into chunks. Slice the jalapeno into rings. Layer the vegetables in the jar to within an inch of the threads.

Step Two: The Brine

There are all kinds of recipes out there for brine strength ranging from a specific measurement in the jar to percent salinity. After reading The Ultimate Kimchi recipe and Wild Fermentation by Sandor Katz, I decided to do this the old fashioned way - use my taste buds.

I make a brine by adding salt to water until it is "too salty to be tasty, but not salty enough to make me gag." I understand that this is a very vague description of how much salt to use, but it works. I promise. Start with a teaspoon in a pint (two cups) of water and taste it. You can hardly taste the salt, right? Add another teaspoon and taste again. Then increase by half teaspoons until the water is really gross. Add a splash of water and taste again. Somewhere in between tasty and gross is the right amount of salt. It always seems a little saltier than seawater to me.

Oh - and use the right kind of salt. You should use sea salt because it is pure and has lots of trace minerals that are really good for you. I personally use RealSalt because it lists the trace minerals on the package and sells for a reasonable price. Other sea salts would be fine too. You can also use kosher salt or other salt as long as it has no iodine and no anti-caking ingredients. One caution about Celtic or grey salt - moist salt is sometimes known for carrying bacteria and mold that can ruin your ferments. If you want to use moist Celtic sea salt then you should bake it first until it is dry. Seriously, though, who needs to go through that much work for pickles. Just buy some lower quality sea salt for fermenting and keep the Celtic for sprinkling on your potatoes.

Once you have your brine made with the right kind of salt to the right saltiness then pour it over the jar full of vegetables. The brine should cover the vegetables but still be below the threads of the jar. Screw the lid on tight and set it on the counter to begin fermenting.

Step Three: Fermentation

Just like in the Kraut 101 tutorial I recommend you check your pickles every day and learn to look for signs of fermentation. The day after you make your carrot pickles open the jar and listen for popping, fizzing or hissing as you open the jar. Smell the contents and then taste a sip of the brine (you can take some out with a spoon or just sip it out of the jar like I do... but then again I'm pretty cavalier about things like that). Is it at all sour or fizzy or still just salty? Put the lid back on and let it sit out for another day.

It usually takes 2-5 days for signs of fermentation to really show up. Exactly how long depends on everything from the quality of your vegetables and the ambient temperature to whether you sacrificed to the proper deities. I'll address some of these variables in the next post and in the end it doesn't really matter how long it takes, just that it happens. Be patient, it will.

When your pickles are popping, fizzing or starting to taste sour then move them to the fridge. Carrot pickles usually taste best after another two or three days in the fridge (you should try them every day to see when you like them best) but will last for months without getting mushy or gross. The onion will start to get a little mushy after a month or so but whole garlic cloves are still virtually raw until at least a month in the brine.

I like to eat these pickles in anything even remotely Mexican in flavor. I love them in quesadillas and burritos as well as on salads. The pickle brine can really brighten up a soup and makes a fine salad dressing when substituted for vinegar in any recipe.

* * * * * * * * * * * * * *

Once you've run through this recipe once then you are ready to start thinking about pickling other vegetables. Here are some of my favorites.

Cucumbers: pickled cucumbers are a classic. I have used whole pickling cucumbers as well as sliced eating cucumbers (remove part of the skin, it is tough and bitter). Pack the jar with cucumbers, dill seed, garlic cloves, black peppercorns and maybe some sliced onion and/or mustard seed. Cover with brine and follow the steps above.

I didn't use cucumbers as my master recipe because I've had mixed luck with fermenting them. Cucumbers, being so watery, are at risk of getting mushy and even when they aren't mushy they never taste quite the same as vinegar pickles do. I like the fermented flavor but have not yet perfected the crunchy cucumber pickle. Some people add a grape leaf to the jar and others soak the cucumbers in salty water first. I'm going to experiment this summer and I'll let you know.

Turnips, Radishes, Not Spicy Carrots: Slice them into planks or chunks and cover with brine. Try these will dill seed and garlic or with mustard seed and red pepper flakes. Turnips tend to be a bit spicy when fermented, but are great on salads.

Beets: I recently made up a jar of sliced raw beets and carrots with no extra seasoning at all. The liquid is thick, sweet and deep red and the vegetables are now tender, sour, sweet. Fantastic.

Green Beans or Asparagus: Trim the veggies to fit in the jar and add a garlic clove and maybe one of those small, dried red chiles. Try doing the same with okra. A little juice from one of these jars is the secret to my Bloody Mary. Fantastic!

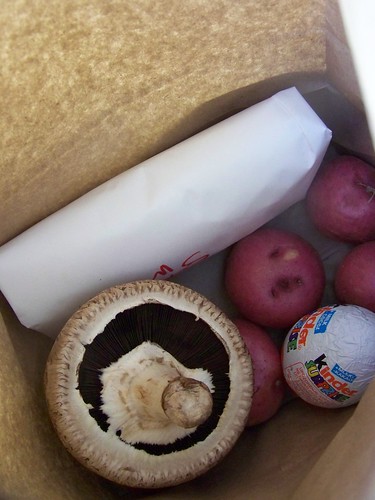
Mushrooms: White or baby 'bella mushrooms can be pickled in brine into a very tasty appetizer. I like to add black peppercorns and mustard seed as well as a small garlic clove. The mushrooms will float like corks but it has never seemed to be a problem.

Summer Relish: Last summer I made a jar of relish using canned corn, chopped green tomato, red bell pepper and onion with mustard seeds. It took a month or so for the flavor to develop but I was sad when it was gone. It was long past green tomato season and I've been daydreaming about it ever since!

Pickled Garlic:
Peel the cloves, fill the jar and cover with brine. It will take months (as in 4 or 5) for the cloves to ferment fully but it will be worth it. They ferment into this mellow, garlicky, almost sweet tangy condiment. Perfect for salad dressings and topping soup. And exceptionally good for you!

Of course you can mix and match. I almost never make a jar of just one vegetable, I use whatever I have around. I will often add turnips or carrots to sauerkraut, or get lazy and throw brine over cabbage as well. Give any vegetable you have a try in the brine and see how it turns out. Experiment with seasonings, garlic, onion and different flavor combinations. You'll be amazed at what you find you like. I serve pickled vegetables with almost every meal and pretty soon you will be too!

This post is part of the Real Food Wednesday Blog Carnival. Be sure to check out the other posts for more great real food ideas!

To see more photos of my lunches, others with home made pickles in them, check out my Flickr page.

Friday, June 12, 2009

I Tempted Her With Pheasant

Last month when I was at Kookoolan Farm I bought a pheasant from Chrissie. I've never cooked a pheasant before but thought it would be fun. Like my goose adventure, only with less grease! I find cooking exotic birds to be a bit less intimidating than cooking exotic beasts. They seem more accessable, and like with the goose I ended up with lots of 'extra food' from the pheasant.

Cooking a pheasant clearly should not be a just me for dinner kind of night so I invited some friends over. One friend hemmed and hawed because, it being a Saturday in June, she had three other parties to go to. I finally convinced her to come under false pretenses of homemade mead, but she was happy with pheasant and wine.

Pheasant is a dark meat bird with considerably less breast meat than a chicken. I looked at lots of recipes for roast pheasant and all of them called for wrapping the breast in bacon before cooking. Everything is better with bacon, isn't it? In the end, fearing a dried out, tough bird I opted to braise the pheasant instead of roast it. The recipe I used was a simple one and everyone loved the flavor. I added a split chicken breast in on top of the pheasant fearing there wouldn't be enough meat for all three of us, and though it wasn't necessary it was nice to have the leftovers. I would certainly use this reciepe again, with modifications found below.

Braised Pheasant
1 pheasant (plus a chicken breast or a few chicken thighs)
3 tbs flour
salt and black pepper
2 tsp dried rosemary
2 bay leaves
5 peppercorns
bacon fat and/or goose grease
1/4 cup red wine
1 1/2 chicken broth
1/2 a medium onion, sliced
4 cloves of garlic, smashed or cut in half
1 tablespoon flour
1/2 tsp ground dried rosemary

1) Cut the pheasant into pieces. I cut the leg/thigh pieces off, cut out the backbone and hacked the breast apart into two pieces. I saved the backbone, wingtips and trimmed neck and tail skin/fat for stock later. Preheat oven to 300 degrees.

2) Combine the flour with salt and pepper making sure the flour tastes seasoned. Rub the flour all over the pieces of pheasant. Heat the bacon fat and/or goose grease (lard or coconut oil if that's all you have) in a cast iron skillet. Brown the meat skin side down first until it is nice and golden brown. Do it in batches, making sure not to crowd the pan.

3) Place the browned pieces in the bottom of an enameled cast iron dutch oven (or other heavy pot with a well fitting lid). Be sure to keep chicken pieces on top of the pheasant as it doesn't need to cook as much. Tie the peppercorns, bay leaves and rosemary in a cheesecloth bundle and tuck in between the pheasant pieces. Add onion and garlic on top of the meat. Deglaze the pan with the red wine and pour that over the meat. Add the chicken broth and place in the hot oven.

4) Allow pheasant to cook for AT LEAST 2 1/2 hours. Probably more. When the pheasant is cooked through and the wing and leg joints move freely remove the meat to a platter and cover with foil to keep warm. Remove the onion and garlic either with a slotted spoon or by pouring all the sauce through a sieve and catching the liquid in a measuring cup, gravy separator or small saucepan.

5) Make the pan liquid into a gravy by cooking flour and ground rosemary in an equal amount of either fat that rises to the top of the pan sauce or more bacon grease. When the flour is cooked and starting to brown add the pan liquid into the roux and stir over medium high heat until flour is incorporated and the gravy is starting to thicken. Stir constantly and reduce heat to low when it is bubbling and thick.

6) Serve pheasant over wild rice, Israeli cous cous, orzo or mashed potatoes making sure to pass the gravy.

The cook is always most critical of their meal and my guests really enjoyed the experience. I found the pheasant to have a really pleasant flavor but it was tough. I braised mine for just over two hours and think another hour in the pot would have done wonders. A dry roasted hunk or meat or bird needs to reach the proper temperature but not go much above. A braised hunk of bird or meat needs to stay at the proper temperature long enough to melt connective tissue. I didn't give my pheasant enough time and it was pretty tough. I'll also add more rosemary next time. It was a lovely flavor and the original recipe called for branches of rosemary to be placed over the meat and liquid in the pot. I think that is a fantastic idea.

In the end, my guests enjoyed themselves. The gravy helped a lot (my trick to good gravy is to season the flour for the roux well with rosemary, basil, oregano or whatever other herb might fit the situation) and a couple bottles of wine with dinner helped even more. I didn't get any photos of the cooked meal, we were too busy eating it. Here is the lovely flower bouquet that was on the table.

I wonder what's next on my exotic bird cooking tour? Duck? Pigeon? Pastured turkey? Bring it on!

For more great blogs about cooking real food and why it's important check out this week's Real Food Wednesday!

Wednesday, May 27, 2009

You can please some of the people all of the time...

and all of the people some of the time, but you can't please all of the people all of the time.

So the saying goes, and so it goes in the kitchen. As a relatively skilled and confident cook who primarily cooks only for myself I usually do pretty good with liking what I cook. I rarely have outright failures and I can usually find some silver lining even in my flops. The exception makes the rule, however.

Two months ago I bought a tub of chicken livers from Kookoolan Farms at our year round farmers market here in SW Portland. I had never cooked with chicken livers before and honestly never really eaten them either. I was a little intimidated but knew I would get around to them eventually.

Liver is quite possibly the most nutrient dense animal food on earth. Oysters may be a close second but liver is an amazing super food. Liver is chock full of vitamins A, B12, and folic acid. It is amazingly high in bioavaliable iron, copper, zinc and chromium. It contains nitrogen compounds that the body uses to produce DNA and RNA. It's also an amazing source of CoQ10. Seriously, this is some healthy health food.

Unfortunately, most Americans aren't very fond of organ meat. We didn't grow up eating it (possibly because our grandparents had to eat it during hard economic times and forced their kids to eat it who swore to never force their kids to eat it) and many folks think it is gross or dirty. There is also advice out there to avoid liver when pregnant because of it's high levels of retinol, a form of Vitamin A that seems to have been linked with birth defects.

Actually, even main stream nutritionists agree that an animal's liver doesn't store toxins, it just repackages them for storage elsewhere in the body. The vitamin A debate seems ridiculous to me. Native people ate liver as regularly as possible and no one died of vitamin A poisoning and if birth defects were common people would have stopped eating liver. The Wise Traditions article by Lynn Razaitis disucsses this issue in depth. She says that studies in Italy and Switzerland in the late 1990s, as well as almost all medical text books written before WWII indicate that liver is fine for pregnant women with doses of 30,000-50,000 IUs of Vitamin A. That's 4-5 oz of beef liver or 7-8 oz of chicken liver. She also quotes the Merck manual in noting that the few cases of Vitamin A poisioning are either due to synthetic vitamin A in multivitamins, or due to eating large portions of polar bear or seal liver. The synthetic vitamin toxicity was at doses 100,000 IU of vitamin A over many months. It takes about 10 oz of beef liver or 16 oz of chicken liver to give you that much vitamin A. Every day. For months.

I don't know about you, but I couldn't get 16 oz of chicken liver in me every day for a month. I couldn't get it in me over the course of a month if my recent liver experience is any indication. Remember how I said I don't usually have flops in the kitchen? Yeah, my chicken liver pate was a flop. I think it tasted exactly like it was supposed to, I just didn't like it. Here's the recipe I used. It's a variation on the recipe from Nourishing Traditions and I think it's a good one. It's just so, well, livery.

Chicken Liver Pate

3 tbs butter
1 lb chicken liver
1/2 lb mushrooms
1 medium yellow onion
2/3 c white wine
2 clove garlic
3/4 tsp ground dried rosemary
1/4 tsp ground dried sage
1/4 tsp crumbled dried organo
1/4 tsp dried dill
1 tbs lemon juice
4 tbs butter
salt and pepper

*Sautee the onion and mushroom, seasoned with pepper and a little salt, in 3 tbs of butter until soft. Add the liver, trimmed of the tendons and cook until firm but still barely pink on the inside. Add garlic and herbs to the pan then the wine. Cook over medium heat until the pan is almost dry. Let mixture sit until cool.

*Pour the liver and onion mixture into a food processor. Grind until a coarse paste and then add soft, but not melted, butter a spoonful at a time. Grind until smooth. Add the lemon juice and taste for salt and pepper.

This recipe actually had a lot of interesting flavor. I think in the future I would increase the herbs a bit but the mushrooms and liver really stood out. The problem is, well, that liver flavor. It's kind of metallic, and kind of earthy. But not in a good way. Luckily my roommate loved it and I found that I could get down a couple tablespoons at a time in a sandwich with radishes, cheese and mustard. I still have about 4 oz in the freezer. Maybe in a month or two I'll be ready to go back for round two.

Photo by These Days in French Life

Do you have a liver recipe you like? Have you ever eaten a liver pate that you really enjoyed? What do your friends, kids, spouse, housemates say about liver? Like runny egg yolks, I'll choke it down until I like it... it's just that nutritious.

For more real food recipes and tips check out the Real Food Wednesdays blog carnival!!

Saturday, April 25, 2009

Waiter, there is too much pepper in my paprikash...

I love When Harry Met Sally. I've seen it approximately a million times and had fun imitating Billy Crystal imitating some eastern European fellow talking about paprikash and pecan pies many more times than that. One thing I have never done, however, was actually eat paprikash. Until this week.

Turns out this stuff is good. Really, really good. It's also easy and very nutrient dense. What more could you want in a dinner? And you get to talk like Billy Crystal all night... "have fun storming the castle!"

Chicken Paprikash

  • 3 boneless skinless chicken breasts, sliced (or equivalent dark meat, or chicken pieces)
  • 3 tablespoons of butter, plus some olive oil plus some bacon grease
  • 1 medium onion, sliced
  • 3 cloves of garlic, minced
  • 6 oz of mushrooms, sliced (could be replaced with green bell pepper or omitted)
  • 1/2 cup chicken broth
  • 3/4 to 1 cup sour cream
  • 3-4 tablespoons of paprika*
  • salt and pepper

Sautee the onions and mushrooms in butter, seaonsed lightly with salt and pepper, until well cooked but not too browned. Remove from pan and cook the chicken in more butter along with the garlic. (If I had had skin-on pieces of chicken I would have reversed the order of cooking here) Sprinkle the chicken with salt, pepper and paprika. Cook until the paprika is well blended into the fat and getting fragrant.

Add the vegetables back into the pan of chicken and add the chicken broth. Bring to boil and then drop to a simmer and cook until the chicken is cooked through (this took just a minute or two with sliced boneless breast, it would take considerably longer with bone in pieces. Add more broth or water if you will be simmering for a longer time).
Lower the heat and stir in the sour cream. Let the mixture heat until it is warm, but do not boil or the cream sauce may break. Taste for seasoning, adjust salt and pepper and serve over butter noodles, spaetzle or rice.

* I only had cheap paprika in the house so I upped the flavor with the addition of some hotter ground pepper. I used approximately 2 teaspoons out of the 3 tablespoons of Ancho, New Mexico and Chipotle chile powders. So that's about 1 tsp New Mexico chile, 1/2 tsp Ancho, 1/2 tsp Chipotle and 2 tbs plus 1 tsp paprika. If you use good quality paprika you will get more flavor out of it so can reduce or eliminate the hotter chiles. I liked the little bit of a kick.

Tuesday, March 31, 2009

Something to Stew Over

I've never really been terribly fond of traditional stew. Part of it is that I'm not a big gravy fan. Maybe that's the jarred gravy my dad always used, but I am not even that excited about homemade gravy. Another part of it is that I've never really liked long cooked meat. I would rather have a dry roasted piece of beef any day! I would even rather have ground meat chili than chili with stew meat. Call me weird, there's just something about the flavor.

This winter, however, I came across two Cook's Illustrated cookbooks that got me thinking about stew in a whole new way. The cookbooks are the Make Ahead recipe collection and Cover and Bake recipe collection. Like all Cook's Illustrated recipes the stew recipes in these books had extensive introductions that covered all the ins and outs of making that recipe. The authors test dozens of different variations to find the perfect recipe. Whenever I have followed a Cook's Illustrated recipe exactly I have ended up with something out of this world spectacular. If you don't know them, check them out!

A couple months ago I made a beef stew from the Cover and Bake book that was fantastic. The meat wasn't overcooked, the gravy was flavorful and just the right texture. It wasn't gummy or oversalted or watery. I knew I needed to give this stew thing another try. And some things just beg to be stewed... like wild boar

The other day, perhaps a payday, I stopped by City Market NW in the rather trendy Alphabet Neighborhood of northwest Portland. City Market NW is the kind of place you should ONLY stop by on pay day, and only then if the credit card bill is not due that same week. It includes outlets for Pastaworks (gourmet fresh pasta, cheeses and antipasti dishes plus wine and import grocery), Viande Meat and Sausage Co (nationally renknown butcher and chartcuterie), Newman's Seafood (can we just say that it doesn't smell like fish) and produce from a local organic farm (who's name I have forgotten.. sorry!). All in a cute little shop with a crazy flower stand out front. When I am independently wealthy I will shop here every day. Until then, only on pay day and with severe reserve and self control :)

Back to our story. I wandered around, drooled over everything and decided that if I was going to spend a week's worth of gas money on dinner it might as well be good quality meat. I thought about pate, but ended up settling on the wild boar stew meat. A beautiful portabello mushroom, some little red potatoes and a Kinder Surprise Egg rounded out my purchase. What? You've never had a Kinder Surprise Egg? You should... a chocolate shell with a little toy inside. Mine was a whirlygig paper and plastic hippopotamus thing. And it's imported :)


Wild Boar Stew for One (That "One" being Me)

1/2 pound wild boar stew meat (beef would work, or pork, I guess)
1/2 of a medium onion, chopped
2 cloves garlic, pressed
1 4 inch diameter portabello mushroom chopped into 1/2 inch pieces (or maybe 6 white or brown mushrooms, sliced)
1/4 cup chopped carrots
Couple tablespoons red wine
Cooking fat (I bet I used goose fat, you could use lard, coconut oil or olive oil)

Couple tablespoons flour
1/2 tsp or so ground sage
salt and black pepper

Half a dozen small red potatoes
Ground rosemary and sage and black peppercorns plus sea salt
Cooking fat (again, goose, pig or olive as you see fit)

* Combine the flour, sage, salt and pepper on a small plate. Taste to make sure it is seasoned well enough - you want it to taste like more than just flour. Toss the cubes of meat in the flour while you melt a couple tablespoons of cooking fat in a heavy bottomed sauce pan or small dutch oven (I used a 2 quart enameled cast iron and it was the right size). When the fat is hot shake off the excess flour and place chunks of meat in the pot. You want it to be hot enough to hear a sizzle and only enough meat to cover the bottom of the pan without too much touching. When the meat is browned on one side stir or flip the pieces and brown on the other sides. Pull the browned meat out onto a plate and repeat with the rest of the meat.
* When all the meat is browned adjust the fat in the pan - I had to add some but depending on how fatty your meat is you might want to remove some. Add the onions and mushrooms and cook until they are soft and starting to color and get dry again, stirring regularly to keep the onions or "fond" from sticking too much and burning. Add the carrots and cook another minute or two then add the garlic and cook until fragrant. Add another spoonful of the seasoned flour and stir and cook for another minute or two.
* Deglaze the pan with a couple tablespoons of red wine and then add the meat back into the pan. Add stock until it just covers the meat and bring everything to a boil. Turn heat down and simmer for an hour or so, or until the meat is cooked through and the flavors have melded.
* Meanwhile, clean and chop the potatoes into serving sized pieces (I think I quartered mine, but they were quite small) while bringing a pot of water to a boil. Salt the water and cook the potatoes until they are done, but not falling apart soft. Drain in a colander and allow to dry while you heat cooking fat in a cast iron skillet in a 400 degree oven.
* Add the dried off potatoes to the hot fat (use an oven mitt to handle the pan and watch for splatters!). Toss once or twice and put the pan back in the oven. After 10 minutes or so check to see if the potatoes are browned. If they are stir them and season with salt, pepper and ground herbs. Allow to brown on the other side and then pull out of the oven.
* Serve stew in a shallow bowl ladled over the roasted potatoes. Perhaps with a generously buttered slice of wheat bread. Maybe a salad, if you don't want to be a purist. Certainly with more of that red wine.

Yup, with stew like this I might just be a convert. Gravy out of a jar? Blech. Wild boar in homemade beef stock... yes please!


Thursday, March 19, 2009

Blender Batter: Pancakes

I'm very active on a yahoogroup that discusses the book Nourishing Traditions and all things traditional foody and health realted (shout out to DiscussingNT - woot woot!). When people first join the list they invariably ask one of three questions - "How do you do ALL of this??" "How do you make Sauerkraut??" and "Does anyone have a GOOD sprouted or soaked bread recipe??". I've only been blogging for a couple months and feel like I've addressed the first two. Now I'll address the last one.

Most of us in America grew up on some variation of fluffy, sweet, soft bread and pastries. My mom made sure we ate wheat bread, but it was as fluffy as the Wonder Bread my friends ate. And we certainly got bisquick pancakes, doughnuts, and white rice. As I learned more about nutrition I learned of the benefits of whole grains - increased fiber and increased nutrients. Then came Nourishing Traditions and their instructions for soaking or sprouting grains. Whoa - this is getting a bit heavy.

I'll be the first to admit that soaking or sprouting grains before consuming them is low on my priority list. I understand the benefits of reducing anti nutrients, increasing digestability and all of that. It makes perfect sense. Heck, I even believe that grains don't need to be the base of our diet. Humans have only been eating grains for a couple thousand years, compared with meat and vegetables which we have been eating since before we were even humans. That doesn't mean it's easy to implement.

But then I found a recipe that makes it easy. Last year I was introduced to Sue Gregg's blender batter method of making pancakes and waffles. She uses a blender to grind a mix of whole grains and fermented milk into a slurry that becomes the batter to make your pancakes or quick bread. The more I experiment with this technique, the more I love it. I'm going to write out how I make pancakes here, but I highly recommend that you go visit Sue Gregg's site. She has lots of information, her original recipes and links to buy her books (anyone looking to buy me a birthday present? Yeah, email me, I'll send you my address :)

Her site is here: http://www.suegregg.com/

Blender Batter Pancakes

1 cup whole grain*
1 cup kefir, buttermilk or yogurt thinned to the consistency of buttermilk

1 tbs (or more) liquid fat - melted butter or coconut oil, olive oil, etc.
1 egg
1/4 tsp baking soda
1/2 tsp salt
1 tsp baking powder
up to 1 tsp vanilla extract and/or sweetner of your choice (optional)

The night before you want to make pancakes combine the grain and the milk in your blender. Using the pulse button start to grind the mixture. When the mixture starts to make a nice vortex in the middle let it run and grind the grains. Sue has you grind it for a full 3 minutes. I usually don't let my cheap blender run that long continuously and even if it doesn't grind the whole 3 minutes it seems to work just fine. Grind it for as long as you can stand it. If it doesn't make a vortex you can add a little more liquid, but do so sparingly. Chances are you have enough liquid and if you add more your pancake batter will be too loose.

Let the mixture of grain and milk sit on the counter for a couple hours or overnight. If your blender is nicer than mine you can just leave it in the blender jar. Mine leaks at the bottom so I scrape everything into a bowl and let it sit on the counter.

In the morning grind the grain/milk mixture again to loosen everything up. Since I probably didn't grind it a full 3 minutes the night before I give it a good grind first thing in the morning. Add the egg and grind it some more. With the blender running add the melted fat. This keeps the fat from clumping when it hits the colder batter. Add the optional sweetner or vanilla.

When you are ready to cook the pancakes (heat up you cast iron skillet, melt a bunch of coconut oil or butter in it, get everything hot, cook your bacon, etc) add the salt and leaveners. Again, do this while the blender is running to avoid clumping.

Cook your pancakes as usual, being sure to give the first one to the dog. That's traditional, remember? :)

*The cool thing about this recipe is that you can use ANY grain you want. The gluten in wheat is not very important when making pancakes so even if you aren't "gluten free" you can make these that much more healthy by using gluten free grains. I usually use a mix of oats (steel cut or rolled), brown rice (or white), wheat berries, cornmeal, and whatever else I have around. I like adding a tablespoon or more of sesame seeds to the mix and have been known to use my Arrowhead Mills 7 Grain Gluten Free Hot Cereal. Toasted buckwheat, or kasha, makes an amazing pancake! Quinoa, barley, amaranth, kamut, millet - whatever you have or like, use it! Just use one cup total of whatever grains you like.

These pancakes rock. No one would ever guess that they were whole seeds and fermented milk a mere 6 hours before. They generally don't have a "whole grain" texture, are light and fluffy, and incredibly flavorful. You can vary them any number of ways by adding berries or nuts, changing the grains, changing the sweetner and of course changing the toppings. I personally love jam and yogurt, but won't turn down a pancake with butter and maple syrup either.

I recently used this method to make a cornbread and am excited about branching out into other quick breads and muffins. The batter could also make crepes/tortilla-like-wraps if made thinner. I generally make a double batch and freeze the extras for quick breakfasts later on.

I just can't say enough good about this recipe and method. Give it a try, seriously. It's so versatile, and you feel so accomplished. "I used whole grains, soaked them and I can have a real breakfast all week!"