Friday, February 25, 2011

Instead Foods

A couple of years ago my sister was going through a phase where she only wanted to eat hot wings. OK, so that phase has lasted up until the present (we've gone to Fire On the Mountain, THE place to get wings in Portland, OR twice in the last five weeks), but it kind of used to be worse. When she was trying to loose weight her friend suggested she make "hot wing salads" of baked chicken breasts over lettuce with hot sauce and blue cheese dressing.

This is an example of what I call an instead food - instead of eating the thing that is really not good for you, you eat something that kind of fills that craving you are having. Unfortunately, like the hot wing salads, most instead foods just aren't quite the real thing.

I have recently been in need of an instead food for my ice cream addiction. Firstly, no one needs to be eating ice cream at the rate I can put the stuff away. Sweet, creamy and chocolate are my three favorite things and there's a grocery store in my neighborhood that sells Hagen Dazs at less than 3 dollars a pint. Secondly, I am coming to the realization that with my third decade of life is coming less and less tolerance for conventional dairy products. Especially fatty and sweet dairy products. Sadness.

So I began the hunt for my chocolate ice cream instead food. Coconut milk is a wonderful substitute for creamy and sweet so I looked into coconut milk ice creams. There is one good quality, all natural brand here in Oregon called Luna and Larry's Coconut Bliss that really is blissful but at 7 dollars a pint or more that is just not gonna cut it. So Delicious makes a coconut milk ice cream that is more reasonably priced, but is full of guar gums and "natural flavors". I was lamenting this situation on Facebook when a friend of a friend said that she makes ice cream in her freezer without an ice cream maker. I immediately turned to google to see if this miracle could be true. Sure enough, David Lebowitz has a recipe for ice cream made in a shallow pan that you stir up every 45 minutes or so. I combined his method with The Nourishing Gourmet's recipe and ended up with an amazing product. Who knew it could be so easy?!?


I wondered what else I could accomplish with this amazing coconut milk and chocolate combination and my mind immediately turned to pudding. I didn't grow up eating pudding but have come to appreciate it's creamy texture and the fact that it comes in truly single serving size containers. I this recipe from vanilla & lace and was very pleased with the flavor and set of the pudding. For the ice cream I had used a canned coconut cream but for the pudding I used So Delicious brand coconut milk. It comes in a tetrapack, is much lower in fat and more like cows milk in consistency. It doesn't give the same really creamy texture as the coconut cream, but the cornstarch does a fine job of creating the pudding texture that fools you into thinking its really fatty and creamy. I poured the hot pudding into 1/2 cup sized tupperware containers and had my own pudding packs in the fridge.

The main problem with my first batch of pudding was the lumps of cornstarch that come from adding the cornstarch to the hot chocolate milk. For my second batch of pudding I used Martha Stewart's recipe that has you whisk small amounts of milk into the cornstarch at the very beginning of the process to form a paste, then add the rest of the milk. I also added a little cinnamon to the pudding for a refined, adult flavor and again poured it into small plastic containers for individual servings. The recipe was 100% successful and definitely a dessert worthy of eating alone in front of a rerun of Sex in the City or serving at the end of a dinner party.

Photos by stu_spivak and llsimon53. Please click on their names or photos and see what else they've been cooking up!

Monday, November 8, 2010

Saturday Baking

Doesn't it seem like as soon as the weather turns cooler you just want to turn the oven on? Well, the weather started changing around here around the middle of October and sure enough I spent two Saturdays in a row baking lovely things for breakfast and sharing. The warm sweet aromas coming out of the oven and the occasional burst of bright sunshine through the orange and red leaves makes fall a not so bad time of year after all.

Making sweets or baked goods while following a traditional foods lifestyle can be challenging for a couple of reasons. Evidence is stacking up from all sides that sugar and simple carbohydrates in refined flour are just not good for you. Sally Fallon recommends the use of rapadura, an unrefined cane sugar, instead of refined white sugar or adapting a recipe to use honey or maple syrup. These sweetners, while still very high in sucrose and fructose that can wreck havoc on all but the very most stable blood sugar levels, do contain some of the trace nutrients of the original plant material. Traditional wisdom reminds us that tempering our sweets with adequate fats can help regulate our blood sugar so I always try to include nutritious ingredients and a full compliment of butter, eggs or coconut oil.

The other problem with baking is the problem of grains. Sally Fallon teaches us that though whole grains are more nutritious than refined grains, they need to be processed properly in order to neutralize anti-nutrients and release their full potential. The usual methods for neutralizing phytates are soaking in an acidic medium, sprouting or fermenting using sourdough methods. I won't even get into gluten free baking, oy! Sprouted flour can be used in any recipe that calls for wheat flour with minimal or no changes to the process. Soaking and fermenting require completely different processes and honestly, are a bit outside my range of motion on a typical Saturday morning. I take comfort in the knowledge that white flour, though not adding much nutrition, is not removing vital minerals through the action of phytic acid. My baked goods are treats, not staples in my diet, and so I don't worry too much.

This recipe, though, circumvents most of these problems by being grain free and refined sugar free. It is based on a recipe in the great cookbook White Trash Cooking by Ernest Matt Mickler, a lovely collection of authentic recipes reminiscent of the author's childhood in rural Mississippi. The original is called Sweet Potato Pone and is a mix of baked sweet potatoes, heavy cream, molasses and eggs baked into a sweet treat. I subsituted the sweet potato for canned pumpkin and the heavy cream for coconut milk to make a healthful, easy baked treat for any Saturday morning.

Pumpkin Molasses Custard (or Pone, if you prefer)

1 can canned pumpkin (or 2 cups mashed cooked pumpkin, winter sqash or sweet potato)
1/2 can coconut milk (or 1 cup heavy cream or evaporated milk)
3 eggs (or 2, if that's all you got)
1/2 cup molasses (give or take - a big hearty glugg out of the jar will do)
spices to taste - I used 2 tsp cinnamon. Nutmeg, ginger or cloves are not out of place here.
1/2 tsp salt

Combine everything in a mixing bowl and then pour into a greased 8x8 baking dish. Bake at 350 degrees for 40 to 50 minutes or until set and browned to your liking. It really can be eaten anywhere from still a little jiggly to brown and firm so take it out whenever you just can't stand it anymore.

Serve with whipped cream, cold heavy cream, chopped nuts or just a spoon. It's very rich but very tasty.

What do you like to bake up on these cool, rainy, autumn mornings?

Tuesday, June 15, 2010

Care and Feeding of Your Kefir Grains

This is a letter I wrote to a friend when I gave her kefir grains last week. I hope it is useful to you, as well!

*** **** *** **** ***
Congratulations! You are now the steward of an amazing life form, kefir, that will provide you with cultured milk very little work on your part. You are the next a long and unbroken line of stewards that stretches back into the mists of time. Interestingly, no one really knows where kefir comes from or how it first came about. It is believed that the first kefir drinkers came from the mountains of the Caucasus where it is considered a gift from the gods. They may be right because no one has been able to grow kefir in a lab without a starter. Every kefir grain in the world is descended from those original grains.

Kefir grains, as they are called, are not really grains or seeds at all. The spongy “grains” are a colony of yeast and bacteria that convert the sugar in dairy milk into their own spongy outer covering, energy to live and reproduce and a whole host of acids, vitamins and alcoholic byproducts of their metabolism. The grains will grow and reproduce in any dairy milk and like to stay at room temperature so no heating is required. You can also use the grains to ferment other sweet liquids but the grains won’t reproduce. For more information on the microbiological make up of kefir grains, or for any other kind of information you could want about kefir, be sure to check out Dom’s Kefir In-Site.


Care and Feeding of Your Kefir Grains

The Very Basics

2 tbs of kefir grains
2 cups of milk

Place the kefir grains and milk in a glass jar with a lid and leave at room temperature until the milk thickens and sours. Strain the kefir, reserving the grains. Add the grains to fresh milk and store the finished kefir in the fridge until you use it.

See, wasn’t that easy?

Beyond the Basics

They also like to stay at a comfortable room temperature, somewhere between 50 and 70 degrees Fahrenheit. That being said, they are resilient buggers and can bounce back from a lot of abuse.

The Milk

Kefir grains are at their happiest in dairy milk that is as close to the way it came out of the animal as possible. They love raw milk but do just fine in pasteurized milk. They do fine in cow or goat milk (or any other type of dairy milk you happen to have) and prefer whole, full fat milk. Low fat milk would be fine, but do not keep them in ultra pasteurized milk (which is actually shelf stable, they just sell it refrigerated because Americans won’t buy shelf stable milk), or non-fat milk for extended periods. If you must buy these types of milk treat them as non-dairy milks, discussed below.

Oh – someday you should try popping your kefir grains into whipping cream. You will never look at sour cream the same way again. Yum!

The Grains and Separating Them

It is suggested to use 1-2 tablespoons of kefir grains to 2 cups of milk and let it ferment at room temperature for 24 hours. You will learn to adjust the amount of milk based on how your kefir grains are doing at culturing milk, the ambient temperature and how many grains you have available. Remember, these guys are hardy and will culture your milk as best they can in a wide variety of circumstances.

You don’t need to rinse your kefir grains (except in special cases as talked about below), just transfer them. They should be clearish white, quite puffy and complex and soft to the touch with a slimy coating. If they are hard, or yellow or smooth they are unhappy and you should check with Dom’s Kefir In-Site to see how to help them, or if they are beyond help.

To separate the grains from the finished kefir you can either strain the kefir through a wire mesh (or plastic, or bamboo) strainer, or fish them out with a spoon or fork. For a long time I fished mine out with a small wooden fork and liked the ease of this method. Any grains I didn’t ‘catch’ just stayed in the kefir and got blended when I made smoothies. I now tend to strain and like that method for two reasons. One, it catches all the tiny baby kefir grains that start to grow in the kefir and two, it helps break up and smooth out the curd of the finished kefir.

Utensils and Jars

I culture my kefir in glass jars with a screw top lid. I tend to ferment mine with the lid on tight because I am afraid of knocking it over and spilling it, but many people suggest leaving the lid slightly ajar, or using a towel or coffee filter over the top of the jar instead of a solid lid. A tight lid allows the kefir to get more fizzy and may alter the amount of alcohol in the finished kefir. Check Dom’s Kefir In-Site for more information about various ways to effect the final fermentation.

It is fine to use stainless steel strainers or utensils to handle kefir, but please make sure they are clean and not left in the kefir for an extended amount of time. Do not use any reactive metals like brass, aluminum, cast iron, or copper. Kefir is acidic and these metals are bad news with acidic food. Plastic or bamboo are other fine choices for handling kefir.

How do I know it’s Ready?

You will know the kefir is ready to strain because the milk will have thickened and smell sour rather than sweet. At first it will be like the consistency of buttermilk, store bought kefir or drinkable yogurt but eventually the kefir will curdle and separate. When this happens you will see a thick layer of white curds floating on top and a thin yellowish liquid below. Taste your kefir at various stages to see which you like to drink – most people prefer it when it has just thickened but I don’t mind curdled kefir, myself.

If the kefir has curdled I make sure the lid is on tight and shake the jar to break up the curds. Then I separate the grains through a strainer and the finished kefir is perfectly good for baking or sweetened smoothies. Remember, kefir is a mix of bacteria and yeast so it will always have a bit more of a yeasty flavor than yogurt or even store bought kefir (which by law is not allowed to have yeast in it). Experiment with more milk or less time if your kefir is too “ripe” or sour for your tastes.


Photo by David Niergarth.

Resting Your Kefir Grains

Your kefir grains will keep fermenting milk into kefir indefinitely as long as they have good milk and proper temperatures. But sometimes you need a break either because you have too much kefir or you won’t be able to strain the grains every day. Luckily, you can refrigerate the kefir grains for up to a couple months with no detriment to the grains.

When you are ready to give your grains a break put them in a clean jar with the same amount of fresh milk that they have been fermenting in a 24 hour period. Dom recommends this amount of milk for resting your grains for up to a week. He suggests increasing the milk by about 30% for each additional week of storage, or you can simply strain the kefir out each week. I have kept 3 tbs of kefir grains in a cup of milk for a couple months at a time and the grains have bounced back just fine. The kefir you strain off the grains after their rest in the fridge is perfectly safe to drink, though it may be thinner or more sour than usual.

Do note that different strains of bacteria and yeast respond to cold storage differently so kefir grains usually require a little care when coming back to full fermenting strength. They should also get to come out of the fridge and ferment at room temperature for a week or so every couple weeks or months so they don’t get too out of balance.

When bringing kefir grains out of the fridge strain them off the old kefir and put fresh milk over them like normal. I usually use a smaller proportion of milk than usual, and change the milk as soon as it seems sour, even if it is a slightly different consistency than usual. The kefir should come back to what you expect it to be within one or two cycles with fresh milk.

Culturing Non-Dairy Beverages

Kefir grains need dairy milk to grow and reproduce but they will culture any liquid into a probiotic beverage. There are two ways to culture non-dairy beverages – switching the grains back and forth, or sacrificing some of the grains to the non dairy beverage.

If you are going to make non dairy kefir only occasionally it is best to switch the grains back and forth. I occasionally make coconut milk kefir by plunking the strained grains into canned coconut milk and let that ferment for 12 or 24 hours. When the coconut kefir is ready strain out the grains and put them back in dairy milk. I often rinse my grains before putting them back in the dairy milk thinking that the surface of the grains needs to be in good contact with the dairy milk. Dom cautions against rinsing in most situations, and I am careful when rinsing to not contaminate the grains.

If you want to continuously ferment non-dairy kefir you should hold back a portion of the grains in dairy milk and use another portion for the non-dairy milk. Use the grains in soy, almond or coconut milk the way you would in dairy milk just being sure to note when they are no longer healthy looking or fermenting properly. Keep another portion in dairy milk so that it keeps growing and you have some to replenish your non-dairy grains when they no longer ferment properly. I’ve never done this method myself, but have heard of others doing it with great success.

You can also play around with fermenting juice or sugar water as well. It often goes alcoholic, but sometimes turns out very tasty.

What To Do With All Your Kefir


Kefir is great in smoothies and baked goods and in a million other dishes. It can basically be used anywhere you would use buttermilk, but it does have a bit of a yeasty flavor that can be unwelcome in some dishes. In other dishes you’d never know the milk was cultured. Here are my favorite ways to use kefir.

*Smoothies. Combine the kefir with frozen or fresh fruit, juice, ice, and sweetner of your choice in a blender to make a delicious smoothie. Add coconut oil, nut butter or good quality egg yolks to boost the protein and fat content, or use more juice to make it lighter. You can blend the kefir with a little fruit syrup or pulp to make it more like the flavored kefir at the store. Experiment with green smoothies!

*Blender Batter Pancakes. This is a method for making pancake or waffle batter by soaking whole grains in kefir overnight and then grinding in your blender. Here is Sue Gregg's original recipe, and here is my blog post on the recipe.

*Kefir naan or flatbread. This is a neat recipe where you combine kefir and wheat flour, knead it like regular bread dough, then let it raise overnight. The natural yeast in the kefir is all the leavening you need. It is a very sour dough but tender and delicious. Cook like naan or pita on a griddle, use as a pizza crust or bake as rolls. Here's the link to the website, and here's a photo and write up of the time I did it.

*Macaroni and cheese. Just use kefir instead of milk for boxed or real cheese sauce.

*Clafouti. This is a delicious, rustic French dessert (or decadent breakfast) that is essentially an eggy pudding studded with fruit. Here's the recipe I use. I just substitute kefir for the milk and use whatever fresh or frozen fruit you have.


This post is a part of Real Food Wednesdays. Check out more real food blogs at the carnival!

Wednesday, May 5, 2010

Kimchi

I just broke into my latest fermentation experiment, a fantastic kimchi with lots of goodies, including arame seaweed. Kimchi is a fermented cabbage condiment that originates in Korea but is similar to sauerkraut. The main difference is seasoning - kimchi most traditionally is seasoned with ground red pepper, onion, garlic and ginger in addition to the salt. It can include any number of additions or substitutions including cucumber, carrots, different types of onions, root vegetables like radishes, fruits like apples or raisins or even stranger things like shrimp paste or raw shellfish. Koreans have hundreds of variations and these photos by eryoni taken in South Korea show just some of the diversity of Korean pickled vegetables.

This batch I made included the exotic addition of arame, a type of seaweed. Seaweed is a great thing to add to anyone's diet for the trace minerals and rare proteins and sugars. Arame, the common name for the kelp Eisenia bicyclis, is a rich source of calcium, zinc and iodine. It is also a good source of lignans which help fight cancer according to some studies. As expected, its taste is hardly noticeable in the highly flavored kimchi, though it is visually apparent as black threads in the cabbage mix.

Kimchi with Arame

Green/white cabbage
Carrots
Green Onions, or sliced white onions
Arame
Ginger
Garlic
Ground chiles
Sea Salt

Note on amounts: I don't give any. That's not the important part. To make one quart of kimchi I filled up a 3 or 4 quart mixing bowl with shredded veggies and seasonings. I would expect this is about 3/4 of a medium head of cabbage, 2 good sized carrots, 10 big green onions, a handful of arame, 3 inches of ginger, 5 cloves of garlic and enough chiles to make it red and spicy. Enough salt to make it "too salty to be tasty, not salty enough to be gross". See my blog posts on making sauerkraut, making pickles and my pickle FAQ for more information on my methods.

I used a mix of ground whole dried peppers and commercial New Mexico chile powder. In the past I have used a mix of chile flakes (like for pizza), cayenne, New Mexico Chile powder and paprika. You should use however much of whatever you have. This is artisanal cooking!

Shred the cabbage to your liking and either chop, plank or ribbon the carrots with a vegetable peeler. Chop up the green onions however you see fit and mince the ginger and garlic into matchsticks or tiny specks, as you see fit.

Put the handful of dried arame into a bowl of warm water and let sit for 5 or 10 minutes.

Toss all of the veggies together with the ground chiles and salt in a large mixing bowl or cooking pot, tasting as you mix. Pull the arame out of the water, squeezing it as dry as you can and leaving all the grit behind in the bowl. Mix that into the veggies and continue mixing, tasting and adding salt or chile powder as necessary.When the veggies and seasonings are mixed together well and good and salty you can either leave it in the bowl for an hour or so, or start packing it right away. I have gotten lazy and been leaving it in the bowl for a while to allow more liquid to come out of the veggies and make packing it easier.

When you are ready start spooning the mixture into your clean quart sized jar. Really pack it down in there. I use a regular mouth half pint jar to push it down into a wide mouth quart jar, but I've also used wooden meat mallets and those Chinese soup spoons to pack the veggies down. You really want to squeeze all the air out of the jar and let the liquid come up over the veggies. If you are squeezing and squeezing and still not getting liquid over, or at least to the top of your veggies you can add some more brine - salt added to water until it is too salty to be tasty but not so salty it makes you gag. You will end up with a wetter kimchi, but it will ferment just the same.

Put the lid on your well packed veggies and leave them on the counter for a couple days. I find that ferments with ginger in them seem to get fermenting much more quickly. I did this kimchi a day after doing a plain cabbage kraut but the kimchi was ready to go in the fridge a day earlier. It was fizzy and the lid was popping and it was smelling quite sour. Put it in the fridge and start eating it whenever you want something spicy gingery sour salty.

I have been eating this kimchi with everything. My favorite is kimchi and macaroni and cheese, but I was also really impressed with kimchi and colcannon - mashed potatoes with sauteed cabbage and collard greens. It's of course great with any stir fried vegetables or Asian flavored meats, and I tossed a fair amount into a bowl of instant rice noodle soup the other night. I think the trick to incorporating fermented vegetables into your diet is just putting a spoonful on your plate with every meal. No matter what the food you are eating is, try it with some sauerkraut, pickles or kimchi. Maybe you won't like it and you don't eat that spoonful. Then again, maybe you will love it and have discovered a whole new taste sensation. And isn't that what life is all about?

Oh - while you are thinking about kimchi you should check out the Ultimate Kimchi Recipe. The listed ingredients may or may not be the actual ultimate kimchi but the directions certainly do. Enjoy.

This post is a part of Real Food Wednesday, check out everyone else's real food posts!

Thursday, February 11, 2010

I Love Oregon.. and Cheese

February 14 is not only that hallmark holiday all decked out in pink and red, it is also the anniversary of Oregon becoming a state. Since I love Oregon much more than I love pink hearts I am very happy that a friend of mine has a tradition of a "Oregon, Be My Valentine" cheese and wine party each year. We play Pin the Heart on Oregon, take prom-style photos in front of a giant map of Oregon, wear green instead of red and generally love up on our very lovable state. Oh, and eat a ton of local (and otherwise) cheese and wine. Oregon is known for both.

For two years running I have made cheese logs. Not only are they retro and delicious, they're a great way to stretch a little high quality cheese out to feed a party. One recipe I've made is the classic cheddar cheese log and then I made two others with blue cheese and goat cheese. Here's the cheddar recipe, with variations for the other two below it.

*** *** ***

Cheddar Cheese Log for the 21st Century

8 oz cream cheese or homemade yogurt cheese (see below)
6 oz shredded cheddar cheese (see below for links to directions to make it, or buy the best quality you can find. The sharper the better)
1/2 tsp Worcestershire sauce (look for High Fructose Corn Syrup free brands)
1/2 tsp ground mustard
1 tsp seasoned salt (like Chile Grill Salt)
1/4 tsp ground black pepper (optional)
1/4 tsp cayenne pepper (to taste, optional)
1/4 tsp turmeric, if your seasoned salt doesn't have it in it
1/3 cup finely chopped almonds, walnut or other nut of your choice

*Combine the cream cheese and shredded cheddar in a bowl with a fork, or with a mixer. Sprinkle the seasonings in and continue mixing until everything is uniformly combined.

*Use plastic wrap and your hands to form the cheese mixture into a ball, log or several small balls. Wrap in plastic wrap or parchment paper and refrigerate until firm, at least two hours.
*Unwrap the cheese and roll it in the finely chopped nuts. Serve with crackers or sliced apple.

Herbed Goat Cheese Log

-8 oz cream cheese or yogurt cheese
-6 oz soft goat cheese, with or without herbs
-Up to 2 tsp of two or three of your favorite dried herbs or a tablespoon or so of your favorite fresh herbs chopped finely. Try oregano and thyme or basil and rosemary or herbs de Provence.
-Salt and pepper to taste
-1/3 cup chopped pine nuts, hazelnuts or other nuts
-1 tbs ground sumac
*Combine cream cheese, goat cheese and herbs in a bowl or mixer. Use plastic wrap to form into a ball or log and refrigerate until set.

*Roll firm cheese log in either the nuts or the sumac, or a mixture of both. Serve with pita bread or sliced pears.

Honeyed Blue Cheese Log

8 oz cream cheese or yogurt cheese
6 oz soft blue cheese
salt and black pepper
1/3 cup chopped pecans
2 tbs dark honey

*Combine the cream cheese and blue cheese with a fork or mixer, adding salt and a little black pepper as you would like. Form, wrap and refrigerate.

*Unwrap the cheese and sprinkle liberally with black pepper. Roll in the chopped pecans and place on your serving platter. Drizzle the honey over the cheese and serve with sweet, crisp apples.

*** *** ***

Cheese is a healthy food when you choose the right kinds. Those right kinds, as Kristen the Food Renegade reminds us, are made from whole milk from healthy animals and not much else. Anything that says "cheese product" or "protein concentrate" anywhere on the package is not the kind of cheese worth putting in your body. Find a good grocery store or cheese store and start tasting different kinds of real cheese. Better yet, find a farmer who will sell you their homemade cheese or learn to make your own.

Making cheese is not terribly difficult but does take some time. I've never made hard cheese but drool over the directions on Dr. Fankhauser's cheese page regularly. I have, however, made cream cheese out of yogurt many times. Kelly the Kitchen Kop wrote up some great directions here, which is really handy since cream cheese is an integral part of making cheese logs.
These cheese logs were a huge hit at our party, and I bet they will be at yours as well. The cheddar log has a comforting, familiar taste while the goat cheese one is a little sophisticated without breaking your budget. Everyone raved over the blue cheese log this year. I think it's a particularly inspired flavor combination. I hope you enjoy them as much as we did!

This post is a part of Real Food Wednesday! Check out this week's Mr. Linky for tons more great real food recipes.

Tuesday, January 19, 2010

How to Dress a Salad

When people are switching over to a more traditional or healthful diet the how-to of salad dressing almost always comes up. Commerical salad dressing is usually a nasty brew of polyunsaturated oils, high fructose corn syrup, artificial flavors, gums and starches. For some people switching to a healthier diet they are the first thing to get tossed out of the fridge. For others they can be the last. Healthy, homemade salad dressing SHOULD be easy, right? It's just oil, vinegar and seasonigns, what can be so hard? I can hear the healthfood wanna be's laughing now.

I had the hardest time with salad dressing until just recently. It was always too oily, or too vinegary, or too salty, or not salty enough. Then I discovered an old cookbook, snitched from a public library untold years ago, in my mom's basement. The Savory Way, by Deborah Madison, one of the leaders of the Berkeley health food movement in the 1960s and 70s. The book is vegetarian and elegant, but homely too. These are the kinds of foods someone who has spent years perfecting their sense of flavors and textures makes at the end of a cocktail party, or for her own Sunday afternoon supper. Flipping through the book makes me long to live next door to her, to have the luxury of dropping in for a bowl of this or a nibble of that. Generally simple, but perfectly composed, her salads are a highlight of the book.

In one of the salad dressing recipes she mentioned her trick to perfect sald dressings - a simple ratio. She uses a ratio of 3:2, oil to acid for all of her dressings with adjustments in ingredients and additions, but not that base ratio. Three to two is almost identical to 5:3 but using that ratio allows you to mix and match your oils and acids in even more variations. A ratio also allows you to make various quantities ranging from a quarter cup of dressing for dinner for two to a quart of dressing to keep in the fridge to have on hand. Simply adjust your measuring tool. I often use tablespoons or teaspoons when making dressing for one or two, but quarter cups would make a family sized batch.

A few words about ingredients before I get into some recipes. One of the reasons we are ditching the commercial salad dressings (aside from cost - they are expensive compared to homemade!) is the polyunsaturated fats. In my post on fats I linked to a couple of articles about the health impacts of polyunsaturated fats - as in, they are really bad for you and you should work towards eliminating them completely - and also talked about the cooking fats I do use in my house. Most healthy fats are solid at room temperature, though, making them unsuitable for salad dresssings.

Olive oil is the classic choice for salad dressings. It is high in monounsaturated fat, a fat that has real health benefits, and low in polyunsaturated fats. Use caution when buying and storing olive oil, though, many olive oils are adulterated with cheaper vegetable oils, and the monounsaturated fatty acids are fragile and thus go rancid more quickly than animal fats. Buy from a reputable source and keep the oil in a cool, dark place.

Sometimes you just don't want your salad to taste like olive oil, though. Sometimes you are going for an asian flavor, or your kids balk at the olivey flavor. Check with your olive oil source and see if they have a light or second pressing oil with a more neutral flavor. You can also use some nut or seed oils (sunflower, sesame, walnut, almond, etc) for salad dressing as well. High oleic sunflower oil is a particularly good choice because it is high in monounsaturated fat and low in polyunsaturated, but it is hard to find. When buying nut or seed oils be sure to read the labels carefully for the levels of polyunsaturated, monounsaturated and saturated fats in the oil. Ideally, you want something with low poly- and higher mono- and saturated. In any case, remember that these seed and nut oils are fragile foods that should be used in strict moderation. Buy small bottles, keep them cool and dark, and don't use them for much of anything except salad dressing. Keep cooking with your good, healthy animal fats.

Here is an example of a simple dressing and a few variations using Deborah Madison's magic ratio. I will use tablespoons for all my measurements because I usually make just enough for one or two meals, but feel free to scale up if you are feeding a crowd.

*** *** ***

Simple Italian Dressing

  • 3 tbs olive oil
  • 2 tbs red wine vinegar
  • 1/2 tsp dijon mustard
  • 1 small garlic clove, pressed
  • goodly pinch of salt and grind of pepper

In a small jar with a lid combine the vinegar, mustard, garlic, salt and pepper. Stir with a fork until well combined. Add the oil, screw on the lid and shake until well incorporated. Taste, on a leaf of lettuce, and adjust salt or vinegar as necessary.

Asian Dressing

3 tbs high oleic sunflower oil or un-toasted sesame oil
1 tbs rice wine vinegar
1 tbs lime juice
1 tsp grated ginger
1/2 tsp grated or pressed garlic
1/2 tsp soy or fish sauce
a few grinds of black pepper
chile flakes, to taste

Combine everything but the oil in a small jar with a lid. Stir to combine and then add the oil. Screw on the lid, shake to combine then taste and adjust as necessary.

Fruity Vinaigrette

1 tbs extra virgin olive oil
2 tbs light olive oil or high oleic sunflower oil
1 tbs fruit infused cider vinegar (raspberry, blueberry, cherry, plum, etc)
1 tbs red wine vinegar
1/2 tsp honey, or to taste
a pinch of garlic powder
a very generous amount of black pepper
salt

Combine everything but the oil in a small jar with a lid and stir well to combine, getting the honey really incorporated into the vinegar. Add the oil, put the lid on, shake to combine and adjust seasoning.

Balsamic Roasted Garlic Dressing

3 tbs olive oil
1 tbs balsamic vinegar
1 tbs white wine vinegar
2 or 3 cloves roasted garlic
1/2 tsp dijon mustard
salt and pepper to taste

Mash the roasted garlic with the mustard and the salt and pepper. Stir in the vinegar until it is well combined then shake it up with the oil.
*** *** ***
The variations here are endless. Add herb, fruit or spice infused vinegars or oils, different fresh or dried herbs, different sweetners or spices. Sometimes I like to use the brine from my home pickled vegetables. Pickled beets make a particularly beautiful and tasty salad dressing. You can stir in grated parmesan, crumbled feta or blue cheese, yogurt or sour cream. The sky is the limit here.

What is your favorite salad dressing? What is your favorite salad recipe? Have you suceeded in copy catting a favorite commercial dressing? Who do you buy your olive oil from?

This post is a part of Real Food Wednesday. Check it out for more real food recipes and stories!

Wednesday, January 13, 2010

Soup Weather

Around here it's been cold. And wet. And dark. Did I mention wet? And cold? The perfect weather for soup! Every culture has a multitude of soups and for a very good reason. Soup is a cost effective way to get nourishing, warming food into lots of people. Warm food is so important in this cold time of the year. Many doctors and parents are coming to realize the health implications of not keeping our bodies, especially our children's bodies, warm. Being chronically cold can affect growth, attention, and even the course of diseases and infection. And we all know how important keeping those bodies well nourished is.

"But isn't making homemade soup difficult?" people ask. Not if you do a little prep work, keep certain ingredients on hand, and use a little creativity in your soup making. The key to good homemade soup is good homemade stock or broth. Canned stock or broth is just salty water with artificial flavors. It is not healthful or nourishing. Real stock made from bones and meat trimmings is healthful, nourishing, has fantastic flavor and mouthfeel. It does take prep work, but it's all prep work you can do in advance. For information on how to make bone broth check my blog here, my other blog here, Cheeseslave's blog here, or Kelly the Kitchen Kop's blog here. A tasty and relatively healthful vegetarian broth can be created with dried mushrooms or a well chosen assortment of vegetable peelings gently cooked, but check out Cheeseslave and Kelly's blogs for a hundred and one reasons to make bone broth.

Once you've got your bone broth a soup is as simple as sauteeing onions, adding meat and vegetables and adjusting the seasonings. Here is a basic stovetop "chicken" soup recipe with variations.

*** ***
Chicken Soup with Variations

*1 yellow onion, chopped into 1/4 inch pieces
*3 ribs of celery, sliced fine
*2 medium carrots, chopped fine
*Coconut oil or other healthy cooking fat
*1-4 cloves of garlic, pressed or sliced
*1/4 tsp ground sage
*1 tsp oregano
*1 tsp ground, dried rosemary
*salt and pepper to taste (really depends on how salty your broth is)
*2 quarts chicken broth or diluted chicken broth
*1-2 cups assorted chopped or frozen vegetables - green beans, zucchini, peas, corn, potatoes, sweet potatoes, etc.
*1-2 cups raw or cooked chicken meat
*1-2 tbs apple cider vinegar

Heat the cooking fat in a 4 quart soup pot and add the onion, celery and carrot. Salt and pepper lightly and stir over medium heat until the vegetables start to soften. Add the dried herbs and continue to cook, stirring occasionally until the onions are translucent. Add the garlic and cook, stirring constantly until fragrant, about 30 seconds.

Add the broth to the pan, scraping up any browned bits and turn the heat to high or medium high. Add the vegetables and meat and let soup come to a boil. Turn heat to low and let simmer until the vegetables are cooked and everything is hot. Taste soup after it comes to a boil (carefully! burned tongues ruin dinners!) and add salt if necessary.

When the vegetables and meat are cooked through taste the soup again for salt, pepper and acidity. Add a tablespoon of vinegar and see if you like the flavor. Add more if you would like, along with more salt and pepper if necessary.

Allow soup to cool slightly and serve with sauerkraut or other pickled vegetables, buttered or cheesy bread, a salad and a homebrew. Er.. or whatever you would like to serve it with. Hehe.

*** *** ***

Variations on this soup are endless. You can adjust the vegetables, the meat, the broth, the cooking fat, the acid and the seasonings. You can add tomatoes or cream. You can strip the soup down to its most basic. Here are a few of my very favorite variations.

Garlic Soup:
Omit everything except onion (reduce to half an onion, chopped very fine), garlic (increase to 6, 8 or 12 cloves, minced or sliced), cooking fat, broth and vinegar. Serve over a toasted slice of hearty bread, with or without cheese, or with a poached egg in a shallow bowl.

Cajun Soup:
Use cajun seasoning instead of the dried herbs (perhaps with some thyme and extra cayenne), omit carrot but increase the celery, and use green beans, peas and sweet potatoes along with chicken or spicy sausage. Serve with sauerkraut and hot pepper sauce.

Taco Soup:
Fry up some ground beef (with organ meat?) with taco seasoning, garlic and onion. Add some tomato, corn and black beans with the chicken broth. Finish with lime juice and serve with sour cream and tortilla chips.

Curry Soup:
Use curry powder instead of the dried herbs, use cauliflower, potatoes and green peas as the vegetables and use lemon or lime juice instead of vinegar. Use virgin coconut oil if you have it.

Bacon and Bean Soup:
Fry bacon first and use bacon grease as your cooking fat. Omit carrots and use drained, cooked pinto or kidney beans instead of the other vegetables. Use the fried, chopped bacon, hot dogs, sausages or no meat and season with a little rapadura, molasses or maple syrup if you'd like. Beef broth is great instead of chicken. Still finish with some vinegar.

Creamy mushroom soup:
Use bacon fat as your cooking fat and add a cup or three of sliced mushrooms in with the onions and celery and cook until the mushrooms have released their water and then gotten dry and browned. Increase garlic if you'd like and use thyme as a main herbal seasoning. Use beef broth if you have it and maybe a splash or wine or brandy. Use red wine vinegar to finish and add sour cream or heavy cream at serving time.

I like to make soup in batches that will provide at least two or three meals at a time because re-heating soup is an easy way to get healthful food on the table fast. You can always freshen up or change the flavor of the soup by sauteeing more onions with seasonings before adding the cold soup and heating it up.

What kind of soup do you like best? How do you work to keep warm, nourishing food on the table during these cold months? Whats your favorite soup garnish or topping?

This post is a part of Real Food Wednesdays. Check out more real food blogs here!

Huge thanks to These Days in French Life, Oz4Caster, Stubborndev and Greygoosie for their beautiful photos! Click on the photos and surf their flickr streams!

Wednesday, November 25, 2009

What to Do with Green Tomatoes?

A month or so ago I pulled the last of the straggling tomato plants out of my garden. The weather had turned and nothing else was going to ripen so it was better to bring them inside and see what could be salvaged. What to do with a table full of green tomatoes? Luckily, I found a few things!

The first thing I tried was fried green tomatoes. It's a simple, classic preparation that turned out great. I used kefir instead of buttermilk or sweet milk to moisten the tomato slices, a mixture of flour and cornmeal to bread them and fried them in a mix of refined coconut oil and bacon grease. They were fantastic hot, topped with some Secret Aardvark Sauce, and also cold on top of a lettuce salad.

The best thing I've done with them, however, is this fantastic green curry with shrimp recipe I came across. The original recipe calls for making a shrimp stock and augmenting the curry with lemongrass but my simpler version was still amazingly good. I've been a fan of yellow curry for a long time but this was my first time working with green curry paste. It is fiery hot but with really interesting sour flavors as well. I found more lime juice and sugar, as well as mixing in some yellow curry paste, really helped mediate the heat. Give it a try!

Simple Green Curry with Green Tomatoes and Shrimp

coconut oil or other cooking fat
1/2 yellow onion, sliced thin
3 cloves garlic, minced
1 tbs ginger, minced
2-4 tbs green curry paste (I like Mae Ploy brand)
1 can coconut milk
2-3 cups shrimp, chicken, or vegetable stock, or water
1 cup green tomatoes, halved or quartered into 1 or 2 inch chunks
shrimp*
brown or raw sugar
soy sauce or fish sauce (optional)
1 or 2 limes

*I used pre cooked frozen small shrimp from Trader Joes. Because it was a splurge item I used a fair amount of shrimp. Use as many of whatever kind of shrimp you want. Adjust how long they are in the curry based on how much cooking or heating your shrimp need.

Sautee onion and ginger in coconut oil in a medium sized sauce pan. When the onion is soft but not brown add the garlic and cook for another minute then add the green curry paste. Continue to cook for another minute or two until fragrant. Stir in the coconut milk and broth until it is the consistency you like - I like mine like a thin stew or thick soup.

Bring the curry to a boil and add in the green tomatoes, a spoonful of sugar, a dash of fish or soy sauce and a squeeze of lime juice. Taste the curry and see if you think it needs more or any of those seasonings. Allow to simmer for 15 minutes or until the tomatoes are tender. Stir in the shrimp and allow them to get cooked or heated through. Adjust final flavor with more sugar, lime or fish or soy sauce.

Serve over jasmine or basmati rice with more lime juice squeezed over top.

This recipe posted as part of Real Food Wednesdays. Check out the other posts for more ways to incorporate healthful, real food, into your diet.


Wednesday, November 18, 2009

Homemade Cider Vinegar

Some people love vinegar and other people can't stand it. I'm in the former camp. I add vinegar to just about every sauce or soup I make, love it on cooked greens and raw salads. Sometimes I get a hankering to drink cider vinegar raw. I usually come to my senses first, but it is healthful and good stuff. Imagine my relief when I found out just how easy it is to make it at home!

Vinegar is a bacterial ferment that turns alcohol into acetic acid. Remember, alcohol is a yeast fermentation that turns sugar into alcohol. Some people make cider vinegar by allowing raw, fresh pressed cider to do it's own thing with wild yeast and bacteria but I like to shepherd the process along with some simple technology and starters. You can start with raw, pressed cider, pasturized store bought juice or apple scraps and sugar. I used the scraps because that's what I had, and the vinegar turned out great.

I highly recommend that you start by reading the beer, wine and vinegar chapters of Wild Fermentation by Sandor Katz. Try making a beer like the one I write about in my Alewife blog post, or try a wine from one of Sandor's recipes. Once you've tried a beer or wine ferment, vinegar is an easy next step. It's a lengthy process but like all fermentations it's mostly waiting. Take an adventure, give it a try.

**** **** ****
Scrap Cider Vinegar ala Broderick Cellars

Hardware:
*A one gallon or so sized bucket or wide mouthed glass jar with a lid
*1 nylon mesh bag, food grade (could use cheesecloth, I guess, but I have a 2 gallon nylon bag I got at a brew store for not very much money)
*A pot, 6 quart or larger
*a stainless steel long handled spoon (or other easily cleaned spoon-like device)
* a cup or jar, pint sized or so
* a measuring cup or kitchen scale
*A one gallon sized glass jug with a narrow mouth (you can buy these at brew shops, or you can buy a jug of Carlo Rossi wine or apple cider invite your friends over and have a party :)
*An air lock and stopper (avaliable at homebrew shops for cheap - Wild Fermentation by Sandor Katz has DIY options, but I say buy an airlock, it'll work great and costs like a buck)
*A funnel and strainer and/or a siphon/racking stick/length of food grade plastic piping

Software:
*Apple peels and scraps - about a gallon OR one gallon apple cider
*Sugar and/or apple juice concentrate - see below for amount
*Water, good quality.
*Wine yeast, avaliable at homebrew shops or online
* Unpasturized vinegar like Braggs, a glug or three

Phase One: Make Hard Cider

Day One: Making the Must and Adding the Yeast

If you are using scraps and sugar, follow the directions in this first paragraph. If you are using cider, then heat the cider to pasturize it, cool it to body temperature and skip down to where you add the yeast.

Make a mock apple juice with sugar water and/or apple juice concentrate by heating up water and sugar until the sugar is dissolved and the liquid is just boiling. I use the amount of sugar in apple juice as a guide so 24 g of sugar per cup of juice. That equals about 2 tablespoons of granualted sugar per cup or a half cup sugar per quart of water. You could probably get away with less sugar because there is sugar in the apple peels, but I would add at least a little. (Online Conversion.com is an amazing website to help you convert weights and volumes of common food items... very handy for off the cuff cooking!) You need about a gallon of boiling hot apple juice sugar water.

Put your peels, cores and scraps into your nylon mesh bag and put in "primary fermenter", aka your bucket. If you wanted a wild fermentation you would let the sugar water cool to body temperature and then pour over the apples, cover with a cloth and let ferment. I like to guarantee alcoholic fermentation by adding wine yeast. Take out a cup or so of the sweet water and let it cool to body temperature in a small jar or cup. Pour the rest of the hot sugar water over the apples in the bucket and stir to combine everything well. Put the lid on the bucket and let everything cool to body temperature. Body temperature means it feels neither hot nor cold. It's a little cooler than bath water, about 100 degrees F.

While the apple must (juice ready for fermenting) is cooling add your wine yeast to the small jar of body temperature sugar water. It will start to get frothy and smell yeasty after 10 or 20 minutes. When the must is body temperature and the yeast is primed (active and ready to work) then pitch(pour) the yeast into the must and cover the bucket with the lid again. The lid shouldn't be air tight, but it should be closed. The guy who taught me to brew used a 5 gallon bucket with a small hole drilled in the lid as his primary fermenter. He covered the holewith a clean coffee filter and then the whole lid with a clean dishtowel. I have a glass jar with a glass lid that doesn't fit down tight and that works fine, too. Day one is completed. Your must is beginning to ferment?

Day Two: Check Fermenting Cider

Now you will leave your fermenting cider to do it's thing for a couple days. On the first morning check it the next morning to make sure it's frothy and fermenty (if it's not, email me and we'll make an emergency plan B) Every day or so clean off your "easily cleaned spoon like device" and stir the cider around making sure to mush any floating fruit back down under the liquid. Do this quickly and try to keep the lid on as much as possible while stirring. The active fermentation will make it difficult for contaminating bacteria or yeast to get a foothold in there, but it could happen. 5-10 days after you started fermenting it is time to "rack" (move the liquid offthe solid stuff) the cider into your "secondary fermenter" (jug with an airlock- isn't brewing lingo fun?!?).

Day Three: Racking into Secondary Fermentation

On racking day clean up your whole kitchen, your kitchen sink and the secondary fermenter and funnel/sipon tubing. I use hot water and soap with three rinses of hot water, but others would have you use bleach or some more serious disenfectant. Have a trash bag or compost bucket handy. With your primary fermenter situated near your sink and garbage take the lid off and pull the nylon bag out of the liquid. With clean hands squeeze it a little to get most of the liquid out of the fruit. Put the fruit in your garbage or compost and set the bag aside to clean later (but not too much later. Don't forget, ask me how I know. It was gross).

Now you have to get the cider into your secondary fermenter. One way to do this is to siphon it. Stick the clean tubing into the primary fermenter until most of it is in the liquid, put your thumb over the end of the tube and pull it out ofthe liquid until the part of the tube with the liquid is below the bottom of the fermenter (like in the sink or on the floor below the counter), put the tube inyour secondary fermenter and take your hand off the end of the tube. The liquid will pour through the tube into the jug. Magic. This guy has pretty good instructions with photos. The other way to do this is to gently pour the liquid out of the bucket into the strainer in the funnel and into the jug. Either way works.

Once your jug is filled up to about the shoulder of the jug then put the airlock on it. There are a couple varieties of air lock but all involve filling a small portion of the lock with water and putting the stopper and lock on the mouth of the jug. Put the jug back in a safe, dark spot where it won't be disturbed or have major temperature fluctuations (ie: basement good, back porch bad). Label it well with what it is and the date you started fermenting and the date you racked it (the labels on my jugs are my record keeping system, what exactly goes on your label is up to you)

Aaaaand, now we wait a few months. Like three, or six. You will know the cider is done fermenting because you won't really see bubbles coming up out of the airlock anymore. Also, the cider should clear up as the yeast die and fall to the bottom of the jug.

Thanks to Anthony at Homestead Pretty for the gorgeous photo. Go check out their post on making honey wine!

Day Four: Racking Off the Yeast

When you have a relatively clear cider and hardly any bubbles coming up through the air lock then you can taste the cider. The easiest way to do this is to stick a small amount of tubing or a straw into the jug, put your finger over the top and pull the liquid out. A syringe with some tubing would work too. You don't want to disturb the yeast bed. Does your cider taste alcoholic? If not, come back for emergency plan B, but most likely it will. It may not taste good, but it should taste alcoholic.

At this point, you can rack the cider off the yeast bad (carefully, with the tubing - a commercial racking stick works great here because it is stiff and has holes in the tubing half an inch up from the bottom so you pull the liquid from above the yeast bed. Tubing can work with some careful holding to keep the end off the yeast bed) and either bottle it to age for drinking as hard cider, or make vinegear.

Congratulations! You are done with phase one!

Phase Two: Making Vinegar

You've racked the cider off the yeast in the secondary fermenter. You can rack it into another jug, into your original bucket or into a number of smaller jars. Ultimately, you will want to get the liquid into containers with relatively wide mouths because vinegar is an aerobic (with oxygen/air) fermentation. We used the airlock to keep oxygen out of the alcohol fermentation, but will work to get air into the vinegar fermentation. I put my cider into 3 or 4 quart sized mason jars and recommend that, but you can find containers that work just right for you. It should be glass, though.

Pour the cider into the container(s) you are going to make the vinegar in. It is OK, and even a good thing to let this pouring incorporate lots of oxygen intothe mix. Pour it from as high up as you can, let it splash around a bit. Add a goodly dose of raw vinegar to your cider.. I'd say 1/8-1/4 cup vinegar per quart of cider. If your vinegar has a mother in or on it - the rubbery or stringy floaty bits - then add those to the cider, too. That's the good stuff.

Cover the container(s) of cider with something that will allow air in and out, but keep out bugs and dust. I put two layers of coffee filter over the mouth of the jar and held it in place with a mason jar ring. Cloth and string or rubberbands would work too. Label, label label.

A note - this ferment should be kept away from any other alcohol ferments you are doing like beer or wine. You might also want to keep it away from kombucha ferments, though I don't. Vinegar bacteria can spoil alcohol ferments(make them vinegar when what you really wanted was wine) and could potentially cross contaminate with kombucha. My vinegars have turned into kombugar and I don't care if my kombucha becomes vineguchaor, but some people might.

In a couple weeks or a month or whenever you think about it, see how your vinegar is doing. Is there a mother on top? It looks kinda like a kombucha scoby but might be quite thin like a film. Does it smell vinegary? It's OK, maybe even adviseable, to lift the mothers off the jars (carefully keeping them a side to add back) and pour, mix and aerate the vinegar. I had three jars going and would get out a fourth and pour everything back and forth among the jars, mixing and aerating everything. Then add the mothers back to the jars, cover with the paper or cloth and let them sit another few months. When it is vinegary to your liking, it's vinegar! :)

**** **** ****
It sounds super complicated, but it's not really, I promise. Like I said, check out Wild Fermentation for good, simple instructions with clear illustrations. Google "home wine making" for more info and make friends at your local brewstore. They're friendly folks there, no doubt. Your vinegar will keep in the cupboard for close to forever so don't worry about making too much. I have recently been infusing my vinegar with different flavors - rosemary, oregano and blueberry are my favorites so far.

If you have any questions, pleae leave a comment. I tried to write this as clearly as possible, but maybe I didn't. The best way to learn this stuff, of course, is to meet someone who can show you. Good luck with your vinegar, and all your kitchen brews!

Posted as part of Real Food Wednesday! Check it out!!


Wednesday, October 21, 2009

Nothing Says Lovin' Like Something From the Crockpot

As the wheel of the year tips into autumn there is nothing so wonderful as coming home to a hot meal ready and waiting for you. Since I don't have a significant other/housekeeper/cook/slave to do my cooking for me I've had to rely on menu planning and my trusty crock pot to keep me warm and fed. What? You don't have a Crock Pot? They cost like 20 bucks. Go get one. You've never liked any food that came out of a Crock Pot? Well, I've got some tips and recipes for you to try right here.

My aunt bought me a crock pot a few years ago for Christmas but it took me years to get the hang of it. I tried recipe after recipe, but everything had that overcooked "Crock Pot" flavor. Stuff was dried out, smelled burned, was generally gross. One of the hardest obstacles to overcome was the fact that with an 8 hour work day and commuting time I am often out of the house for 10 hours at a time. Very few dishes require 10 hours of cooking in a crock pot, and even fewer are edible after that long. Also, so many recipes I found called for cream of whatever soup, velveeta cheese or other foods that don't belong in my kitchen.

The second problem, though not completely solved, has been gotten around with some well chosen recipes. Though she doesn't always use 100% real food I absolutely love Stephanie over at A Year of Slow Cooking. Her writing and recipes gave me permission to throw some slop in the crock pot and call it dinner. Thanks! On the other end of the spectrum are the Cook's Illustrated slow cooker recipes. As with all Cook's Illustrated recipes they are extensively tested and rather complicated. The upside is that if you follow the recipes, you get a really good dish every time. I also am a big fan of Leanne Ely's Saving Dinner recipes. She uses real food and uses a slow cooker at least once a week in her autumn and winter meal plans. She also sells ebooks of slow cooker recipes on her website.

For the other problem I was relying on a rather unreliable boyfriend or housemates to turn on the crock pot after I left the house. After one too many teary evenings of cold food and a hungry me, Dave finally came home with a lamp timer. It was a brilliantly simple solution. You plug the crock pot into the timer and the timer into the wall, set the little pins and voila - crock pot turns on and off when you tell it to! You do have to make sure you have set the timer correctly, and that the crock pot is in the "on" position, but I have been so happy with the results. No more 10 hour chicken, no more crock pot flavor!

One of my very favorite crock pot recipes is so simple it's hardly a recipe. It's just a whole chicken, seasoned as you see fit, and shoved in the crock pot. The result is tender, moist chicken meat, well seasoned and way, way cheaper than one of those grocery store rotisserie chickens. If you shove the bird in with the legs down and breast up you even get a decent amount of almost crispy skin. Home and cooking gurus like to talk about Rubber Chicken meal planning (getting three or 4 meals out of one chicken) and the crock pot makes it so much easier. In addition to the chicken meat I got 2 cups of gelatinous chicken broth, bones for more stock, about 1/4 cup of chicken fat for cooking AND I roasted a head of garlic in the cavity of the bird. I'll be eating off of last week's chicken well into next week.

The last time I did chicken in the crock pot I seasoned the bird with Chile Grill Salt with extra garlic powder and black pepper on all sides. I shoved a little butter up under the breast skin and cooked him for 8 hours. My other favorite seasoning is to put a quartered lemon in the cavity of the chicken, season with salt, pepper and maybe some oregano and put as much of a rosemary branch as will fit into the crock pot all wrapped around the chicken. Serve with a little extra lemon juice for fantastic greek chicken.

Last night I made another well loved crock pot recipe, tamale pie. This is a chili topped with cornbread batter and baked or crock potted until the chili is hot and the cornbread cooked. I made a chili the night before out of ground bison, canned beans, random tomato products, garlic, onion, and chipotle in adobo sauce. I also mixed up some cornmeal and kefir for Sue Gregg's Blender Batter Cornbread. In the morning I poured the cold chili in the crock pot and went to finish the cornbread batter. Oh wait, my blender broke. I realized I could just mix everything up by hand since I was using cornmeal instead of whole grains. Hooray! I poured the batter in, set the timer so the chili would cook for six hours and be done when I arrived home and off to work I skipped. I came home to perfectly cooked cornbread, hot chili and a very happy me. Topped with spicy carrot pickles, sour cream and garden tomato it was a fantastic late autumn meal.

So what's cooking in your crock pot? Do you use yours regularly? What are your family's all time favorite crock pot recipes? What recipes have been a total bust? Any tips or tricks for doing real food in the crock pot?

For more real food tips and recipes, check out Real Food Wednesday!

Special thanks to Kamphora and (Cup)Cake Eater for their fantastic photos. Go check out their flickr streams for more!

Monday, September 21, 2009

Street Food, Portland Style

For years Portland, Oregon has been up and coming in the food world. It is a fantastic climate to grow a wide variety of produce and meats so we are known for our local, organic, sustainable and otherwise virtuous food. Chefs like to pair local specialties like salmon, hazelnuts, raspberries and lamb with our world renown wines. There are restaurants specializing in local foods at almost every price point ranging from Higgins and Wildwood at the top, The Farm Cafe and Laughing Planet in the middle all the way down to vendors at farmers markets and street carts like Addy's Sandwich Shop.

Today, though, I went for something a little different. A little more Asian. I spent a day last week reading through Food Carts Portland.com and found myself daydreaming about a Thai cart they reviewed downtown. If you throw a rock in the air in this town you will hit a decent Thai restaurant or food cart, and as you know I do love Thai food. This one, however, is a little different.

Nong's Khao Man Gai has only one dish on the menu... khao man gai. Just one dish, you ask. And this one dish is chicken and rice? This doesn't sound daydream worthy. But just wait until you taste it. First off, it's served wrapped up in white butcher paper with the fork and napkin tucked under a rubber band. Too adorable!

Then you open the package and smell the delicate, heady scent of the chicken and rice. Whatever seasoning Nong uses in her broth is absolutely fantastic! The cucumber and cilantro add a nice crisp, cool crunch to the warm soft chicken and rice and look beautiful against the mound of brown. Then you open the little sauce cup and the ginger soy chili smell momentarily takes over everything. But you are ready. You take a fork full of chicken and the flavor sensation begins. A little chicken, a little rice, some sauce. Or no rice, just chicken and sauce. Cucumber and rice and sauce. A sip of the winter melon soup served on the side. Yummmmm. Everything is subtle, and flavorful and absolutely delicious.

I don't often spend this much time waxing poetic over a single dish, but this stuff begs for it. It is the epitome of that Asian juxtaposition of simplicity and complexity. I know where I'm going to eat the next time I am feeling a little under the weather, or just in need of some interesting comfort food. Next time, I might try adding the chicken livers or fried chicken skin, or I might just try to make it at home. Khao man gai, my new favorite food!

Wednesday, September 2, 2009

Egg Tacos, Ole!

Sometimes you find a recipe that is more than a sum of it's parts. A way to prepare simple foods in an interesting way with lots of easy variations. Sometimes this recipe suprises you and you find yourself eating it every meal for three days straight. This recipe is all of that and more. Smitten Kitchen calls it Huevos Rancheros, I call it Egg Tacos.

I've seen two kinds of huevos rancheros recipes in this world: the traditional fried egg with tortillas and chile sauce, and eggs poached in a chile sauce served with cheese and tortillas. I was actually served the latter while on a cross country trip on the Green Tortoise bus. 30 international travelers, two hippy drivers and me for 3 weeks driving across the U.S. We had huevos rancheros for breakfast one morning at a hot spring resort in New Mexico. It's one of those food memories I will never forget.

This recipe is unlike either or those and is much simpler. Basically, it's an egg fried ON a tortilla with cheese and whatever toppings you like. Couldn't be simpler, couldn't be tastier! It's hard to translate this food concotion into to "recipe" because you can make it different each time. I've made it with one egg on the tortilla and two, I've made it with different cheeses and I've topped it with everything from refried beans and salsa to grilled zucchini and chutney. Give it a try!

Egg Tacos

1 or 2 corn tortillas
A small pinch of grated cheddar or jack, or crumbled cotija cheese
1 or 2 farm fresh eggs
Salt and pepper, fat for the pan

Toppings of your choice including seasoned whole or refried beans, cooked rice, more cheese, avocado, tomato, red or green salsa, sour cream, hot sauce, pickled chiles, lime wedges, grilled veggies, ketchup, chutney, chocolate sauce (OK, just kidding about that last one.. kind of).


Heat a well seasoned cast iron skillet and warm up the corn tortillas over medium heat. Allow one side to start getting browned and a little crispy. Use only as many tortillas as will fit in your pan with minimal overlap. For my Ikea skillet it's one. With a 10 inch skillet I could fit two.

Flip the tortilla once it is starting to brown and add a pinch of cheese to the top of the tortilla. Crack the egg directly onto the tortilla, trying to keep it mostly on the tortilla, and cook until the white is starting to set. Carefully flip the tortilla over and cook the egg to your liking. Serve with toppings!


As I made these tortillas I came across one major problem - keeping the eggs from sticking to the cast iron skillet. Non-stick pans would fix this problem but we don't use those kinds of pans here at Real Food, My Way. (For an explanation of why and healthy alternatives check out this article this article from Mercola, this one from Tuberose.com, this one from Marks Daily Apples, or even this article that was front page of the Oregonian newspaper FoodDay section recently.) A very well seasoned cast iron skillet is clearly the answer, but you don't always have that as well. I tried using tons of butter, like I do when I scramble or fry eggs normally, but the tortilla kind of sucked all the butter up. Once I did successfully lift up the tortilla, melt some butter under it and flip the egg into the melted butter without spilling egg white all over the pan. Just note, this is a recipe to make one a day your cast iron seems to be cooperating.

This recipe is so easy, so tasty and so variable. I am not joking when I say I made it for five meals in a row and never got bored. Thanks, blog-o-sphere!

For more great recipes and tips from the blog-o-sphere, check out Real Food Wednesday!

Wednesday, August 12, 2009

The Making of an Alewife

Almost two years ago now I met a very lovely man who I like to call the Brewmeister. The Brewmeister had recently come back from a 9 month program in Berlin to learn to brew beer but had previously thought about earning a bachelors in fermentation science at Oregon State University because he loved making wine and mead almost as much as he loved making beer. Before too very long the Brewmeister and I were cohabitating and fermenting like crazy fools. It wasn't all unicorns and rainbows so when spring rolled around this year the Brewmeister moved to Alaska and I kept a fair amount of his brewing supplies. Who said men are good for nothing? :)

This summer I have been putting the skills I learned at the Brewmeister's side to use in making my own beer and wine. Brewing alcholic beverages has an acient history and some say it might even have been the ultimate factor in humans deciding to stop wandering and set down roots and build a civilization. The theory is that people grew grains not to make bread but to make beer, and once you are making beer you need storehouses for the grain and the beer... plus pubs to drink it all in. Until the 1516 Reinheitsgebot, the German beer purity law, was enacted (and even well after it in many places) beer was brewed with a wide variety of grains and herbs, often by women in their own homes. On it's surface the Reinheitsgebot, which restricts beer ingredients to malted barley, water and hops (plus yeast, but that wasn't identified as a crucial ingredient until the 19th century) is a trade protection law to reduce competition with both local bakers and brewers in other regions. Digging a little deeper it probably also had anti-pagan, anti-"drug" and anti-women motives as well. Many of the old style beers were made with herbs that were psychotropic and used in ancient cermonies that predate the puritanical Christianity that was gaining popularity at the time. Hops, a common but not at the time universal bittering and preserving agent in beers, are actually a depressant and anaphrodisiac. People who drink hopped beer don't generally have the energy for all night frolicking like those who drank the ancient gruit ale. No matter the reasons behind the Reinheitsgebot the results were clear - a Teutonic culture of pure beer, made in factories by men using chemicals and precise measurements. This is how the Brewmeister tended to brew.

Being a disciple of Sandor Katz and uncounted generations of alewives brewing in their kitchens I have adopted a much more free flowing style. All of my experience making fermented vegetables had led to me have faith in the microbes. If you give them a reasonable place to set up shop, they will! My first beers were literally "a little of this, a little of that, throw in some yeast". Honestly, that first beer is quite drinkable. I did actually cave and buy a kitchen scale after the first brew day and my second beer is much better.

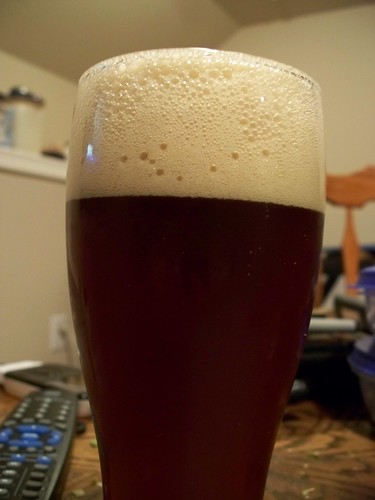
My first two beers are fir tip beers brewed with both hops and the young tips of Douglas Fir trees. Doug Firs are the state tree of Oregon and insanely common where I live. I collected the tips in March and April from trees growing my parents' yard and my everyday dog walk park. They have imparted a lovely acidic and tannic flavor to what would otherwise be a rather boring amber ale. Here is my recipe and instructions. These may look complicated but they are not. In fact, brewing can be a lifetime pursuit and there is always more to learn. But the first step is just brewing some.

The ingredients to make beer are neither expensive nor exotic. If there is a home brewing supply store in your town you are all set and if you don't I'm sure everything can be found online for a reasonable price. Right now I am making beer using malt extract which is basically a molasses or syrup made from malt sugar. The more advanced method of making beer involves extracting the sugar out of malted barley yourself. This involves considerably more equipment and skill but yields a much more complex beer. Malt extract is avaliable in many colors at home brew supply stores or over the internet. Hops are the other main ingredient in beer and both they and brewing yeast are also easily found at brewing supply stores. The variety of hop is not too important in this beer (some hops have lots of bitterness and little aroma, others the other way around) so get something middle of the road if the brewing supply folks ask what you need. I used an American ale yeast, but again it's not terribly important. Anything that isn't a specialty yeast will work just fine.

I will list out both the hardware and the software you need but you can certainly get away with less or load up on more, especially in the hardware department! I will give instructions for a one gallon batch as opposed to the more common five gallon batch because I think it is easier to start small. As soon as you get the hang of it, scale up. I highly recommend reading all the recipes, forums and books you can get your hands on (I highly, highly recommend Sandor Katz's Wild Fermentation) and then just give it a try. Remember, the yeast will make alcohol, all you are doing is setting the table for them.

****

Broderick Cellars Fir Tip Ale


Step One: Brew Day

Hardware:
*Cooking pot with a lid
*Stainless steel long handled spoon
*Cheese cloth or other mesh "hop bags" or a strainer
*Kitchen scale or other device to weigh a couple ounces of plant material
*A second pot or 1/2 gallon glass jar
*A small glass jar, coffee mug or pot
*Timer
*Funnel and strainer
*1 gallon glass jug - this is called a carboy or fermenter
*Air lock and stopper
*A stove or other device to heat water to boiling and keep it there, as well as running cold water, *A tub of ice water or some other way to cool a volume of liquid relatively quickly.

Software:
*Pale or amber malt extract - 1 pint (it is usually sold in 7 or 14 pound tubs. It stores forever so don't worry about buying too much)
*Hops - 20 g of whole hops (Any variety that is not a specialty bittering or aroma hop)
*Fir tips - 40g (Be sure to collect only the young, soft, light green tips. They have a lovely citrusy, christmas tree smell but less tannin and bitterness than the older, dark green tips. The young tips of any edible conifer would do. Spruce is traditional but many pines are edible too)
*1 packet of dry ale yeast (Don't let them talk you into "pitchable yeast". Since you are making a 1 gallon batch you want to be able to use less than a whole packet. Any American or non-specialty yeast will do)
*Good drinking water. People always claim that their water is the reason their beer or wine is so good. If your tap water is icky, buy bottled water. Or better yet, find a well or a spring.

Method:

Start heating a half gallon plus a pint (10 cups) of water in a good quality cooking pot and 4 cups of water boiling in a second pot. Measure out your hops and divide them into two hop bags. One bag should have 15g of hops in and the other one should have 5g. Measure out the fir tips and put 20g in a third hop bag and the remainder in your glass jar or other container that can hold at least cups of water. When the smaller pot has come to a boil pour the boiling water over the fir tips in the jar and let steep. This is your fir tip tea.

As the larger pot of water gets hot pour in the malt extract. Carefully swirl hot water in the measuring cup to get as much malt out as possible. Stir to help the malt dissolve and pull out one cup or so and put that in your coffee mug and allow it to cool. Continue stirring or watching the pot until it comes to a full boil. It may get frothy so be careful with it. When it is boiling add the bag with 15g of hops and the bag with the fir tips in it to the boiling malt water. Stir or push them under the water and then put the lid on the pot and turn the heat down to where it maintains a strong simmer/low boil, but isn't boiling over. (OK - they say you shouldn't boil your wort with the lid on because it can cause off flavors. When I boiled with the lid off I had such great loss of volume I had a hard time topping it off. Read some other recipes and do whatever feels best to you). Again, be careful because all the sugar in the water may cause it to boil over. Set your timer for 55 minutes.

Check the coffee mug of sugar water to see how cool it is. When it is body temperature - when you touch it it feel neither cold nor warm - pour approximately 1/2 tsp of the dry yeast into the cup. Let the yeast dissolve into the sugar water and start to feed and bloom. By the end of the boiling period your yeast should be starting to get frothy and it should smell like yeasty bread batter. Fold up the packet, put it in a zip top bag and store it in the freezer until you need more.

Clean your carboy and funnel with hot water and soap. Many brewing books and experts suggest sterilizing with bleach water. Sandor Katz and I say cleanliness not sterility. Stephen Harrod Buhner, author of Sacred and Herbal Healing Beers uses a hop tea to disinfect his brewing supplies. Do whatever makes you feel most comfortable.

When your timer goes off drop in the second hop bag, reset your timer for 5 more minutes and put the lid back on. When the timer goes off a second time turn the heat off and start fishing out the hop bags with your stainless steel spoon. Use a second spoon or some tongs to squeeze as much liquid out of them as possible and set them aside (don't forget to empty and clean them as soon as they cool. Ask me how I know).

Fill your sink with cold water or ice water and put the pot, with the lid on, in the sink. Stir the wort (as your unfermented beer is now called) with a clean spoon, and swish the cold water around to cool the wort quickly. You don't want to get any of the water into the wort so keep the lid on. If your fir tip tea is not cooled to body temperature then put that jar in the cold water and swish it around too to cool it off. When both liquids are body temperature or a little cooler, around 80 degrees F, then pour them through a strainer and a funnel into your jug with the yeast. Pour the wort first, splashing it around a bit, then the yeast, and top off with the fir tip tea. Fill the air lock with water up to the fill line and pop the stopper on top of your jug. Put your jug in a dark place with a stable temperature and clean up. Don't forget those hop bags! Brewing day is done!

The next morning check your beer to make sure active fermentation has started. The air lock should be bubbling away and there should be froth on top of the beer. If there is not active fermentation by 24 hours then proof another 1/2 tsp of yeast in warm sugar water and add that to the wort. It'll be fermenting, though, don't worry. Let it sit for 3-4 weeks until primary fermentation is finished. You will know it is ready for bottling because there will be a clear layer of yeast at the bottom of the jug and it will take about 2 minutes for a new bubble to come up out of the airlock.

Step Two: Bottling Day

Hardware:
*Plastic tubing or racking cane (tubing with a stiff end specifically designed for siphoning beer or wine)
*A second one gallon jug or a cooking pot that will hold 1 gallon (a second jug is a much better choice)
*6 22 oz beer bottles or 11 12 oz bottles. I prefer the ones with a flip top because then you don't need caps and a capper. If you don't want to spend for the flip top bottles you can reuse beer bottles that were not twist tops. Buy a capper and caps at the same supply house you bought malt and hops at.

Software:
*4 oz by weight of malt or corn sugar, or white sugar. That's 4 tbs malt sugar, 2/3 cup white sugar or 3/4 cup corn sugar. The malt or corn sugar can be bought at the brew supply store or sometimes for a whole lot more money at a health food store. White sugar gives a different flavor, but certainly can be used.

When primary fermentation has slowed (layer of yeast on the bottom of the jug and about 2 minutes between air lock gurgles) you are ready to bottle your beer. Start out by washing and santizing your jug, bottles and racking hose. Again, use hot water and soap, bleach or hop tea as you see fit. If you using bottle caps instead of flip top bottles be sure to read up on how to use them.

Heat about a cup of water in a small pan on the stove and stir in the sugar. Bring to a boil to dissolve and sterilize and then let cool a bit. Pour the cooled sugar water into the clean second jug. This sugar is going to mix with the beer and give the yeast a second wind in the bottles forming carbonation.

Bring your fermenting beer out of the closet and put the jug on the counter with the second jug on the floor or a bench below the counter. Insert the racking cane into the beer and either follow this guy's instructions for sterile siphoning or do like I do and swish your mouth with scotch and suck the beer into the tube. Have a glass handy to pour the first bit of beer into and then put the end of the tube into the jug with the sugar water in it. Try not to let it bubble and slosh too much, but you can gently stir the beer to mix it with the sugar water. As the beer is siphoning into the second jug get your bottles all lined up in the sink or on a easily cleaned surface lower than your counter. Taste your uncarbonated beer from the glass. How does it taste? Anything short of disgusting and you are well on your way to good homebrew.

When all the beer, but not much of the yeasty sediment, is in the second jug put the airlock back on the first jug and bring the second one up to the counter. Insert the racking cane and start the beer flowing again, this time into the bottles. Again, try not to splash or slosh the beer as you fill the bottles to within an inch or two of the top. With only 6 or 12 bottles this won't take too long and you can flip the flip top when you are done (or use a capper to cap them, which won't take too long either). Rinse or wipe your bottles off and stash them away in a dark, coolish spot and clean up.

The yeasty sediment in the bottom of your fermenter can be saved and used for your next brew. Swish the yeast and leftover beer together and pour into a glass jar with a tight fitting lid. Stash it in the fridge and on next brew day wake the yeast up by mixing the contents of the jar with warm sugar water while you boil the wort. You may never have to pay for ale yeast again!

Store your bottles in a dark spot with a stable room temperature. During the next three weeks the yeast will eat up the sugar you gave them and produce carbon dioxide to carbonate the beer. After 2 or 3 weeks pop a bottle in the fridge overnight to chill and open it to taste it. If it's carbonated put the other bottles in the fridge and drink up. If not, either drink the beer (it's still homebrew!) or pour it on your compost pile and wait another week to try again. Darker beers will continue to age over time while lighter beers are more at risk of spoiling. I've had some of this beer in the fridge for 2 months and it is still changing flavor and still getting better. The worst thing that can happen is it doesn't taste good anymore and you'll need to brew another batch.

***

So there it is, one alewife's guide to brewing a 1 gallon batch of beer. I highly recommend reading Wild Fermentation and Sacred and Herbal Healing Beers as well as spending time on the homebrew forums or chatting with the fine folks at your local brew supply store. You'll learn lots more about brewing beer and maybe figure out some better ways to do it!

Brewing beer is not that difficult. In a future post I will talk about making wine, which is a very similar process. Wine is possibly easier to start but takes months, if not years, to finish and age. Beer takes a little more work up front but is ready to drink is just over a month. In the end it is all just setting a table and inviting the right yeast to the party. It's not hard, it's not expensive and the results are well worth it. Even a middling homebrew is better than a fine commercial beer.

Prost!